Learning lessons on a Honda Z GSS
Tags: mokei arii honda honda-z owners-club
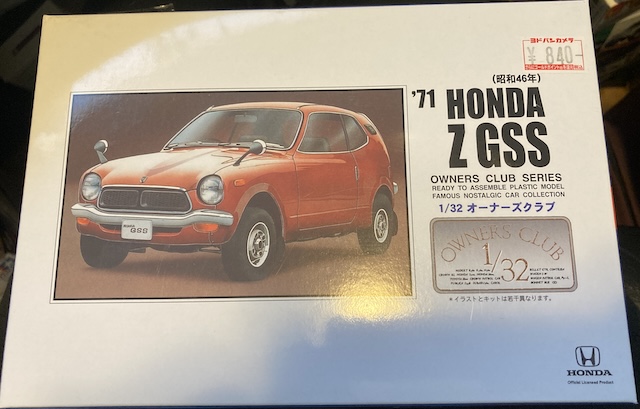
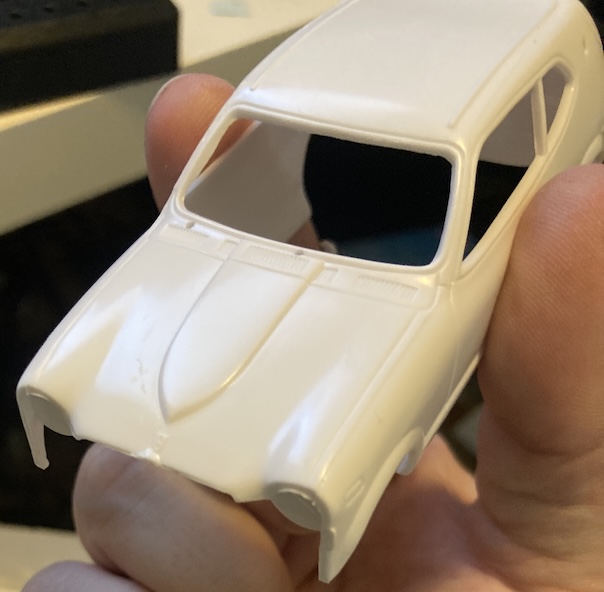
This model kit of a ‘71 Honda Z GSS was picked up at a Yodobashi Camera. I was drawn to its adorable 1/32 scale and its incredibly cheap price. Are these Owners’ Club kits junk? Do I have what it takes to paint and build this little car?
This is the very first car I’m actually airbrushing in colour1. Sure, I’ve got a lot of stuff that I’ve primed out, but I fell in love with this little guy and decided it was time to give it a serious effort.
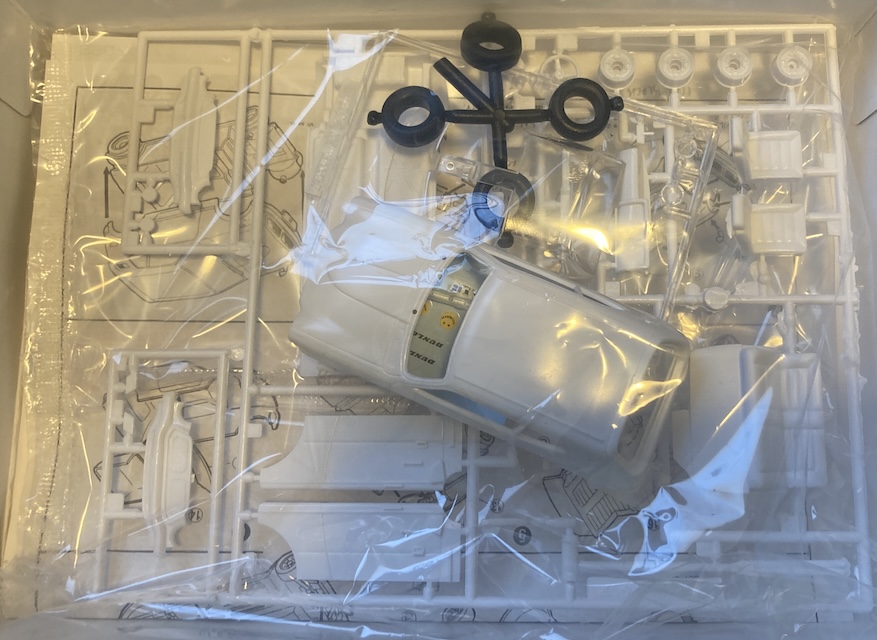
My initial impressions were pretty positive. There’s moulding flash on a couple of the parts, but everything is so tiny and cute.
I’m not sure how this lines up with model years, different Honda sub-dealers, or markets, but you can choose which form of Z you want to build. There are two sets of grilles and two sets of sail-panel badges. The manual only calls out one set of these, but they have identical runner numbers. I chose to paint both grilles. In case one was ruined, I could swap to the other one.
The instructions are a single-page Ikea-style infographic treatise that are almost entirely in Japanese, with only a couple of painting instructions that use Gunze colour codes.
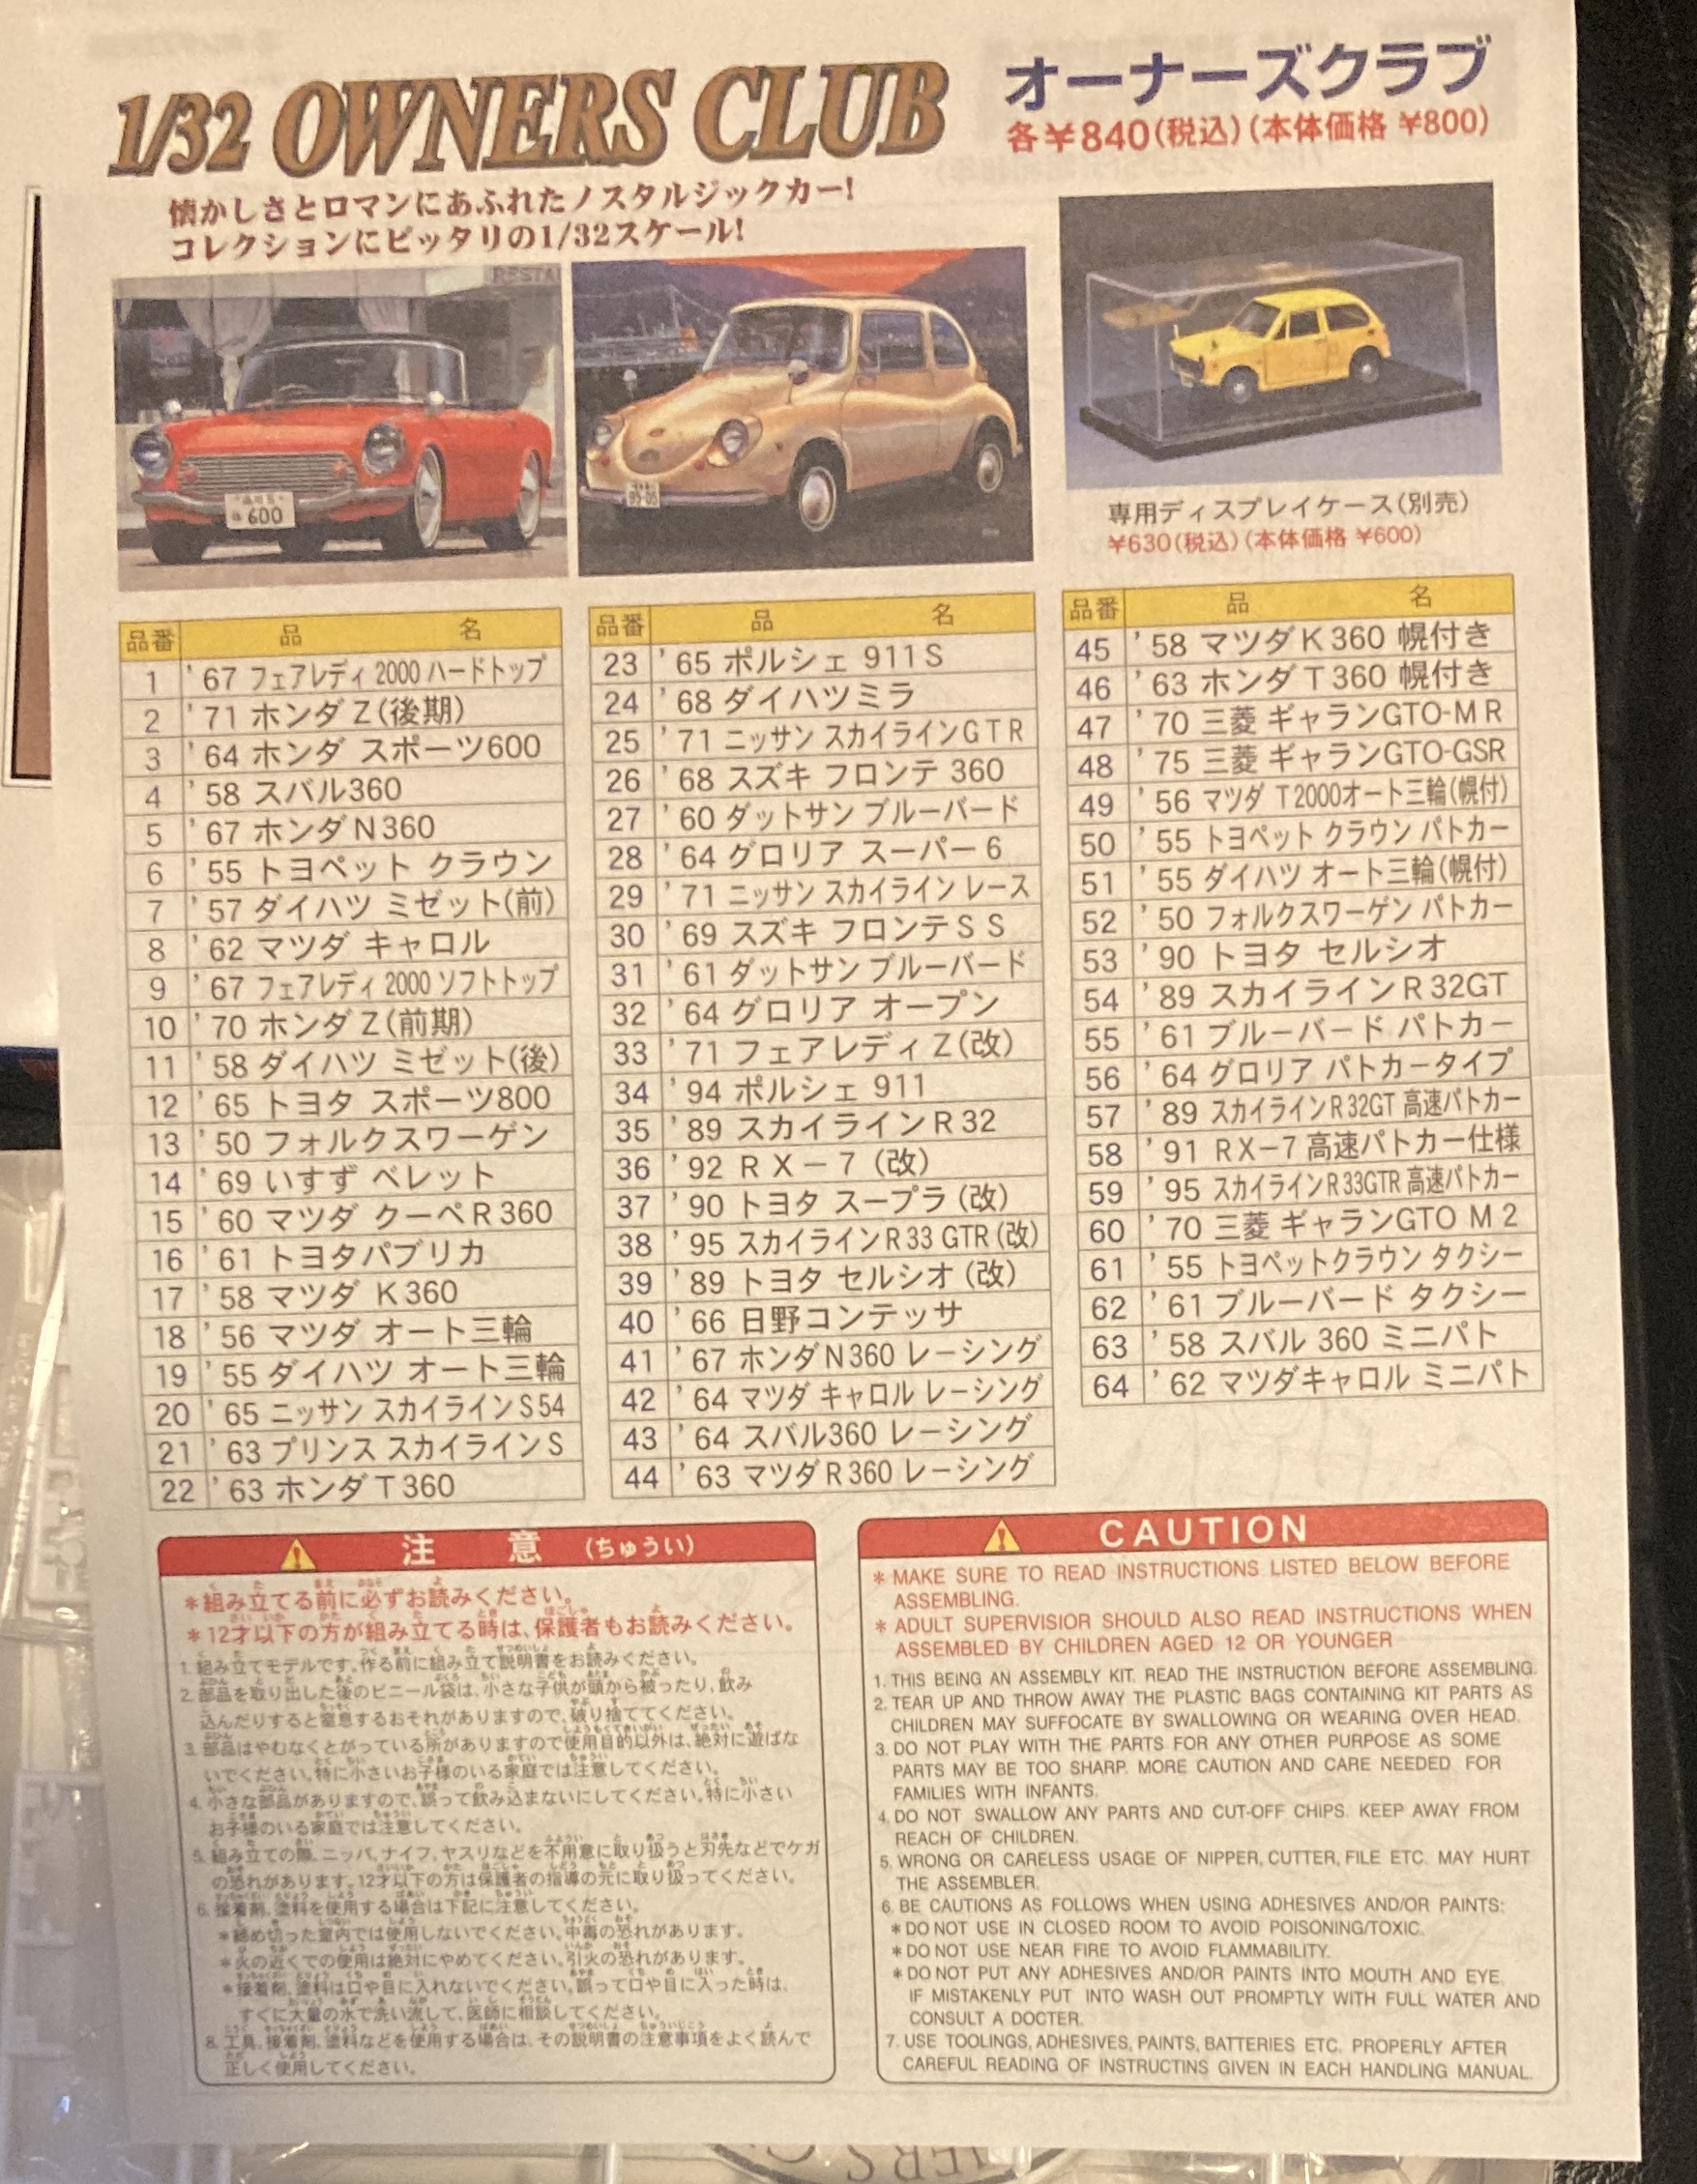
On the backside of those instructions, you’ll find a catalogue of other Arii goodies in the 1/32 Owners Club series. Those goodies include a very nice-looking display case. Wish I could order it from my local store for ¥600, or at all!
In true Japanese budget model kit fashion, roughly a quarter of the models available are the same car as another kit, but with police car lights on them.
Every kit is stated as being the same price. ¥840 with tax, or ¥800 without. I am not sure how this is possible, as consumption tax is now 10 percent, and I did indeed pay ¥840 and not ¥880 at Yodo. Maybe Arii is eating some of it?
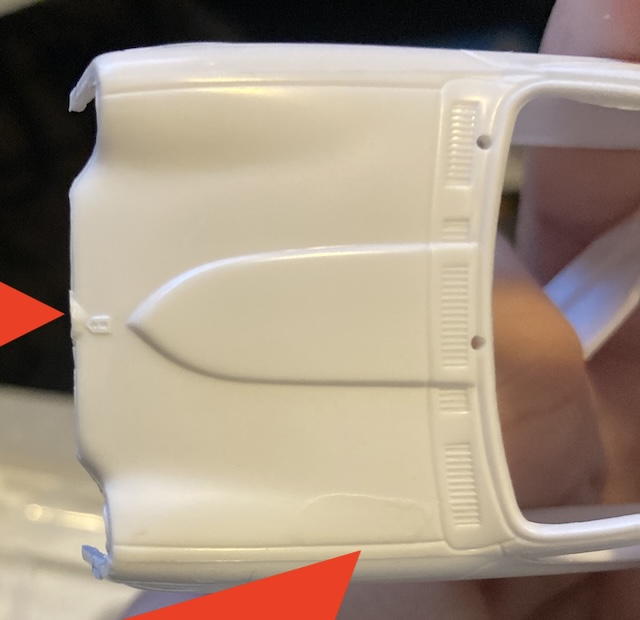
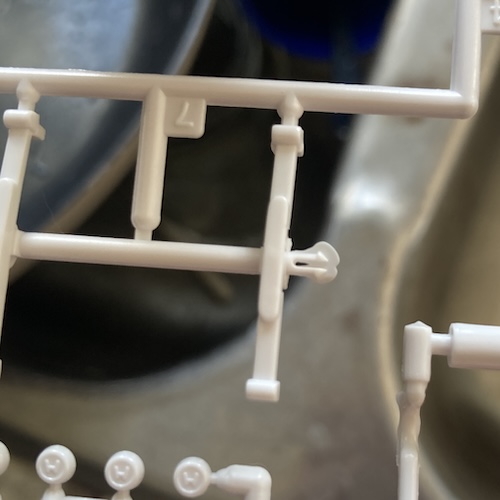
As soon as I pulled the body out, I noticed some additional flash. There was some on the drivers’ side A-pillar, but the most annoying part was a leftover runner mark that had globbed up just under the logo.
I didn’t think that I had the appropriate tools for this, but I tried my best to clean it up with a sanding stick as the Handy Router was a much bigger risk than I wanted to take. The collection of Mini 4WD files I had were all too big as well.
Later, I realized that all I needed was my Olfa craft knife, but I’m getting ahead of myself.
Wanting to keep the embossed Honda logo made it very annoying to sand, as I had to go slow and keep looking to make sure I didn’t accidentally obliterate the bottom of it.
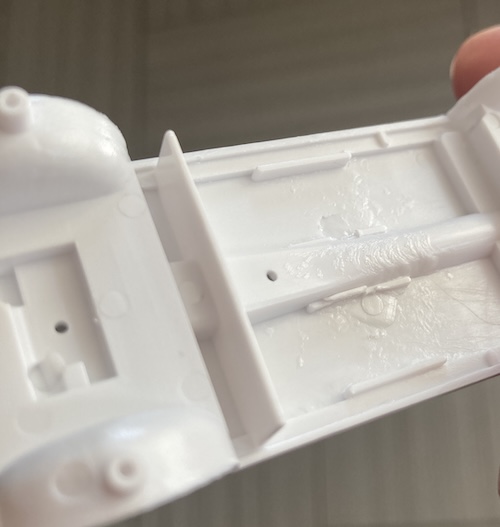
As soon as I had that glob knocked down a bit, I found that there was also a nasty uneven mark on the passenger side of the hood. It looks almost like there was a drip of plastic on the hood while the plastic was still soft.
I did not have a good plan on how to fix this flaw. My best idea was to fill it with putty and sand it flat, but without the right tools to do so, I figured I would only make things worse. I decided that if it looked bad after a colour coat, I would just flat-black the hood and pretend it was a race car.
Later on, while painting, I found a very tall mould parting line running the length of the body that I had missed. I decided that it was too late to fix at this point, but I wish I had seen it earlier. That sort of set the tone for the paint job in general, really.
Painting Al Fresco
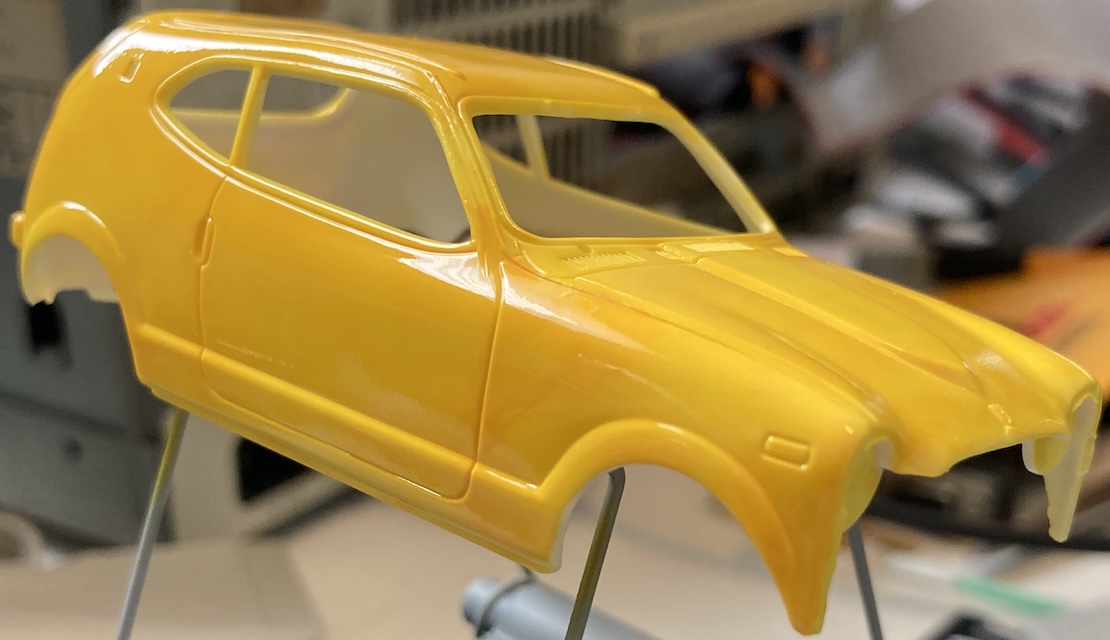
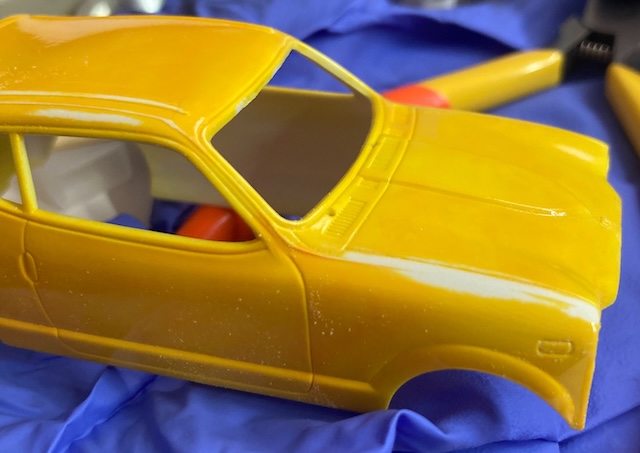
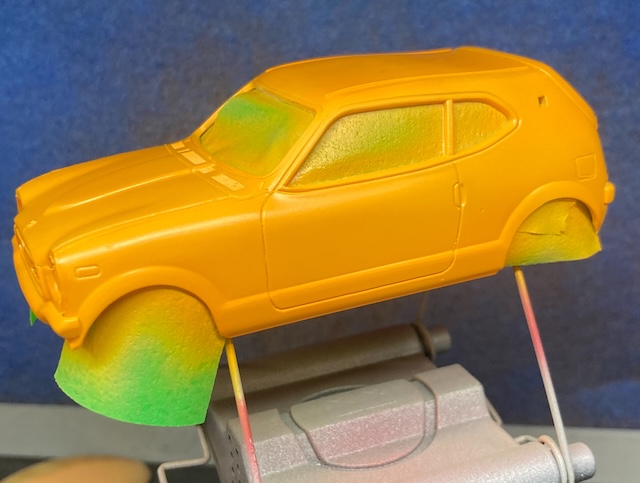
Despite my complete inexperience, and being told that yellow is one of the hardest colours to paint, I decided to paint this car yellow. This is actually the “Blue Angels” yellow Mr. Hobby Aqueous, which is a little more orangey than their regular yellow.
Part of the reason I picked yellow is that I had other yellow parts to paint at the same time, from the Holiday Buggy. I had pink Surfacer 1500 on hand, which I had bought specifically to prime yellow things, but I chose not to use it.
I then compounded the error of spraying directly onto the white body by doing it outdoors, in direct sunlight.
Most of the time, I could not see what I was doing, and would end up doing accidental “freak dots” or leaving big chunks of pigment when my rhythm was off. I also left some areas not as well painted, because faint yellow and white look almost the same in midday sun.
Like with other airbrush jobs in the past, the quality of my work increased dramatically as time went on. The topmost coats were much more even, and much better, as I had put them on super wet like I would have for a real car.
Whether this improvement is because I am getting a better “feel” for it, or the el-cheapo compressor overheating is somehow sending me good vibes, I don’t know.
What I do know is that my ability to see the leading edge of the paint improves also, and that makes a big difference. Welding and soldering were the same way, so I’m hopeful that my skills will improve here with practice as well.
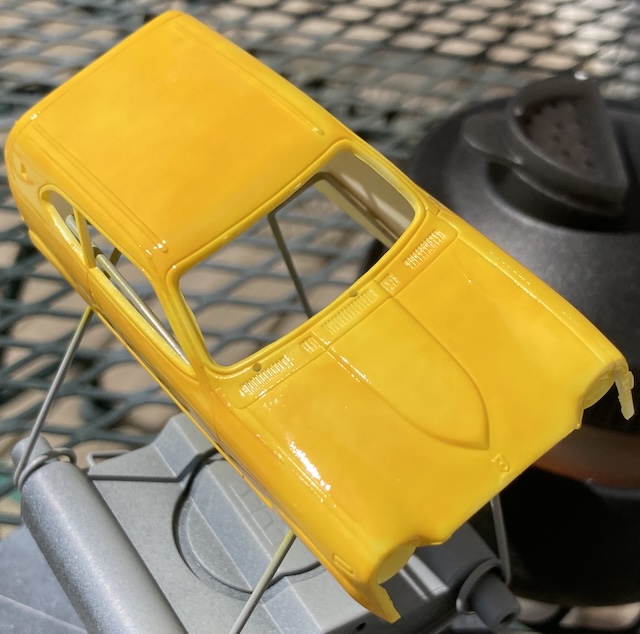
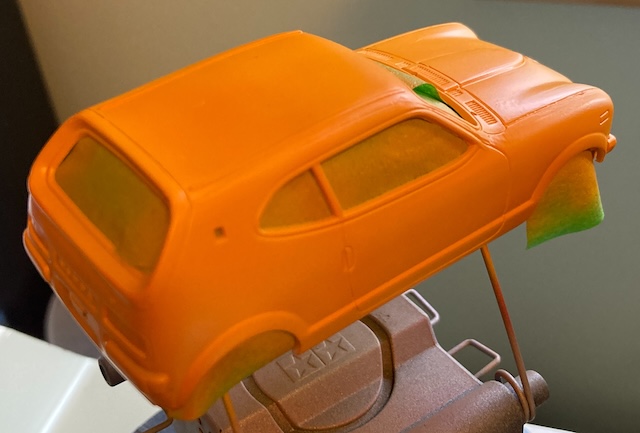
As you can see, the paint is very uneven, with the occasional orangey blob of running pigment. Because yellow is also very transparent, it’s really hard to cover up your mistakes on a previous coat with another coat.
I also had neglected to paint the inside at all; I had assumed that there would be more interior trim pieces covering it up, but consulting the web for pictures of the Honda Z interior shows body colour everywhere. From now on, I’ll start with the inside of the shell and paint the outside second – probably would have also put the ugliest of my paint mistakes on the inside, where they’d be harder to see.
After all that work, I was a little down about the outcome. The Holiday Buggy parts came out much worse, though, so I called it a learning experience about the dangers of yellow and brought it inside to dry.
I decided that instead of a new-from-the-dealer car, this was actually one that got crashed and repainted. A guy named Dean did it, in his parents’ backyard, in rural Alberta in 1985. There, now I feel better about it.
Painting Out of Fresco
I also bought a paint booth, so I can do this indoors! Not having to carry all my stuff from the basement will at least help with my prep time, and I can finally live my dream of painting in the winter.
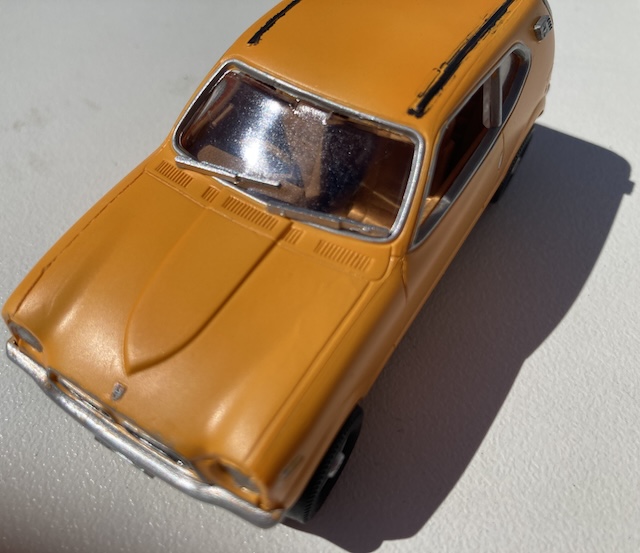
There were also some sprue nubs at the top of the windshield I didn’t notice until it was into paint. Filing those down returned it to white plastic in that region, but thankfully it was under a section that was going to get repainted as a window-moulding colour anyway.
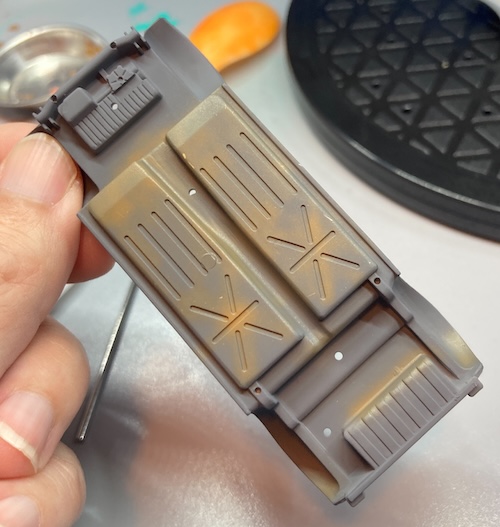
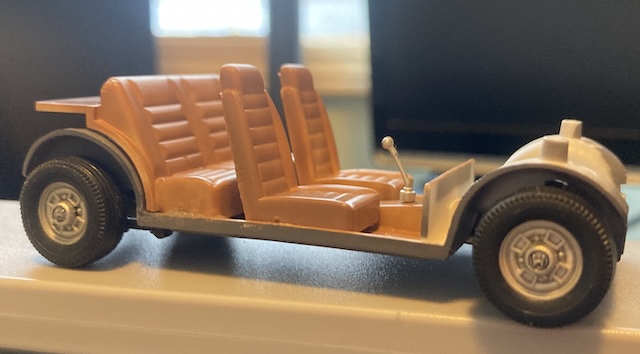
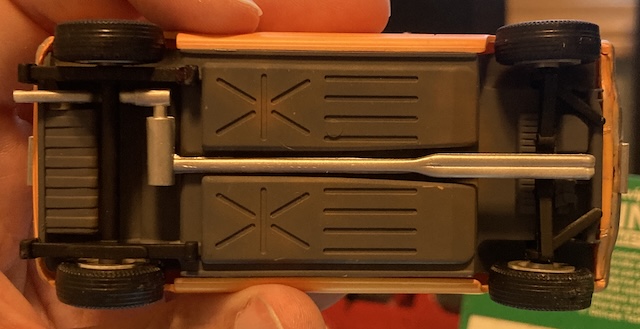
I set about preparing the rest of the parts. There was a lot of flash on the second set of sprues, ranging from annoying (flaps coming off the seats,) to challenging (globs in between exhaust runners,) to extremely difficult, which you can see here with the glob around the rear axle. Slowly, I cleaned these up with the nipper and some very strategic use of sandpaper.
I wasn’t sure how to deal with this huge glob in the interior, which even interfered with the seat mounting positions. This spot would be visible as well! Ultimately, I decided to take a craft knife, and just very carefully clean up the area. Since it’s covered by the seats, it didn’t have to look good - it just had to let the seats sit flat. You can’t tell it’s there. We’ll pretend “Dean” had an accident with the jack, and didn’t do a good job repairing the floors either.
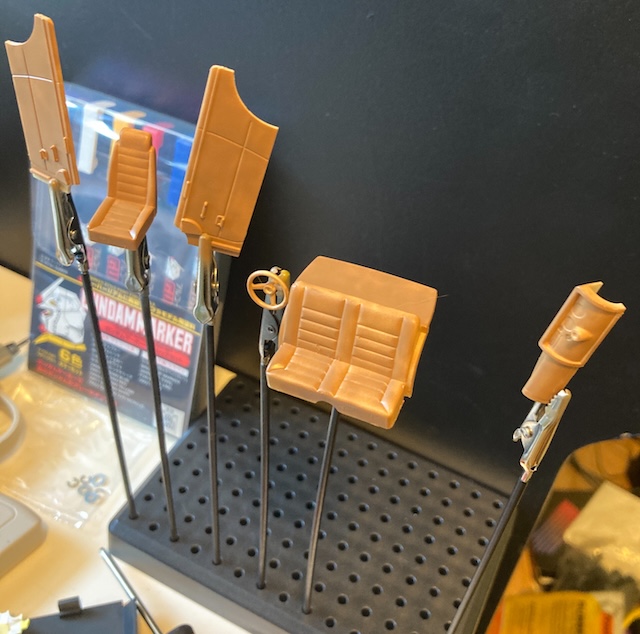
I had a couple dark spots when painting the seats and door cards, so I decided to make the seats look a little lived-in. After installing the seats, I also noticed a bit of flash on the back that I had missed. Oh well. It’s not perfect, but they’re very tiny, and chances are they’ll be hard to see once they’re installed into the chassis.
With the leftover brown, I added a bit of wear and tear to the underside. Also, it covered up a couple spots where I had chipped the paint away by dropping the underbody while the paint was wet.
The suspension parts all got painted flat black. I was tempted to do something special with the front uprights, but there’s so little detail there that it wouldn’t be worth it. I got a little bit of quick-set cement on my finger as I was putting in the rear leafs, and wrecked the paint on one of the leaf shackles. Whoops! A black Sharpie fixed that up… as long as you don’t look too closely. Lesson learned about the dangers of quick-set extra thin. I switched to CA glue after this.
I also dumbly did not paint both halves of the springs, thinking that only the bottom half would be visible - turns out the top half is visible through the wheel well. You know, where it holds the wheel on.
Miscellaneous pieces of trim that I wanted to be a brighter silver than the wheels – stuff like the shifter, centre caps, and rear view mirrors – got painted in Tamiya Chrome Silver. You absolutely cannot tell the difference between that and the Titanium Silver the wheels caught. I’m really happy how these centre caps for the wheels came out, mostly because I didn’t lose them. Unfortunately, the panel liner mostly evaporated after this, so it didn’t look quite that good on the finished car.
The centre caps were really hard to put on straight. The flare is a bit wider at the bottom than the design of the wheels allow for, but not wide enough to sit flat on those designs, so it can neither sit flush nor proud of the centre of the wheel. I sort of floated it with tweezers and held them in place with gel super glue, while looking at the sides to make sure it’s vaguely uncrooked, but it was extremely fiddly to do four times. If I did this again, I would probably try to sand some flats on the centre caps so it has something to lock into, but I’m not confident that I physically could.
Painting Again
You know how it is. I started trying to clean up some of the flash inside the windshield frame, where it would be hard to see, and then I started cleaning up some of the more obvious flash on the front fenders. The front end didn’t seem to line up well, so I cleaned that up as well. Then I started scraping at the seam part line. All of a sudden, I had a lot of bare spots of white plastic on my little Honda, and it was decided for me that a full repaint was in order.
You can still kind of see the part line near the A-pillar, but I was worried about obliterating the adjacent windshield frame’s detail with an errant knife slip. Hopefully my skill levels improve in the future and this kind of thing becomes less risky. The glob on the hood cleaned up really well with the knife, and so did the part line on the opposite side of the body.
Time to redeem the patchy paint job I did outdoors. Since there was already some paint built up, I decided to go over some of the door lines using a Hasegawa needle scriber. The plastic is very thin on this kit, so I ended up making some spots that are a little more transparent than I would have liked.
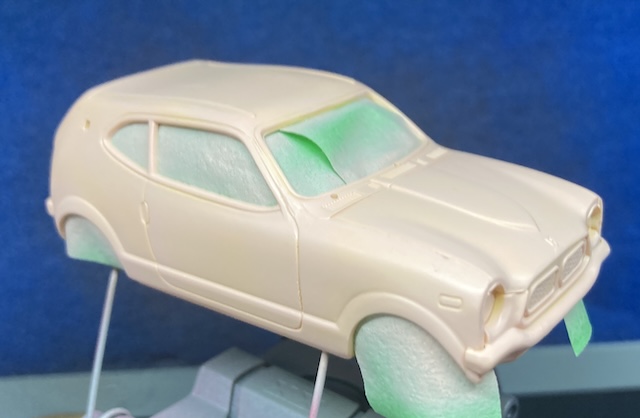
I scuffed the paint semi-thoroughly with 600 grit, 800 grit, and 1000 grit, and got ready to repaint. This time I decided to do it in Mr. Hobby Aqueous H24 Yellow-Orange, which I think is closer to the colour I had in my mind when I picked the Blue Angels yellow in the first place. Learning from my mistakes, I decided to paint the inside of the shell first.
To make sure I got an even coating of paint, I also picked a front end and glued it into place on the body. In retrospect, this was pretty risky – I should have used tape, or poster putty, to temporarily hold it – but I was fairly sure the headlights would still be able to go in and look good.
I started by painting the interior, because that would at least give me a good idea what was going on. As expected, the orange comes out very faint and yellow on the initial coats, and “oranges up” quickly, so it takes some discipline to make sure the number of coats is even. That technique was maybe 80% successful, but it will be hard to tell once the car is assembled. After the warning provided by that minor debacle, I decided that it would be a lot easier to track where I had and had not painted by re-priming the exterior.
Lucky for everyone, I had pink Surfacer 1500 on hand. This was a little unusual compared to other paints: for one, it didn’t clean up from the bowl very easily. I’m not sure I mixed it sufficiently, or maybe my brush was clogged, as the first couple minutes of spraying were very weak until I got some proper flow and it laid out nicely. Priming the car, of course, exposed all of the little slips I made while scribing panels. Oops. I’m new, give me a break.
Once it was cured, the surface felt nice and smooth, so I decided it was time to move directly to a topcoat. Sometimes surfacer is kinda rough, like when I used the spray can on the body of the Rising-Trigger. It certainly did not cover up all of the damage I did with a scriber, but I was ready to get this thing into a reasonable colour and move on to the next kit.
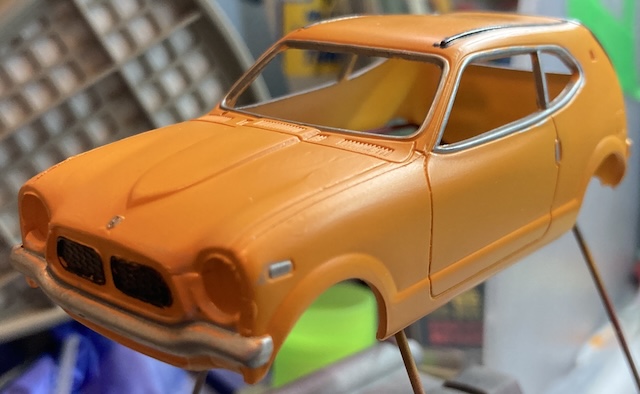
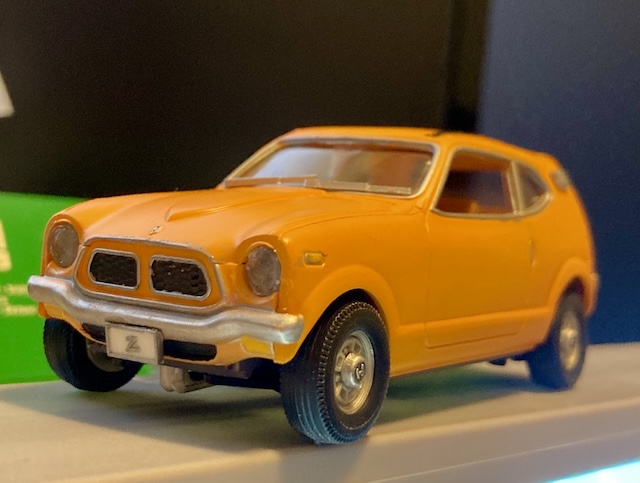
I was bad at managing overlaps and probably some corners got painted more than others, but I was happy with the much more even orange-y colour that came out. It looked very yellow coming out of the airbrush, but dried a lot more orange.
Removing it from the LEDs of the paint booth, the natural light shows that it is in fact extremely orange.
Good enough for me. Now to do all the black and chrome parts!
Trim Painting
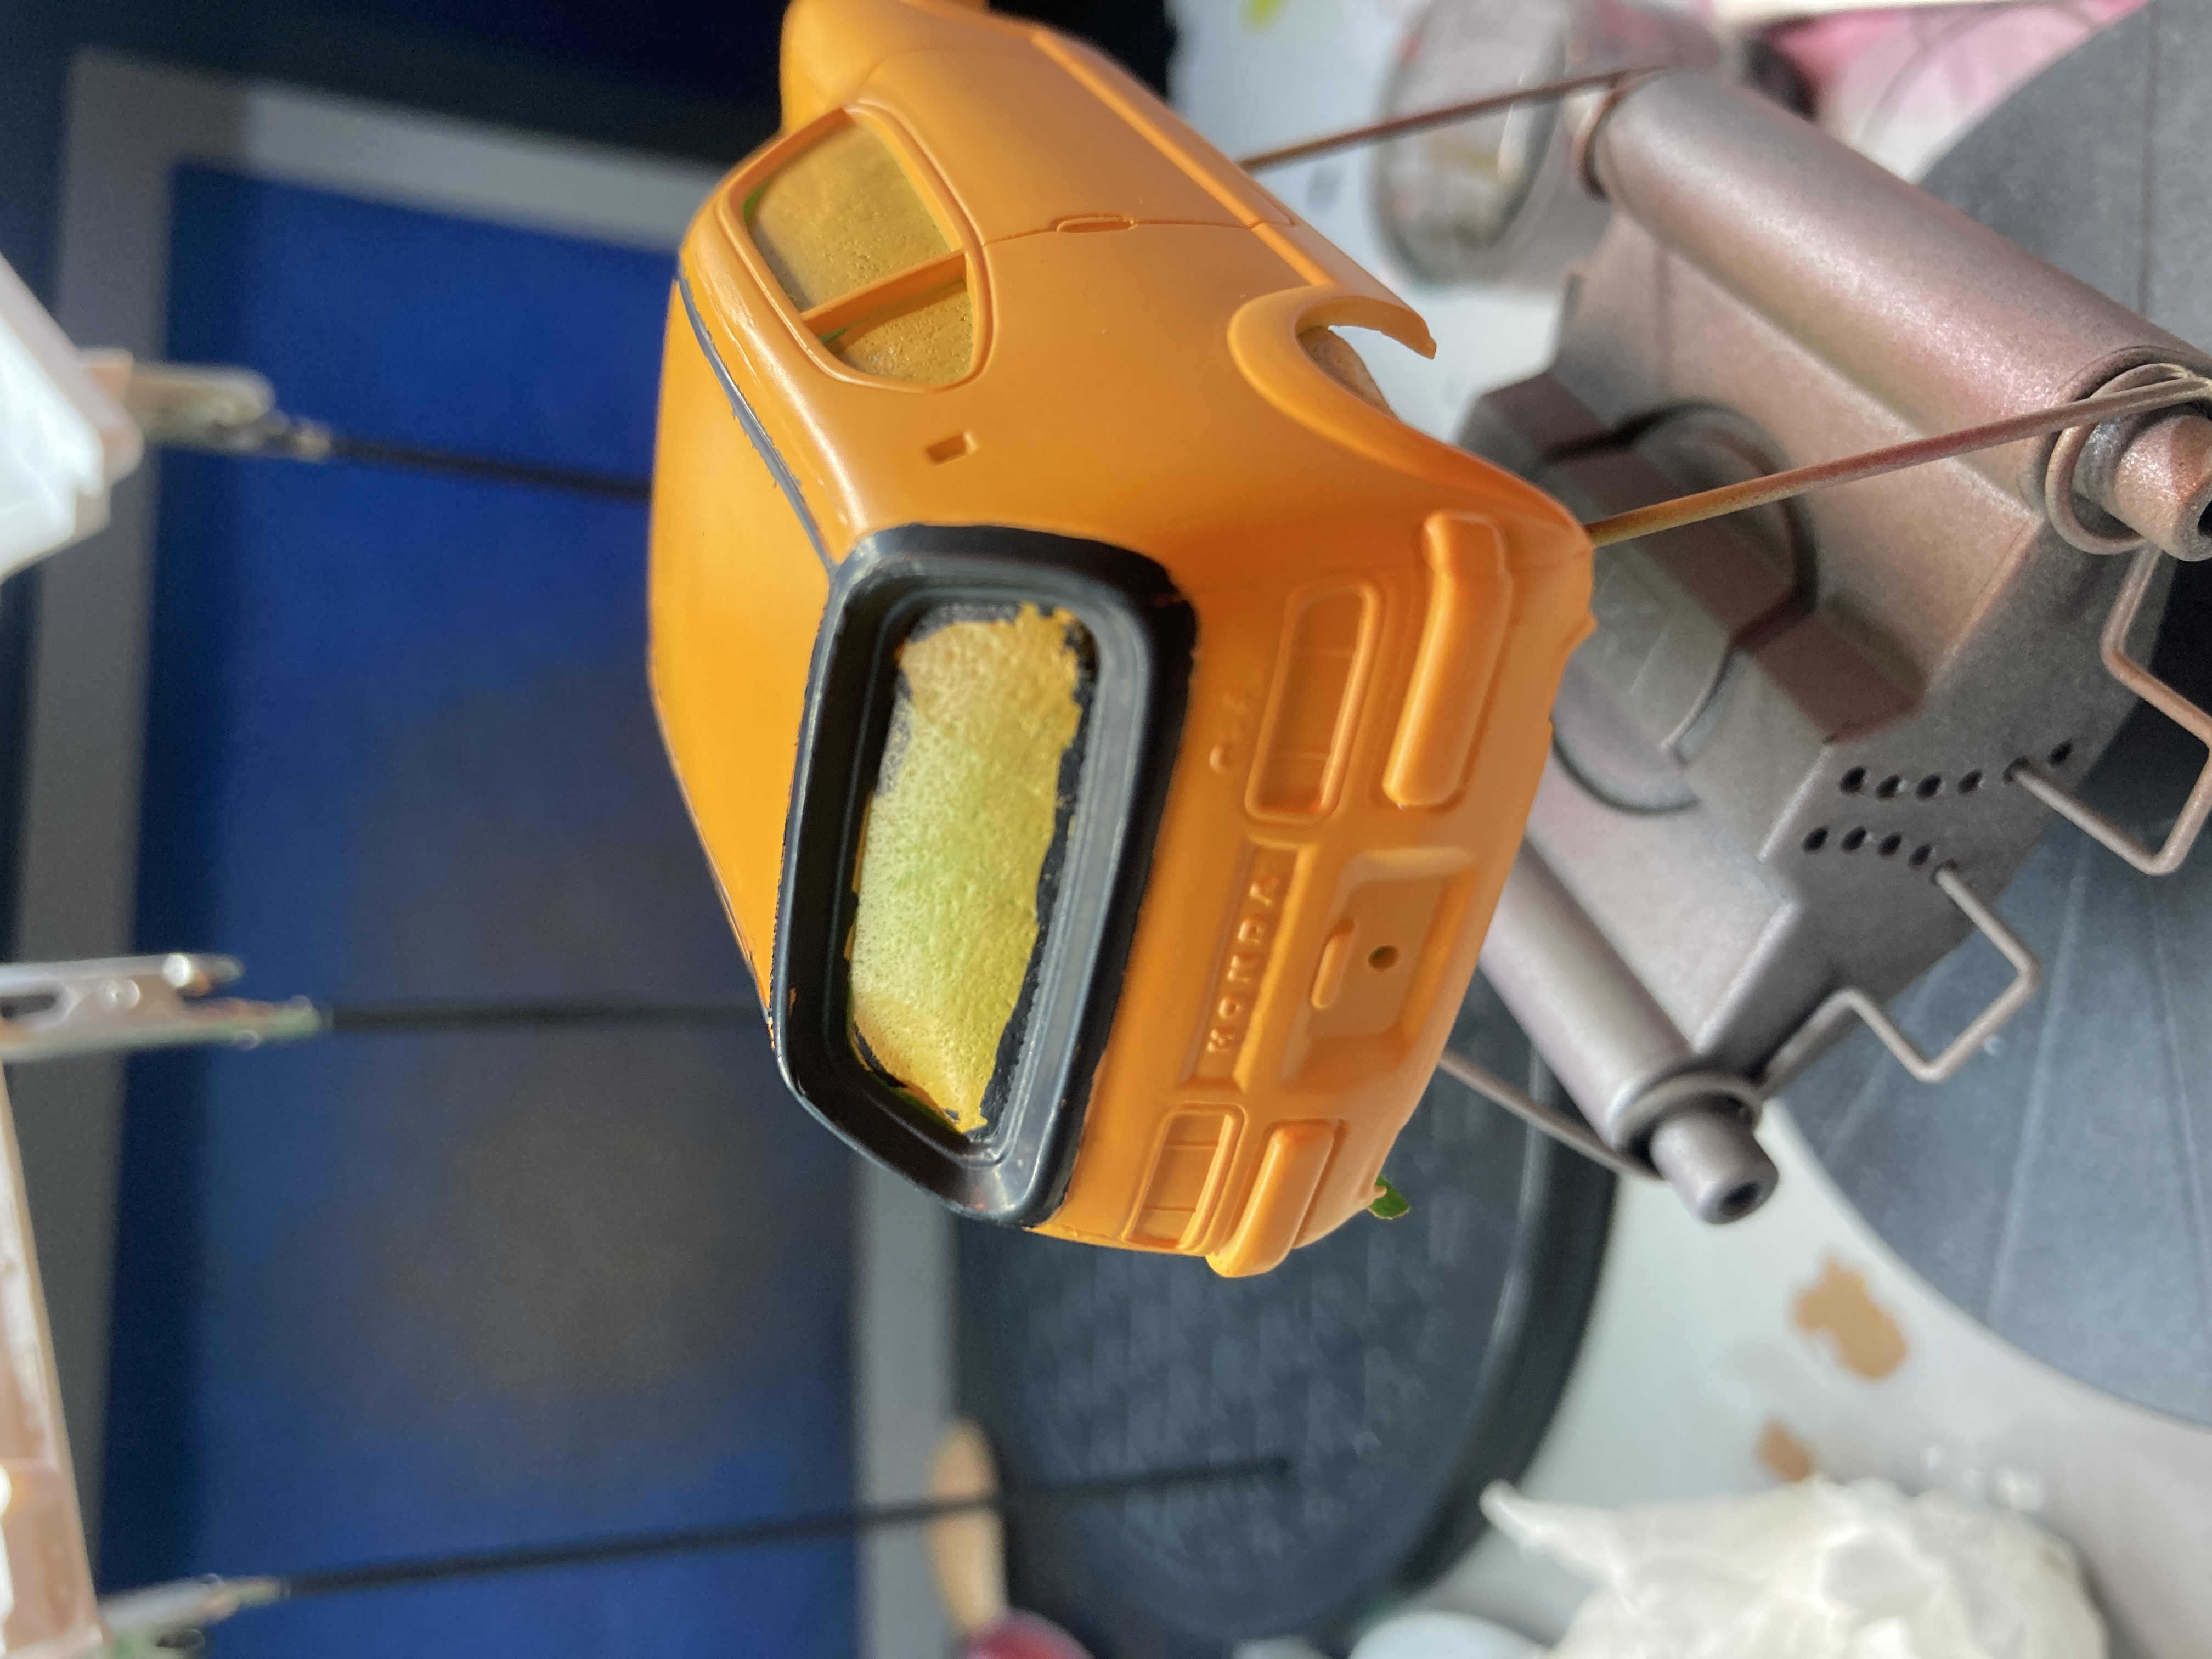
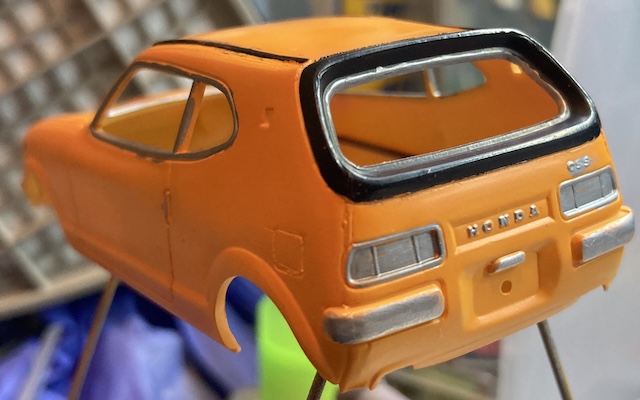
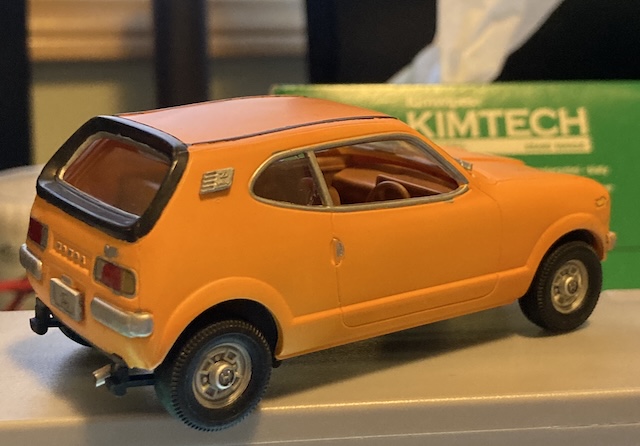
Even with some masking, I still pushed too hard with the Rubber Black pen and got it under the tape on the rain rails. I then tried to fix things with a pointy q-tip, but probably made it worse. At least the rear hatch area2 has come out very nicely: after this, I touched up the missing points very carefully.
![]()
A silver Sharpie touched up the corner turn signals and the Honda badge on the front. Then I tried to use a new Posca silver marker on the bumper, which turned into a huge disaster. It just wouldn’t dry: running all over the place, slinging off the bumper and under the tape. I ended up pulling the tape off, doing what I could to recover it with a q-tip, and then redoing the bare spots with a silver Sharpie.
I then went on to do the rear bumperettes, the badges, the grille surround, and the infill for the tail lights. Those went great, so I moved on to the window trim, which surprisingly went really well. The secret, it turns out, is to only take small little “bites” with the very tip of the Sharpie, and only push rather than push and pull. I still made the occasional slip when I got too eager, but this made me feel really good.
The rear “GSS” badge was barely decipherable even when the kit was bare, and it turns out that repainting the car made it even less visible. It just kind of looks like a glob instead of distinct letters. I should have tapped the marker to these letters very gently instead of trying to swipe.
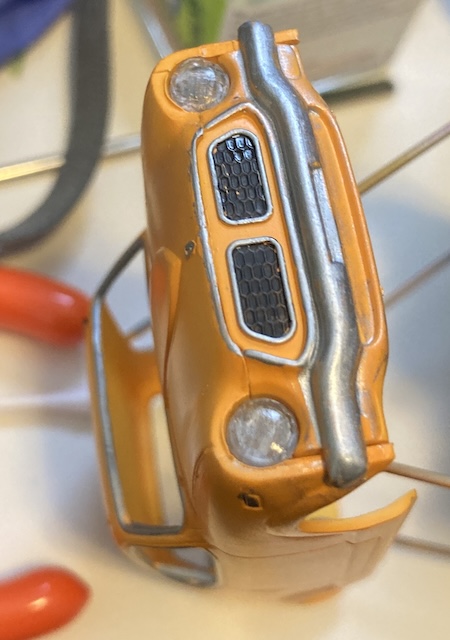
After sealing the back of the headlights with some more silver Sharpie, I ended up sanding them down substantially. As they come off the sprue, they’re not very round at all, and wouldn’t even fit in the opening. A lot of tactical filing and sanding made them round again, and then they fit great. Hey, it looks like a car now.
Tail lights
I noticed that the tail light section was fairly recessed. Although it was still pretty shallow, I figured maybe it would be possible to make it look nice. Arii didn’t include clear parts for the tail light, and just calls out “clear orange” and “clear red” for the colour, with presumably a chrome silver backing.
I had recently gotten a little UV resin kit. I’ve seen model makers on YouTube use the resin to fill in dashboard gauge lenses, and so I’ve thought about trying it for awhile. This seemed like the perfect application.
For those similarly uninitiated, UV resin comes out as a slightly sticky goop that you can push around with a toothpick and clean up with a Q-tip. It only becomes hard when you cure it using a UV flashlight (or presumably the sun, if you have a lot of free time.) My resin kit had a little eyedropper, although the opening was way too big for precision work. Even so, I dropped a glob onto the right tail light, popped some bubbles, mixed it around to release the surface tension, and watched it flow mostly into the shape of the tail light. Then I cured it.
On the left side tail light, I had quite a bit seep out, even after trying to clean it up with a Q-tip, and so there’s a lot of goop outside of the tail light bucket. However, this stuff cures optically clear, so it just looks like a partially-applied gloss clear coat, which I was going to do anyway.
Since I only have Aqueous clear red and clear orange, I didn’t want to brush paint them on. Instead, I bought a set of coloured Sharpies, and got out the red and orange ones.
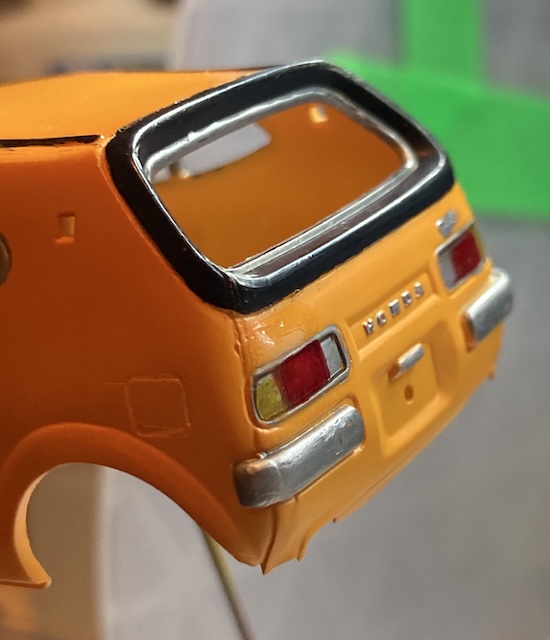
Defying the instructions, I decided to keep the innermost part of the lenses unpainted, so as to act like a US-market reverse light. It also helps a little bit with letting some light in behind the coloured sections. In other words, the rear lights from the inside to the outside are coloured white/red/orange. This configuration doesn’t seem to exist in reality, as the US-market turn signals are also red instead of amber, but I think it looks better this way.
Did all of this extra work really come out with a better result? Not that I can tell. The red Sharpie is pretty opaque, and at this scale, it’s very hard to notice the additional depth, even if you’re looking for it with a directional light. That said, it was fun to try something new, and now I’m not going to be afraid to do this on gauge clusters or wheel centre caps.
Fiddly bits
For the last couple of trim pieces, I again was lazy and just used the silver Sharpie. The corner badges required some fiddling, but went on fairly straight.
After some deliberation, I skipped out on the fender mirrors: attaching them would be just too fiddly, and all of my dry fits looked terrible. Japanese fender mirrors are not parallel, with the drivers’ side mirror being closer to the headlights than the passenger side.
I also skipped the rear-view mirror for the aforementioned reasons of fiddliness. There’s a place on the canopy where it looks like it might attach, but there’s no receptacle for the mirror’s peg on it.
Should I clear coat this whole thing? I thought about it, but ultimately decided I wouldn’t want to lock in the silver smears from the front bumper for all eternity. Perhaps when I’m feeling like revisiting this model, a future generation can flat-black the car and turn it into a kaido racer. Or I can just buy another.
It was difficult for me to eyeball the angle of the windshield wipers, but I think they went on in a natural-looking way. Worst case, Dean put them back on wrong when he swapped a burned out wiper motor in the past. C’mon, Dean.
Calling it. I affixed the canopy with clear Elmer’s glue, which gave me a lot of curing time to think about what I was doing. Maybe too much time.
I only realized after it cured that I forgot to rubber-black the blades of the wipers before putting the windshield in.
It’s Really Done?
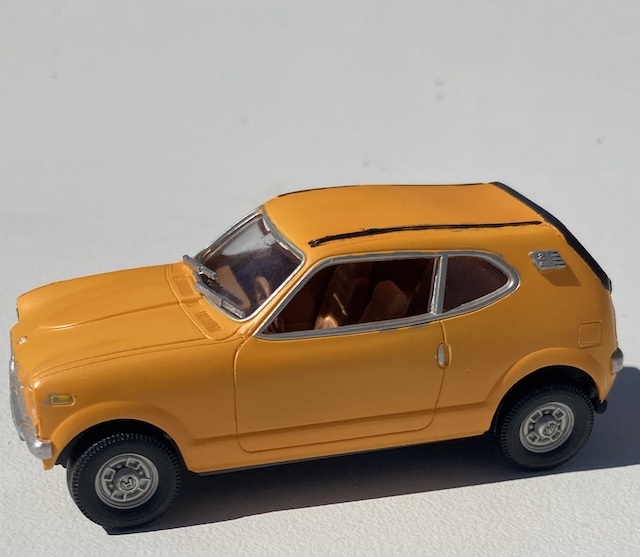

Yes, it’s really done!
Club Sandwich
Despite all the problems I had building this kit, the charm of the Arii packaging and the kit shone through. It combines intricate detail with a fun toylike scale and a ridiculously low price. This is by far my favourite of the model kits I’ve constructed so far, and I’ve already ordered a handful of other Arii 1/32 Owners’ Club kits from Japan.
If you get the chance to build one of these, I bet you will have even more fun than me.
Thanks for reading! Please look forward to the next project.
-
The Rising-Trigger was finished first, but I started airbrushing on this car. You’ll see why this one wasn’t finished first very soon. ↩
-
Although I thought initially the rear hatch/window surround was a rubber thing, it turns out it’s actually a very early – and pretty enormous – injection-moulded ABS plastic piece. On this particular Z one, I guess it must look a little more rubbery. ↩