The Trigger Also Rises
Tags: mini4wd daxing rising-trigger paint
Now that I’ve fixed the Rising-Trigger knockoff chassis’s broken motor mount in the previous entry, it’s time to move on and start building the car. Of course, since it’s a knockoff Daxing chassis, this car will mostly be used for display. So we better do a good paint job. Did I mention it’s my first paint job?
Paint Prep
I started out by cleaning the model in dish soap and warm water, and then moved on to wet-sanding it down. The Daxing plastic is extremely shiny, which means it probably won’t take paint very well, so roughing it up felt like the right thing to do. I used 800-grit hardware store sandpaper, although it was difficult to get into all the nooks and crannies with it.
For priming, I decided to use Surfacer 1000 in grey, because that’s what was available. I had never used Mr. Hobby surfacer before, and I could only get the spray bomb in the store, so consider this a bit of a learning project. Even with my terrible airbrush skills, I would have preferred to get this in airbrush format. Not only is it cheaper, but it’s a lot easier to apply. Spray bombs are really messy when you’re trying to hit a complex target just slightly smaller than a TV remote.
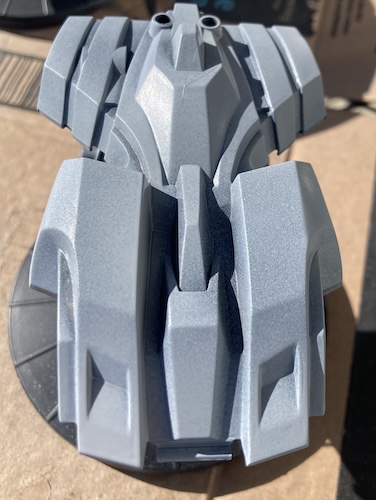
As per the usual instruction, I did a quick light coat for my first shot. Then I immediately found a cat hair on it.
I am very glad I have a place to do this outside, because boy does this stuff stink. That’s how you know it’s working! You definitely want to put on at least a dust mask even so. If I could have done this over again, I would have filed down the sprue marks on the corners a little better before getting the cowl ready for paint. They weren’t obvious when the model was all in black, but immediately popped out at the surfacer stage, and are very obvious in the colour.
I waited 10 minutes between coats, setting a timer so that my notorious lack of patience didn’t screw up the job again. I tried really hard to only use gentle pressure on the trigger so it wouldn’t spatter.
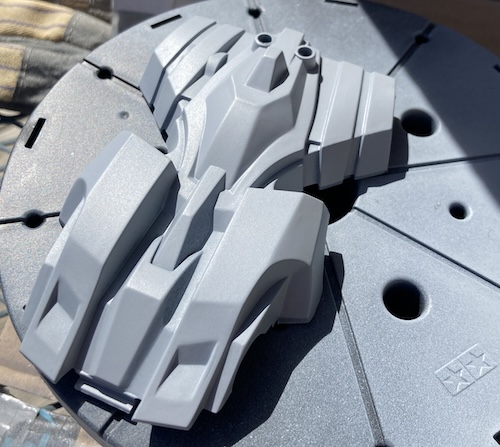
My second coat went on a little thicker, and by then I had run out of time and weather to paint. After a couple hours of drying in the sun, it looked amazing as I brought it inside to cure overnight. So let’s assume I did that right.
Paint
That fresh surfacer then cured over a lot of nights; it sat in my basement for the entire winter! Finally, as part of learning to airbrush in general, I was casting around for something – anything – ready to paint after getting an indoor paint booth. Retrieving it from the basement, I then lit up the inner details with some Dspiae orange paint.
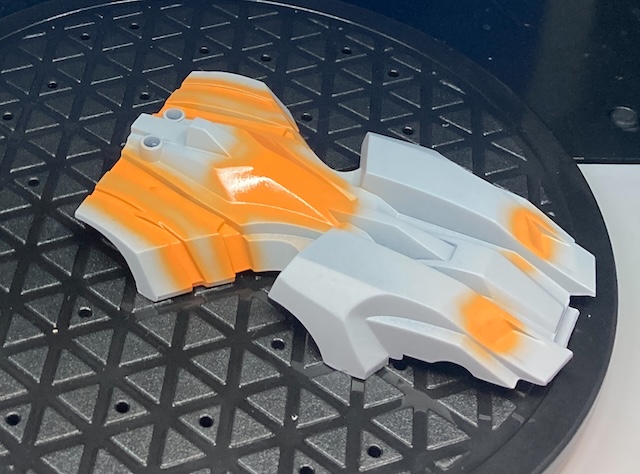
This provided a good excuse to learn how to mask, which took a long time, but I think looked pretty nice considering my inexperience. I have to be more gentle with the knife for sure, as I put some deep gouges in the surfacer that show up when you look closely. Probably, it is a bad idea to cut the masking tape direct on the body at all.
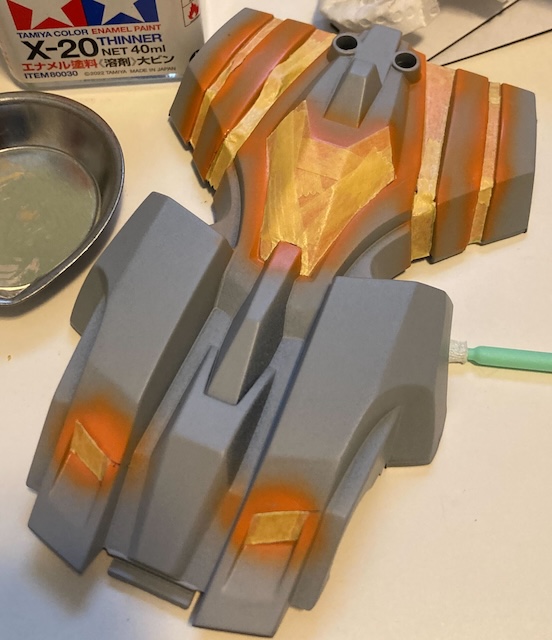
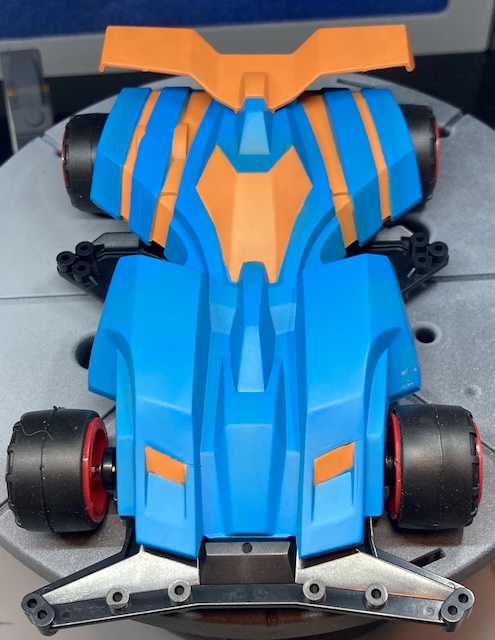
I decided to top-coat with Mr. Hobby Aqueous “Sky Blue,” because it was what was on the desk at the time. Learning from my many mistakes in the past, I tried hard to make sure each surface got an adequate coating. This was made a little bit easier since there are so many flat surfaces to help me split up my panels, instead of just one large one like on most real cars.
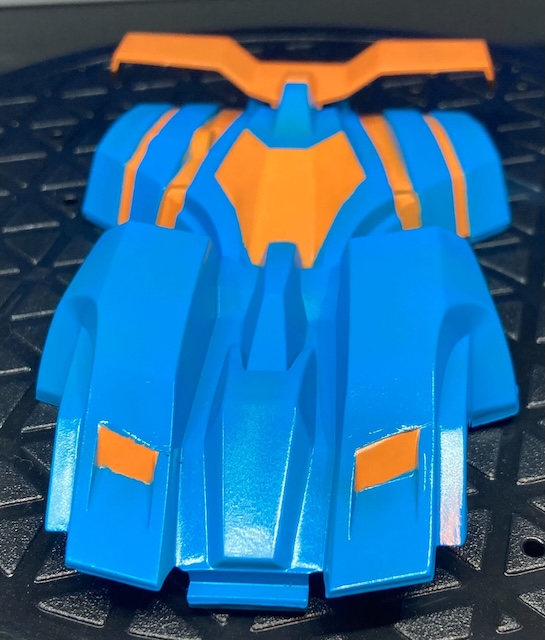
I noticed that even the orange paint was very soft and thin. Maybe I should have done more coats? I wasn’t sure if only the clear coat was meant to protect the colour layers.

I had a bit of trouble with the end of the masked stripes fraying at the ends when I tried to cut them at the body edge. I think i should have used another piece of masking tape sideways to end the stripe, but that’s a lesson learned, and the spoiler will cover most of my sins.
I wanted to do a clear coat to keep the paint from chipping off, so I grabbed a jar of Mr. Hobby Aqueous GH-101 “Premium Topcoat Smooth Clear,” and put it on. It is a matte finish, which I somehow missed despite being prominently stated on the label. Smooth Clear is very gloopy and viscous in the jar, so I thinned it 1:2 and seemed to get a decent result.
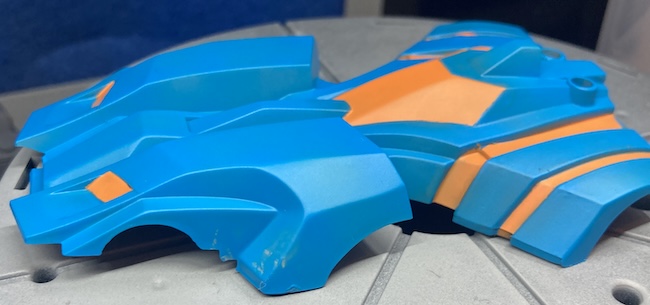
Although everything went (ha!) smoothly, it wasn’t perfect. One big whoopsie is when I put it on way too wet and then stuck my thumb in that exact spot a couple seconds later to turn the car around. The thinner had softened the paint beneath it and I mushed the whole thing.
At least it draws some attention away from the fact that I failed to sand down the sprue marks on each side.
Dry fit
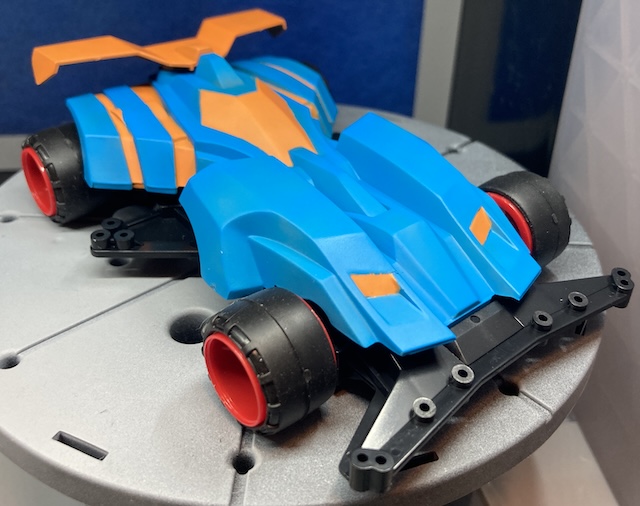
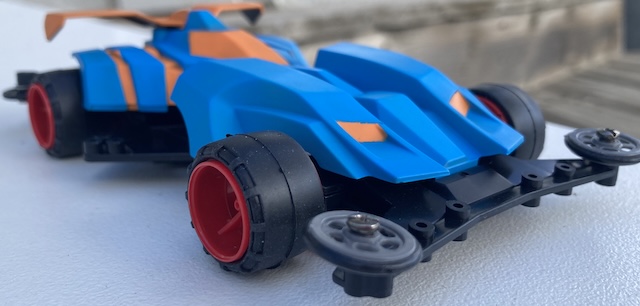
Even so, I was now confident enough to try a test assembly with the rest of the car. I put the driveshaft, the countershaft gear, and the drive gears into the chassis, and loosely installed the axles.
I considered painting the wheels, but gave up when I realized the inner rim was still visible around the tires. I’m not sure how the Rising-Trigger “aero” wheels really vibe with this colour, but unfortunately they didn’t cover up the blemish I made in the front left quarter of the body.
Chassis assembly
Despite the somewhat mangled motor mount, everything went together smoothly. The quality of the plastic is not quite as stiff as the Tamiya stuff, but the mould is dead on, without lots of flash. Everything fit together quite well.
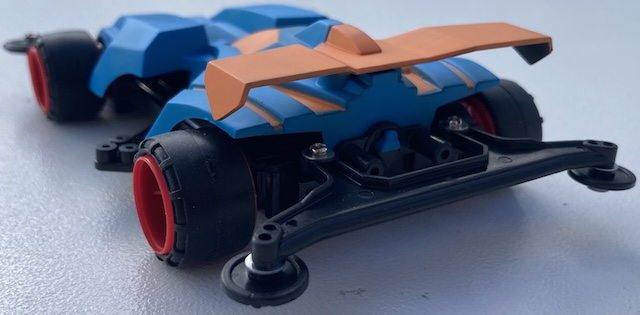
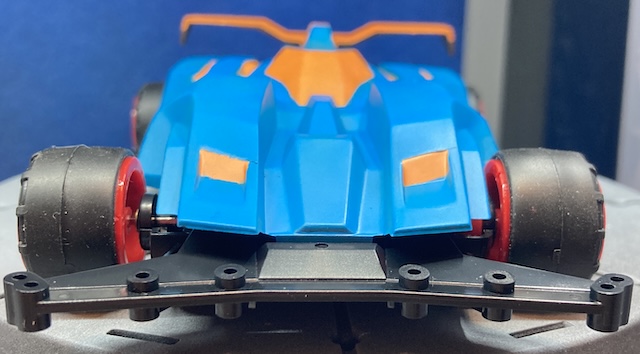
Being an older kit, I forgot that it has the “under-ride” rollers in the rear, which makes it look a little weird. Good thing the giant spoiler helps visually balance that out, in the grand tradition of the 80s.
Conclusion
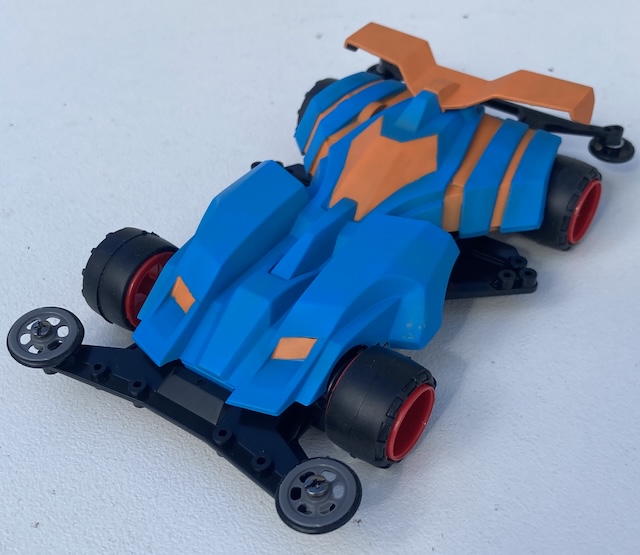
I’m happy with how this turned out. The paint job isn’t 100% even, but the masking and the bold colours make me happy. I may have had more than one oopsie with dissolving layers of wet paint with the clear, so I need to be more careful next time to make sure to only handle the kit by a stand instead of directly.
A glossy clear would probably have looked nicer as well, as the matte clear makes it look sort of like a “2000s thing,” instead of a 1980s thing. Even so, this is one kit that I’m happy to put on my shelf. Thanks for reading!