
Who does a Skyline live for?
Tags: mokei tamiya nissan skyline car
Let’s get around to actually making a Tamiya kit. A perfect candidate is this R32 Nissan Skyline that I found at a local hobby shop! Through only a little bit of struggle – mostly my fault – I still managed to turn this late-80s supercar into a pretty nice model.
Body prep
I started out trimming part lines from the body, they’re not bad, but they are in annoying contoured places (like the inside of headlight buckets) and they needed some sanding to clean up after that.
Because the spoiler felt fiddly, I glued it on rather than worry about ruining the paint job on the trunk lid later. It was surprisingly tough to glue it on as the hole in the lid didn’t seem fully formed, and the pegs seemed quite small. Bad first impression for a Tamiya!
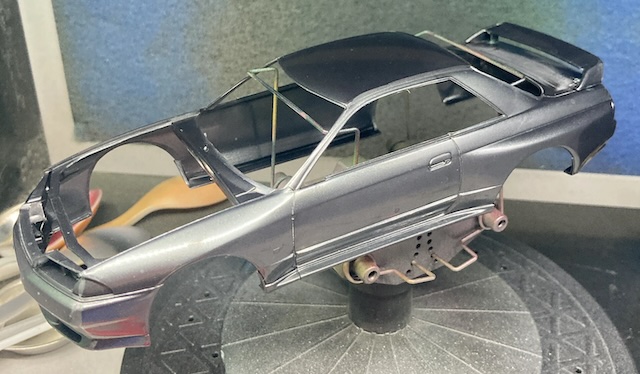
Gluing it onto the body this early was a mistake, as the trunk turned out to have more flaws than I initially saw, making it harder to correct them. Some glue also seeped out, but it did make the unpainted body look cool.
While unboxing the rest of the car, I was surprised to find out the hood is clear! That’s a cool idea. It also seems to attract cat hair and dust more readily than the “usual” kind of plastic.
I glued the engine/transmission together, to make them easier to handle, and blasted the whole assembly with chrome silver. I knew that the lower half had to be painted black, but either way I would have to mask some of the transmission bellhousing section, and it seemed easier to do it while the entire thing was glued together.
Lots of gunk ended up in the places where I scribed the body. I tried to clean them out with various things including folded sandpaper and was only sorta successful. I ended up washing the body several more times and also giving it a light scuff in places that looked worked.
Engine and transmission painting
Tamiya seems to like starting you off with building the engine of the car, so you can appreciate the mechanicals off the bat. In the case of the early R32 Skyline GT-R, this engine is an inline-six RB26DETT (that’s two turbos) and it’s bolted onto an all-wheel-drive longitudinal transaxle.
As I read over the instructions, I noticed that pretty much every step asked you to paint something with X-18 semi-gloss black. My local hobby stores just so happen to continually be out of it, so I ended up ordering a bunch of paint from a dealer in Ontario.
Initially, I tried brush painting the lower part of the engine block, but I think I over-thinned and ended up with runny paint that crept under the masking tape. To fix the valve cover, I tried re-brushing it with much less thinner. I am finding that brushing Tamiya paint needs to be “one and done,” because going back over it before it has dried makes obvious brush strokes. Brush painting is hard!
After that, I set up many huge batches of semi-gloss black parts. I need more little clippy things to hold up small parts.
The only problem I had assembling the engine is that there is a “don’t cement these” step when you are putting the radiator hose and transaxle together. I misunderstood the instruction, and thought it applied to everything in that step.
It turns out there’s actually a faint little “don’t cement this in particular” icon next to the radiator hose only. That’s so you can pivot the radiator hose into the radiator on a later step and glue it.
This was found out only once I had loosely (and frustratingly) stacked everything together in the subframe. As a result, my oil pan/transaxle is very loose, but it seems to be holding in there alright.
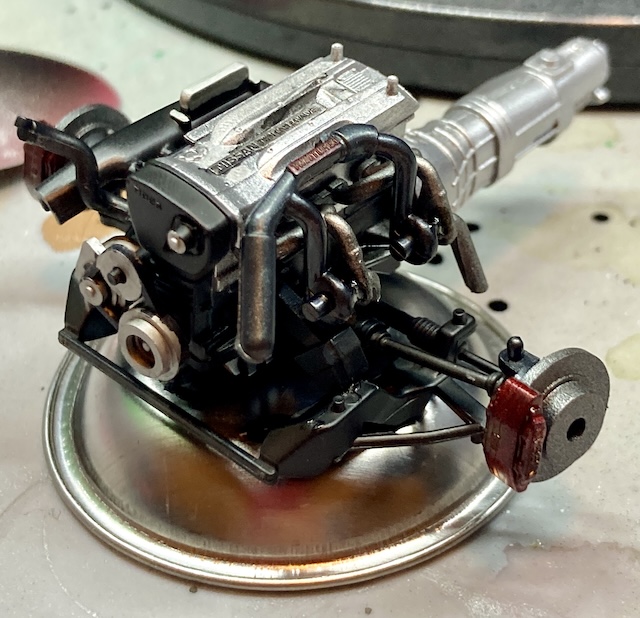
Dang, that looks super good. I used Gundam markers to make the calipers red, in violation of Tamiya Law.
Even more semi-gloss black painting followed after that. You can make your own joke about 90s Nissan here.
For some reason, the next step after building the engine is to paint the entire unibody so that the radiator has somewhere to be installed into. Okay, Tamiya – I’ll take the fun part in the middle, sure.
Body prime
Having learned from many misses and near-misses in previous blog entries, I test fit all the body parts before I painted anything. In retrospect, I should have test fit even more parts, but we’ll get to that.
The hood, perhaps because it is a clear part, or simply just to hold it in place on the body, needed a lot of force to wedge into the body. I felt like it needed so much pressure that it would damage something later when I had everything painted. To fix this, I sanded down the edge of the hood until it fit a little bit less tightly.
As always, to get rid of my copious amounts of fingerprints and sanding dust, I gave the thing another bath in the sink before priming out the body. Counting the drops of primer would give me a good clue about how much body colour and clear coat I would have to mix up later to cover all of this car again, right? Right…
I’m never really sure how to paint hoods. On the AMT Scout II, as with this one, I gently taped the outside of the hood to the body in order to paint the inside all in one paintjob. Then I moved the tape to the inside, and painted the outside all in one paintjob.
This was not a great idea, as I ended up putting an ungloved thumbprint in the edge of the hood while manipulating it. Having a glove on my right hand screws up my airbrush trigger feel; unfortunately, I am right handed and keep trying to do things with my greasy thumbs. Maybe I should learn to paint with my left hand.
There’s also a significant amount of “Skyline parts” covered up by the hood that need to still be painted, such as the entire windshield wiper area. I should have painted the hood separately taped to a bamboo stick or something. The hood got pulled shortly after this to be sanded down and repainted separately from the car later, taped to a skewer after priming.
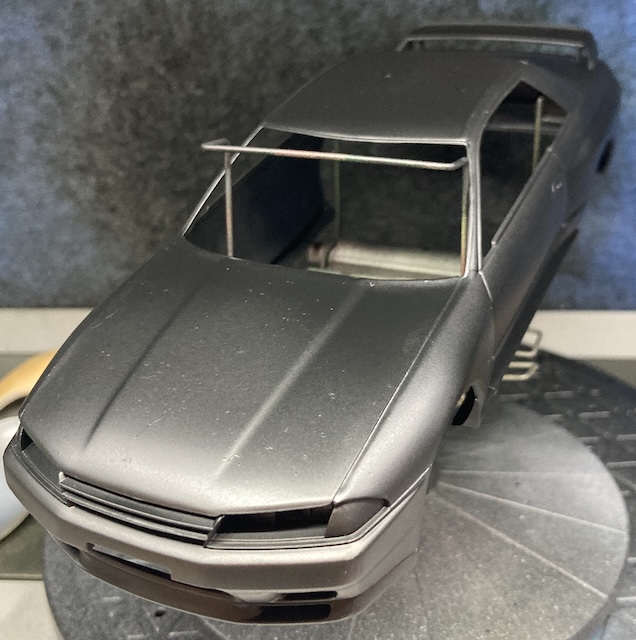
Priming went worse from there: although I tried mixing it in a mixing bottle for the first time, my initial estimate of “probably 200 drops” turned out to be inaccurate. The airbrush then clogged when I was trying to mix some additional surfacer in the (overfull) bowl, so I had to dump out the bowl. That then caused me to have to mix another 100-ish drops in the mixing bottle but then losing count of the thinner, producing overly-thin surfacer.
As a result, I had absolutely no idea how much body colour and clear coat I’d need for the next couple of stages, and I found out that my kitchen scale is too inaccurate to measure by weight.
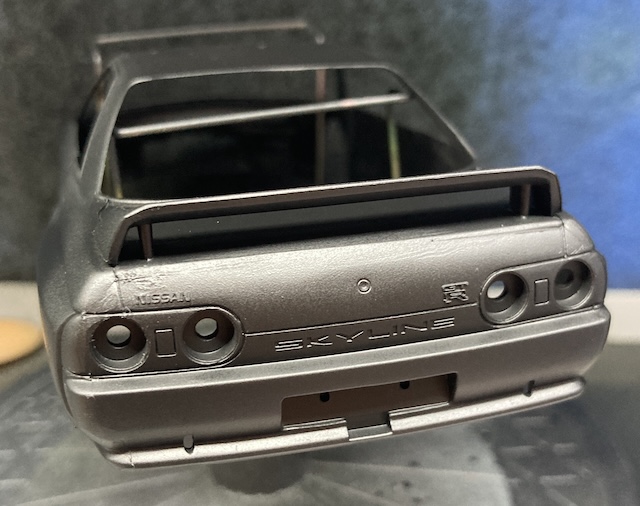
In a similar vein, I wish I had held off on gluing the spoiler on the car. It made it difficult to clean up the mould line on the trunk lid, which immediately popped up when I put the surfacer on it. I was worried about accidentally obliterating the adjacent “NISSAN” detail when sanding it down.
Also, the body kept falling off the stand. I decided to come up with something to hold the body so that I can tape it onto the next one. My old standby, a 500mL Coke bottle, was too tall for the fume hood.
After re-priming the hood, I was ready to mix up some paints and get to work.
Body paint
My chosen body colour is Mr. Color Gundam UG-24 “Trans Am Red Pearl.” It looks very good on spoons, so I figured it would look good on a Skyline too. And the pearl is nice at covering up all kinds of body flaws, like the trunk lid!
To make sure I didn’t run out of paint halfway through and have to mix again, I did 8mL:12mL (as shown by my eyedropper) mix in a 20mL AliExpress squeeze bottle. My measurement might have been off a bit, as the 20mL bottle had a lot of headroom after adding what I thought was 20mL of thinned paint.. but I continued on.
Because of the black surfacer, the end result was a nice black cherry colour. I had figured out from previous experiments with Mini 4WD bodies and fades that the red UG pearl is not especially opaque, so I made sure to take this into account. I think this makes it look more like it’s been resprayed in the R33 era as a show car.
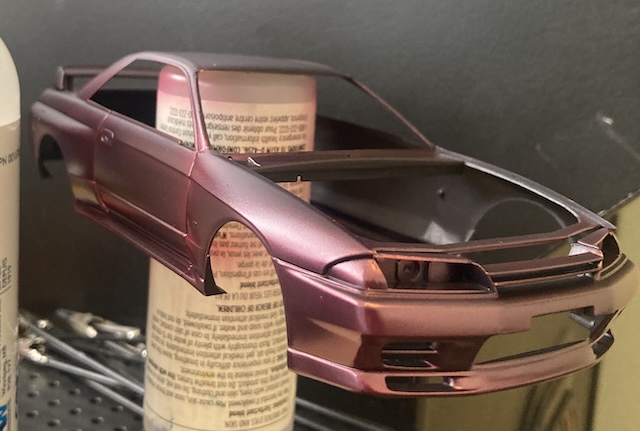
Pearl is challenging to paint. I did keep chasing spots where I thought they had been underpainted, only to find out it was just reflections from a black object in the vicinity. There was a lot of tilting and squinting to make sure I didn’t accidentally overspray the front fenders in particular. You can see this effect in the above picture very clearly.
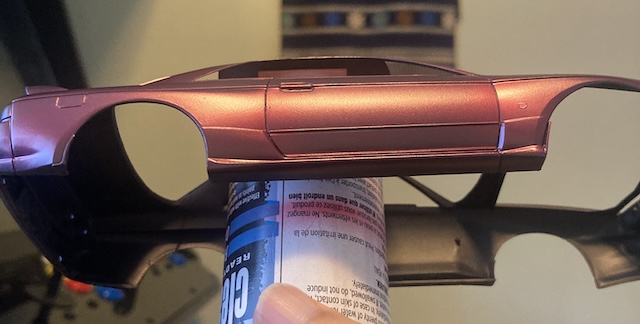
For my colour shots, I decided to do 3 coats from far away and then one coat up close and slow. That seems to have produced a nice effect. On the underbody tray, I did only 2 coats, which ended up making it look pleasantly darker. Nissan wouldn’t have done a show-car finish on the underside of the unibody either.
For a stand, I was desperate and grabbed a mostly-empty bottle of airbrush cleaner and turned it upside down. That works! Hopefully the lid doesn’t leak, that stuff was expensive.
I was afraid to ruin this by wet sanding, so I went right to a Mr. Color GGX “UV-cut” gloss clear coat. Based on some success I had with a spoon, my technique was to do three fast coats from a distance, and then three slow coats close up. I’m still a rank amateur at clear coat, and I was worried about wrecking the pearl layer, but I think things were mostly successful.
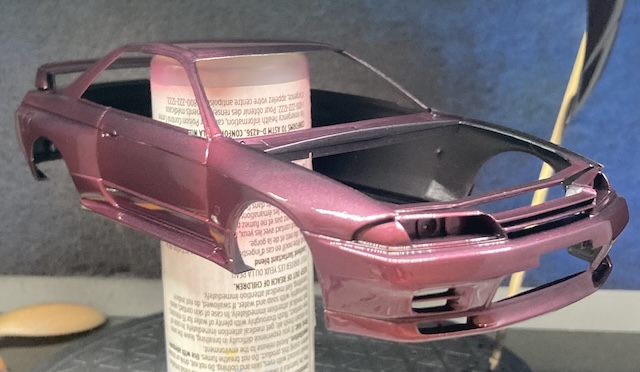
Lots of dust and hair got trapped in the clear coat. As is legally mandated, I got a hair dead centre of the hood. It also produced a fair bit of orange peel as it dried, but I still don’t have any polishing compound, so I moved on.
Underbody
Now that I’d painted the bottom half of the “unibody,” it was time to offer up the subframe. Everything glued in nicely, although I had trouble getting the front subframe to line up perfectly. The lower unibody portion had to be stretched a bit to reach all the pins, which was worrisome with the radiator already installed.
There’s a bit of a crooked gap at the back, but it will be hard to tell when the car is on the ground.
The surprisingly complex rear subframe went in easily, and I remembered I hadn’t painted the wheels or exhaust as soon as I needed those. Whoops!
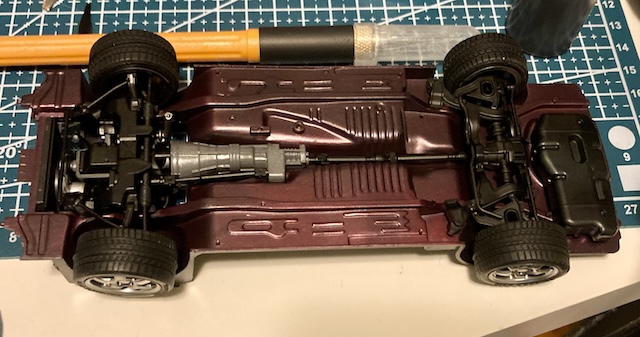
Maybe I misunderstood the instructions, but there’s quite a bit of slop around the “pin” at the top of the brake rotors and the subframe part that you glue it onto. As a result, the brake rotors/calipers went on wonky, and the rear-left one fell off repeatedly when I was trying to install its corresponding wheel. As a result, all of the wheel alignment feels at least a little off, and two of the wheels don’t turn since I got the little poly bushing stuck with super glue. Not super happy about this aspect, but I don’t think you can really tell once the body is on.
I think it would have been better to scrape the paint off the mating surface on both of these and then use Tamiya extra thin cement to get a really good, straight alignment into the rear subframe. I’ll probably try that for the next kit.
The exhaust, crossmember, and front skid plate went in just fine. In fact, the skid plate is so precise that it seems as if it could hold in place without adhesive, which is probably deliberate. Exactly what I expected from Tamiya.
Interior
After producing dozens of little black pieces and a half-dozen little silver pieces, I was finally ready to paint and assemble the interior. Rather than do the two-tone black bits with an airbrush, I chose to fall back on the AK rubber black pen for things like the gauge surround, the stereo, the pedals, the heater vents, and the speaker grilles.
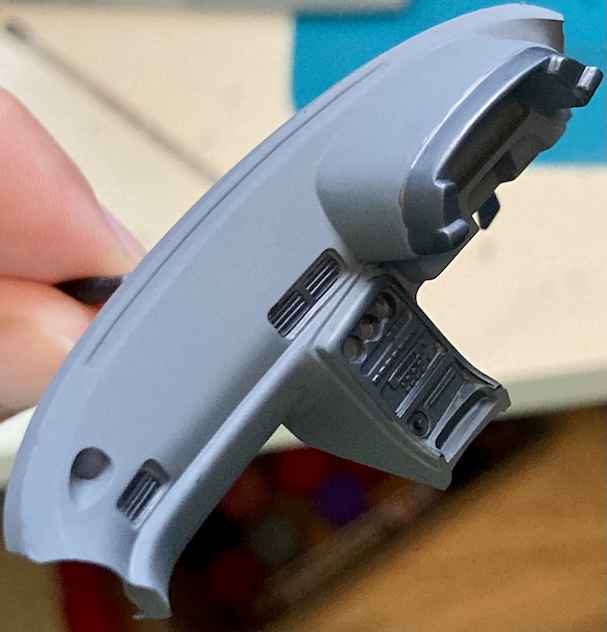
I think they came out nicely!
In a similar fashion, I also skipped doing the Sea Grey accents on the inside of the seat cushions and door cards. The entire interior will just be German Grey. This makes it look a little boring and monotone, but it also saved a lot of masking. The German Grey seemed to go on very soft – I scratched it with my fingernail a few times putting parts on – so I’m glad I didn’t have to worry about tape pulling it up.
I was a bit surprised to see big ejector marks on the floor-mat areas of the mould. When considering this model, I did see a lot of kits for felt “Skyline carpets” that you could glue in, and I guess this is why.
Amazon also had some self-adhesive craft felt that could be cut up and inserted, but it’s quite expensive and I couldn’t immediately find a substitute at the dollar store. I thought about experimenting with gluing down tissue paper and then painting it, but I didn’t want to run the risk of it not working this late in the project. As with the Scout II, I decided to ignore it. Chances are I will never notice this once the dashboard is in.
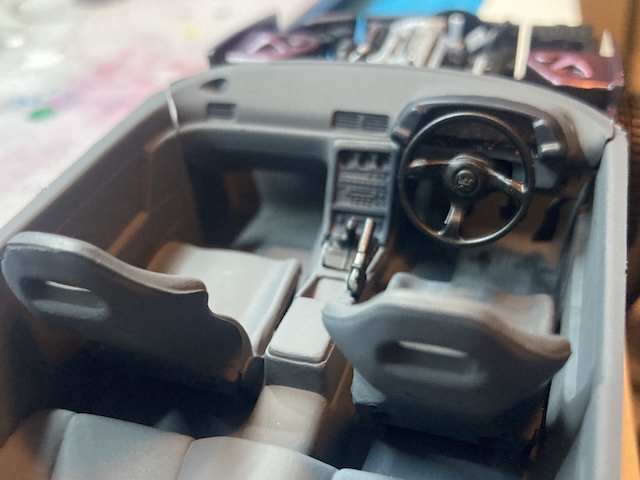
I just barely managed to get away with airbrushing the interior. I had been having repeated problems with paint building up on my needle and clogging my airbrush, and found that the o-ring in the fan tip had swollen up and gotten pinched in the thread. When I tried to dismantle it to clean it out, I found that the o-ring on the nozzle was also melting.
This is probably because I haven’t been using proper airbrush cleaner, which presumably contains lubricants, but instead farting lacquer thinner through it at the end of each session. Clearly, I need to take better care of my equipment.
The Windshield
I was dreading doing the frits on the windshield, and ended up making a bit of a hash of it. The rubber-black AK pen doesn’t look very good on clear parts, and it’s probably what I’m most disappointed in on this kit after the wheels that don’t turn. I decided to skip doing the exterior window trim, as I wasn’t feeling confident and didn’t want to screw up my nice body paint job.
When I finally slid the windshield in, it didn’t seem to fit very well. It sort of floated around from side to side and end to end, unless I held it hard against the roof. I thought there would be more positive retention, like the body should pinch it in place, but I couldn’t figure out how to do it. I did my best to align it and glued it down with Elmer’s glue, then let it sit.
That really did not work, so a few hours later, I pulled it all back out (it had barely gotten sticky) and started again. Despite being warned against it, this time I tried using some super glue. It ended up fogging the window, getting stuck to the window, and eating away a glob of paint on the fender. And it still didn’t stick the window well.
UV epoxy came to the rescue, although I slipped near the end of the cure and dragged a bit up into the visible section of the windshield. Lesson learned there was to put the epoxy into a dish or cup and then apply it more finely with a toothpick or other tool, not to apply it directly to the body in a glob. But at least it was in. Ugh.
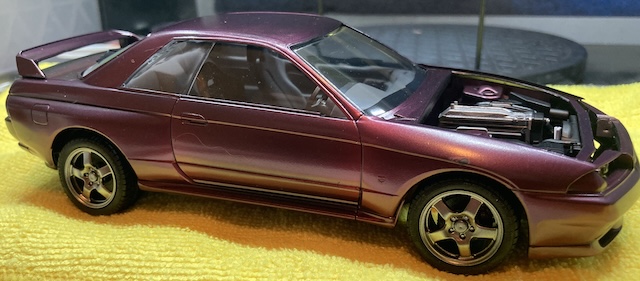
My next task was to glue on the rear wiper, which I did with Elmer’s glue and some time. Luckily, gravity was able to hold it in place, though you can also see evidence of the glue. I’m not sure how you’re supposed to do this. Tamiya clear cement?
Even after this whole disaster, I got the two parts unified and now it was time for the mirrors. I was glad that I went to the trouble of pre-mixing the body colour, as I now had to paint the little wing mirrors and stick them on. It would have been nice if I could have glued them to the body before, so that the car could be painted in one shot, but the mirrors practically hang off the glass in this kit. It seems like the windshield needs to be installed first.
The mirrors painted easily: I just did a few freehand coats until it “looked right” instead of the full multi-coat plus clear. I ran a Sharpie over the inner mirror glass parts instead of mixing up some fresh paint just for those, and I think it looks alright.
The Last Little Bits
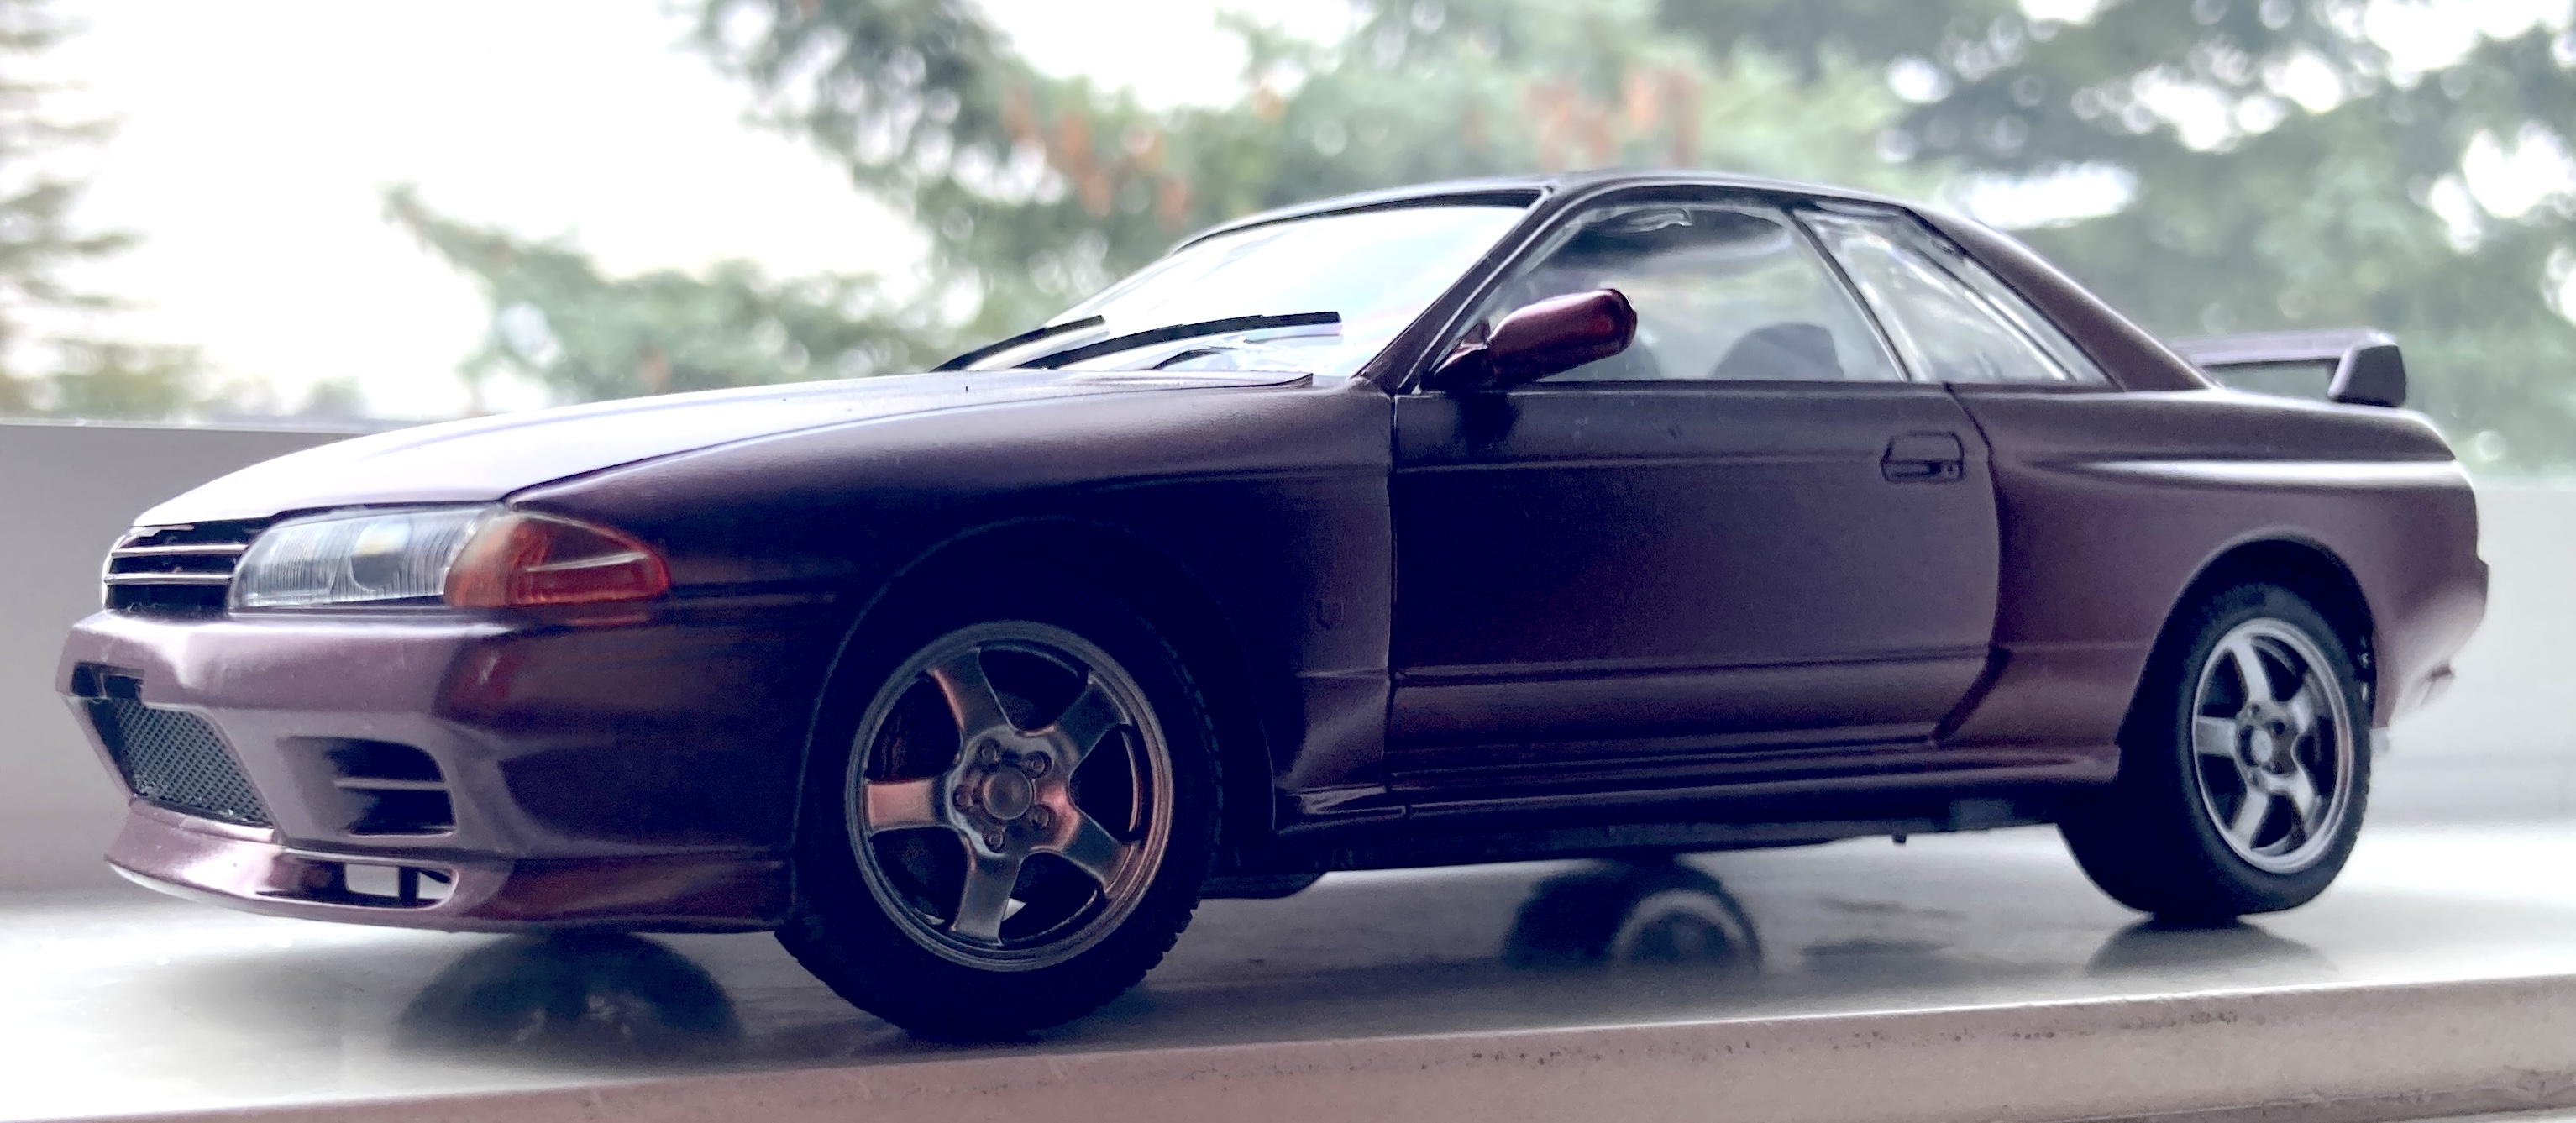
I did the rear tail light lenses and the front corner markers in their respective Sharpie colour. Yes, not as nice as a Tamiya Clear Red/Clear Orange, but I also wanted to be done at this point.
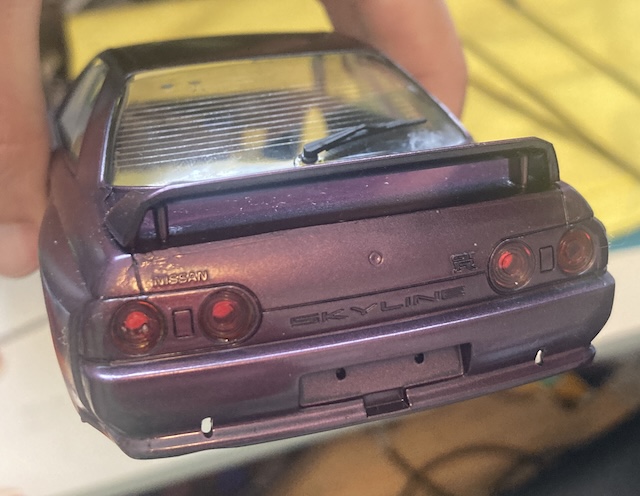
Using Sharpies does leave a sort of “brushstrokes,” but the ink dries fast enough that you can cover up the missing parts fairly easily. I think the tail lights came out great. I really love coloured clear parts.
The orange corner markers stayed sticky for a few days, so I’m not sure what was going on there, but they did glue in nicely as well. Oddly, the orange corners have little aerodynamic winglets moulded into the bottom edge, which I don’t remember seeing on any of the R32s I’d ever worked on. Maybe this was just a first-year thing, as Google images seems to return both kinds of corner lights.
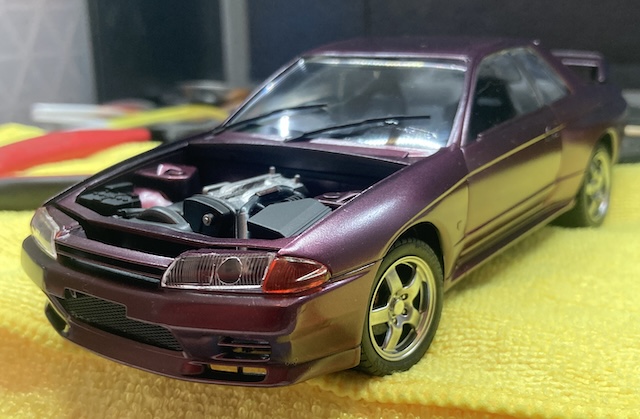
The headlight lenses popped in well once I figured out how to glue them up. The passenger side headlight looks more crooked than it actually is in this picture; it settled and got a bit better as the glue dried. Even with my bad job of cutting nibs, the precision on all these clear parts really made me wonder what went wrong with the windshield.
Conclusion
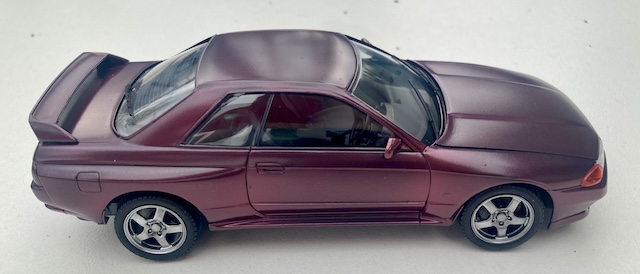
A lot went wrong with this kit, and I’m not sure what lessons to take away from it. Maybe in time and with distance from the project, I’ll be able to look at it more objectively. For now, I’m just going to go with the old standby of “the next one will be better.”
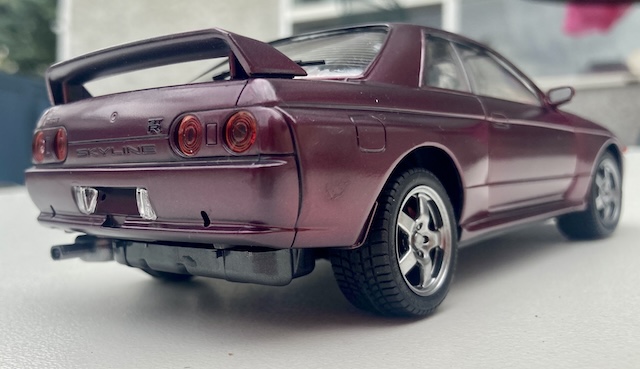
I did learn a lot about gluing up work, and I think the body paint looks very nice outside of a few inconsistent spots. Mould line elimination went really well, barring the nasty trunk spots up close. The interior looks basic but super nice. And this is certainly my most complex model so far.
Even with all of my complaining, I’m proud enough of it to have bought a display case!
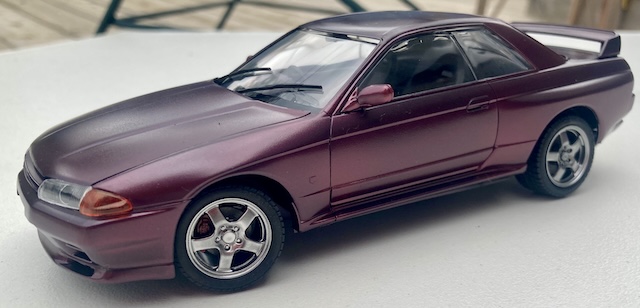
I’m disappointed mostly in how crooked the glass went in, and how wonky the wheels went on as well. I couldn’t escape the thinking that I had simply put the glass in entirely wrong, as the rest of this kit seems really precisely moulded. I also could have done without wrecking my airbrush nozzle in the process, but some parts are showing up soon for that.
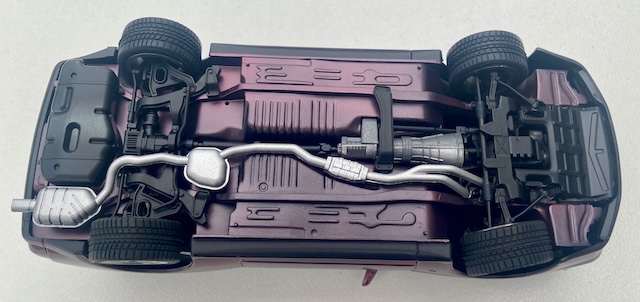
I’m looking forward to trying another Tamiya kit in the near future, but for now I may take a break and go back to my janky Ariis.
Thank you for reading!