Rising Trigger Revival
Tags: mini4wd daxing rising-trigger repair
Getting some of the late-90s Mini 4WD bodies, such as the Rising-Trigger in the Aero Mini 4WD series, can be really expensive. Luckily, a lot of those bodies have been reproduced by Daxing, and you can buy their kits from AliExpress. The only problem is that those kits show up smooshed once in awhile.
There is at least one other clone brand, Auldey, but their cars are substantially more expensive on AliExpress. I’m glad that someone is reproducing the old shells, even if it is in this sort of pirate format.
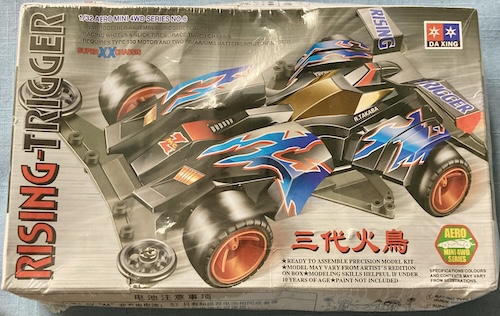
I ordered this kit for about ten bucks Canadian. As you can see from the box, it arrived pretty squashed. They threw the box into one of those e-packet poly bag mailers, and I guess it didn’t have a great trip over.
The build quality is close to a real Tamiya kit, although the moulds are noticeably less precise, snaps are less crisp, and the poorly-printed box is inconsistent with itself. For example, the box claims that it doesn’t come with a motor, but a motor was included with my kit.
I’m told that the motors that come with these clone kits are extremely fast, and I’ll probably course-out the stock car with some degree of violence if I decide to use them. It might even break the chassis! That would be an absolute tragedy, and I would be sad forever if it happened to me.
Oh wait.
Crushed
Having a pristine knockoff box on hand didn’t really interest me outside of novelty value, so I didn’t mind the damage to the box. Your mileage may vary; if you’re going to China to get a pristine box, please go pick some more of these up for me.
What I did mind was that the motor bracket on the chassis was broken.
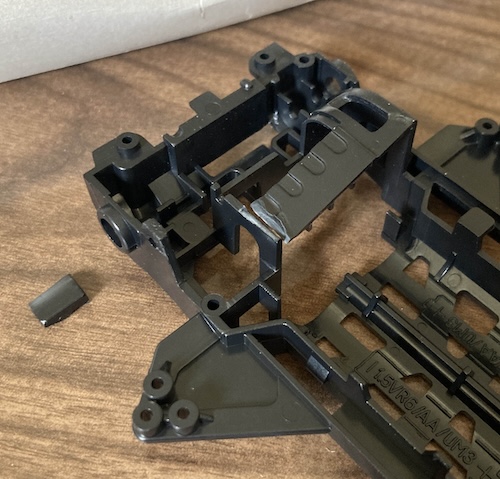
Mini 4WD cars are all body-on-frame; they consist of a body cowl clipped into a chassis. The chassis holds the motor, batteries, axles, bearings, driveshafts, gearing, and any rollers or dampers that will make contact with the walls of the track.
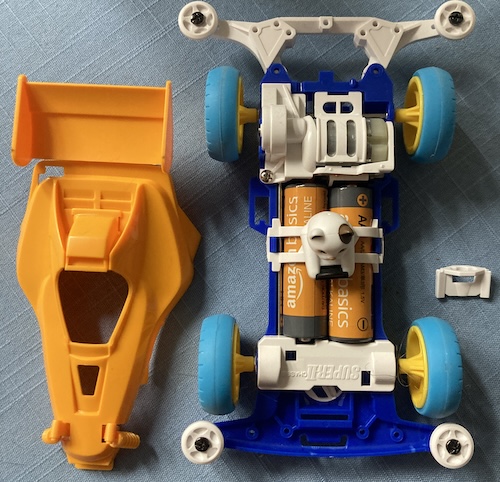
Ultimately the chassis is the car, and the body is sort of there for looks and aerodynamics. During competition, it’s not uncommon for a car flying off the track to damage the chassis, or for heavily-raced chassis to wear out bearing holes, shaft guides, etc. Racing is really about spending money and fixing all the parts you broke, just like a real car.
AliExpress was perfectly happy to let me return the entire kit for free, postage paid, but that’s a waste of resources considering the rest of the kit looked fine. I was hoping they would give me a couple bucks back and tell me to keep it, but no such luck.
Since this is a Super XX chassis, I could just buy another one from Japan, but doing so is silly, especially since I’m not about to race a knockoff retro body that I can’t easily find a replacement for. This Rising-Trigger is probably going to be for display and home track use only.
Let’s just repair it.
The repair begins
I straightened all the plastics to the point where they were in the right vague shape, although the top part was still a little bit bent. Initially, if I tried to force the broken piece back into place, the rest of the chassis still had enough strength that it would spring down and fire it across the room.
I had assumed, going into this, that virtually all Mini 4WD chassis are made out of ABS plastic. In the case of the real Tamiya chassis, you’ll see a mark that actually tells you what the chassis is made out of:
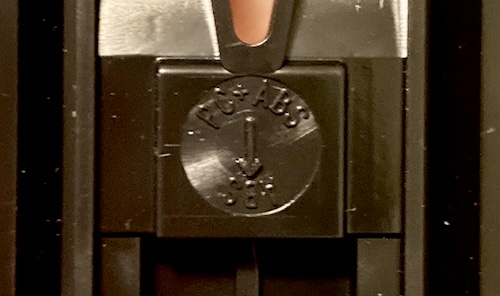
This Daxing chassis had no such indication. To test, I rubbed a little bit of the broken piece with Tamiya ABS cement, and didn’t see anything melt or flow. That cement annoyingly just stuck to the surface. Admittedly, I’m a rookie at using this cement, so it’s possible I didn’t wait long enough (or use the right amount of cement) to see it actually start working.
I wiped it off and put on some quick set Tamiya cement instead, which held the formerly broken-off piece in place on the bottom. Then I put a couple tacks of gel super glue on to hold the top bar in place while I finished stitching the gaps with more cement:
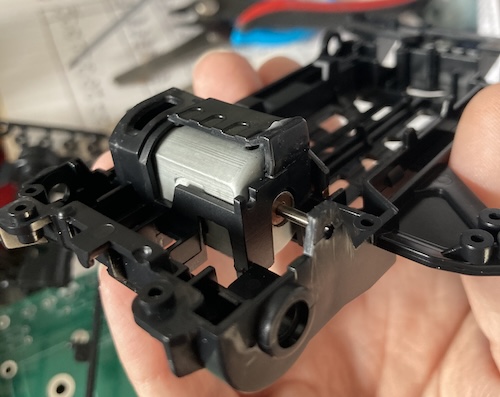
Now that I knew the motor could be held in the motor mount, I figured it was in good enough shape to start reinforcing my repair. I grabbed a junk soldering iron tip from my electronics pile, turned the temperature way down on my Hakko iron, and made a few “stitch” passes on each side of each repair.
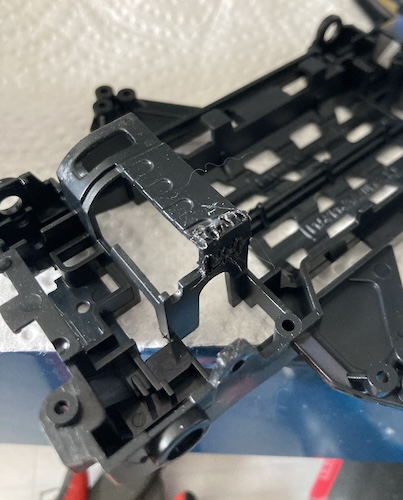
Although this repair is not the prettiest (and it smells really bad to burn cured superglue,) it feels pretty sturdy.
On to the build!
