<?xml version="1.0" encoding="utf-8"?><feed xmlns="http://www.w3.org/2005/Atom" ><generator uri="https://jekyllrb.com/" version="3.10.0">Jekyll</generator><link href="https://plasmadash.com/feed.xml" rel="self" type="application/atom+xml" /><link href="https://plasmadash.com/" rel="alternate" type="text/html" /><updated>2026-10-12T15:02:09+00:00</updated><id>https://plasmadash.com/feed.xml</id><title type="html">Plasma Dash</title><subtitle>Remote-controlled, scale model, and Mini 4WD project cars of all stripes.</subtitle><entry><title type="html">1992 Silverado by AMT</title><link href="https://plasmadash.com/2026/09/17/amt-silverado-build-paint.html" rel="alternate" type="text/html" title="1992 Silverado by AMT" /><published>2026-09-17T00:00:00+00:00</published><updated>2026-09-17T00:00:00+00:00</updated><id>https://plasmadash.com/2026/09/17/amt-silverado-build-paint</id><content type="html" xml:base="https://plasmadash.com/2026/09/17/amt-silverado-build-paint.html"><![CDATA[<p>Sometimes it’s fun to build a kit with lower detail. This regular-cab Silverado pickup truck model has no engine, almost no parts, and very limited underbody detail. I figured it would give me an opportunity to have a quick and relaxing long-weekend build.</p>
<p>As I just said, the goal of this project was to get something done quickly and have fun, but also to try a few new techniques. This “Easy Build” kit has so few parts (43 in the box, with 8 parts left unused because of optional wheels and mirrors) that I figured it would come together in a flash.</p>
<h2 id="colour-choices">Colour choices</h2>
<p>There’s a lot of colours available for the GMT400-series trucks, but I chose Morrie Green Mr. Color GX (GX6.)</p>

<p>This is a little “fuller” green than the GM 43U Emerald Green, but I thought it was pretty close. To confirm, I found a real green GMT400 on the street and stared at it for awhile. Although I don’t have the best colour sense, I decided to upgrade that position to “very” close.</p>

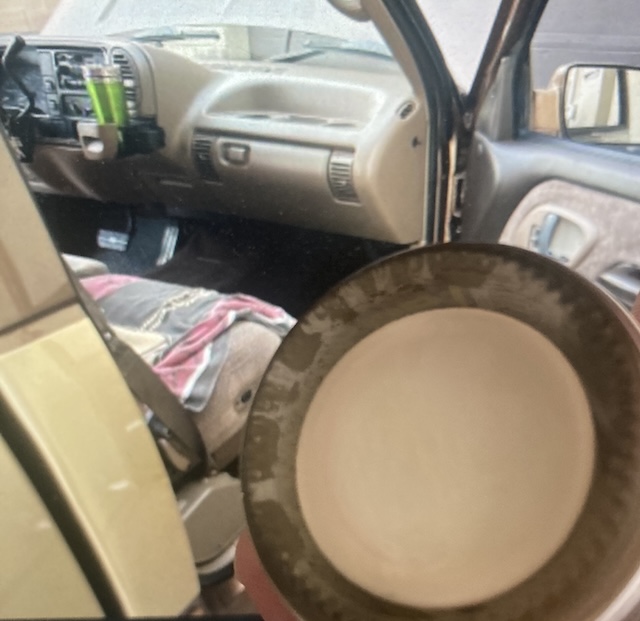
<p><img src="/assets/gmt400-amt/interior-paint-match-c44.jpg" alt="I am holding the bottom of a jar of tan liquid up to a picture on my computer screen showing the interior of a somewhat high mileage, much later model, GMT400." /></p>

<p>For the interior, all of the Emerald Green trucks I’ve ever seen came with tan cloth seats. I rummaged through my paint bin, and found that Mr. Color C44 (“Ship Line Tan?”) looked extremely close.</p>

<h2 id="painting-begins">Painting begins</h2>
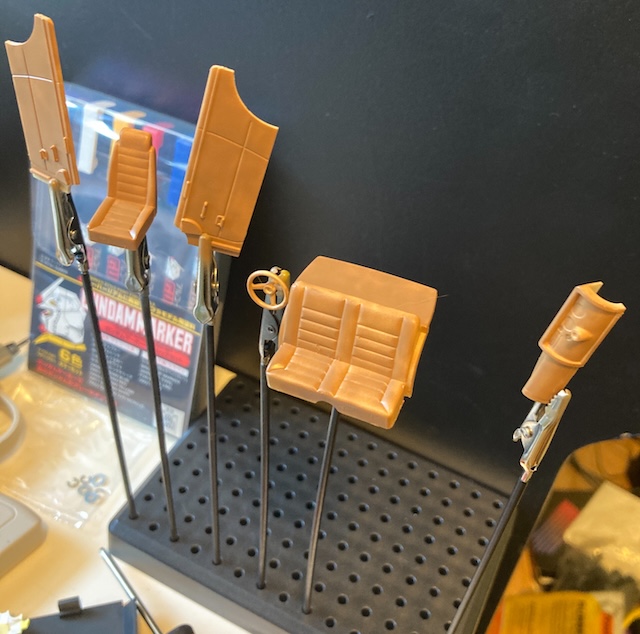
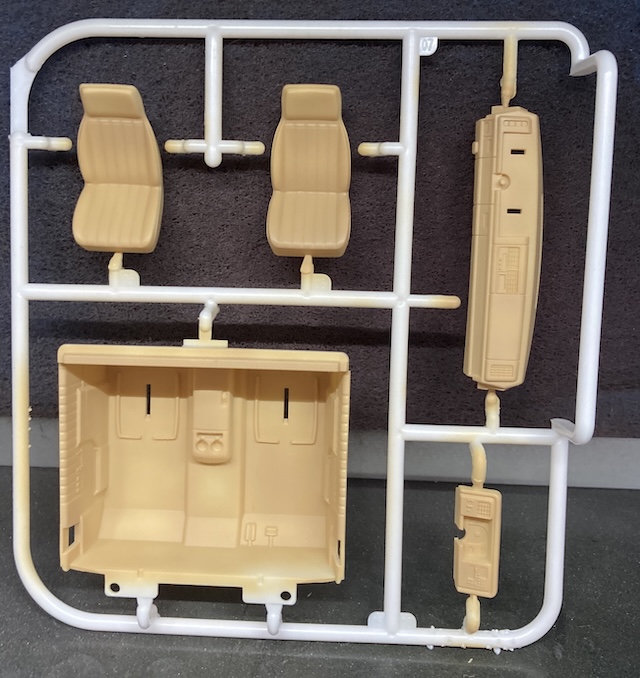
<p><img src="/assets/gmt400-amt/interior-painted-on-tree.jpg" alt="The interior parts are painted while still on the tree." /></p>

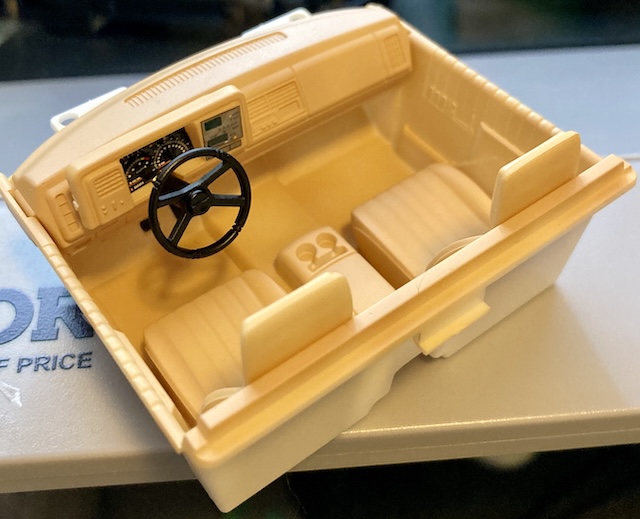
<p>Trying something new, I sprayed the interior parts while they were still on the tree. Previously, I’d avoided this because I worried about the unpainted “sprue part” sticking out like a sore thumb, but in the case of the interior parts, it is hard to tell. I think it came out alright, but I probably won’t do this again.</p>

<p>As usual, I had some trouble getting the gauge decals to lay out flat. The inside of the gauge binnacle seems to be moulded for a different set of gauges, which is weird and unhelpful. I don’t know why they wouldn’t just make this flat. I also put down the other set of binnacle decals, but they were crooked and I couldn’t easily move them without tearing. So they stayed there, and got slightly more crooked as they dried. A fresh Olfa blade made it really easy to cut them out, but I remain a rookie at waterslides.</p>

<p><img src="/assets/gmt400-amt/interior-ugliness.jpg" alt="The interior tub is put together. You can tell an obvious white sprue mark on the left side, and all the stickers are crooked." /></p>

<p>Doing the underbody is a bit of a challenge. Although this kit is a curbside, they’ve made provisions for the hood to be removable and for you to put an actual engine inside.</p>

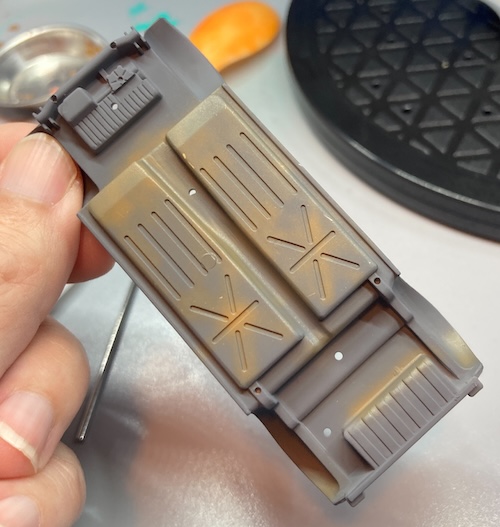
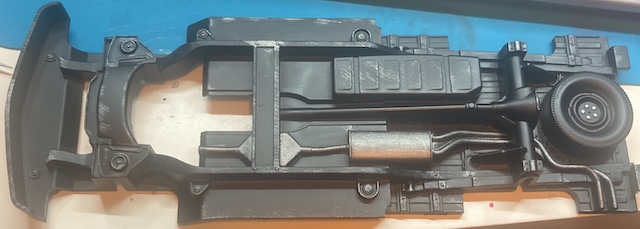
<p>Since I’m not doing that, I ended up gluing the hood onto the cab, and using a little plastic insert that contains the headers and oil pan from the imaginary engine. It’s all one piece, so I got to practice a lot of hand painting – more on that in a bit. Thankfully, this is all on the underside…</p>

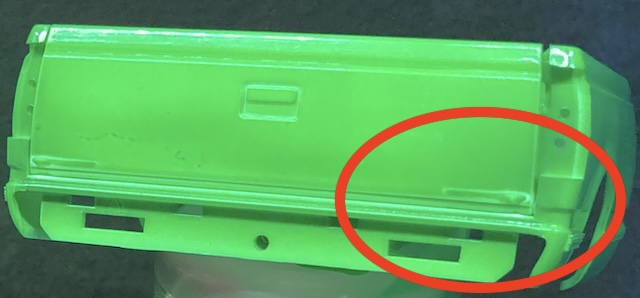
<p><img src="/assets/gmt400-amt/ruined-tailgate.jpg" alt="The bottom of the tailgate is ruined from having the wet paint damaged." /></p>

<p>I also did something stupid at this point, and installed the tailgate. I mostly wanted to see how it was for fitment, but it doesn’t latch well. Even knowing that, I proceeded to paint the whole bed in one shot without holding the tailgate stll. It popped open near the end, and wrecked a whole bunch of fresh paint.</p>

<h2 id="painting-continues">Painting continues</h2>
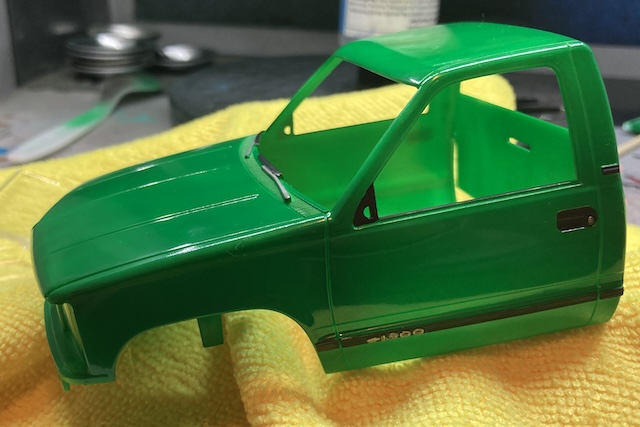
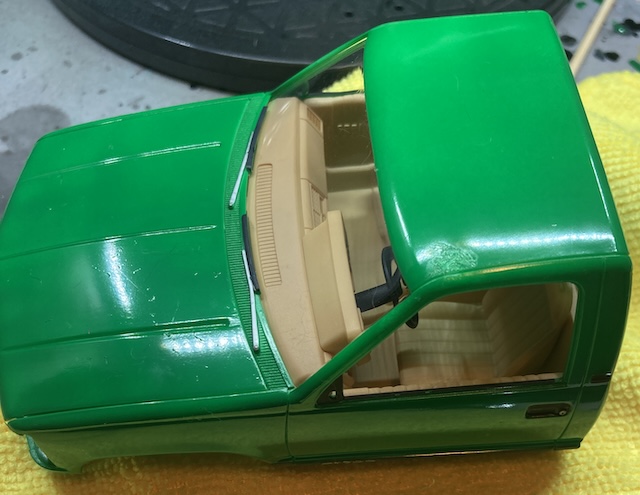
<p>The GX6 is very transparent, so it was easy to make tiger stripes and uneven colours with my tiny airbrush needle. That’s exactly what happened, especially on the hood. I was able to mitigate the worst of it by painting across the whole body in one shot instead of panel-to-panel. Hey, it’s a General Motors product. I’m sure they weren’t much better from the factory. I also had a lot of trouble jigging the body, as it’s just the wrong size for all of my stands, and tape kept letting go in the middle of a spray job.</p>

<p><img src="/assets/gmt400-amt/cab-detail-painted.jpg" alt="The sash trim, wiper arms, pillar badge, mirror triangle, and window felt are all blacked out." /></p>

<p>My manual dexterity with markers is improving quite a bit. Even the tricky recessed door handles were able to be done with the AK brush pens. The GX laid out just smooth enough to make pen work easy, but without letting the ink run.</p>

<p>I added a “Flat Black” AK pen to my existing rubber black collection during a trip to <a href="https://www.mapleairbrushsupplies.com/">Maple Airbrush</a>, and used it for the badges and door handles. I skipped the decal and tried to just use a silver Sharpie for the model number on the sash trim, which doesn’t look great up close but looks fine from a distance.</p>

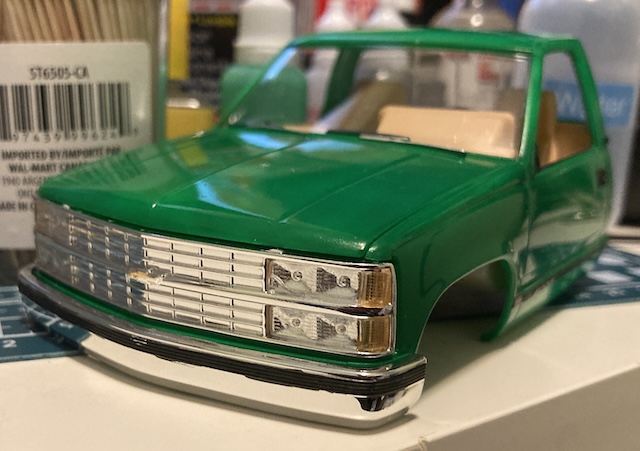
<p><img src="/assets/gmt400-amt/headlights-in.jpg" alt="The headlights and grille are in, but the black line on the front of the bumper is somewhat patchy and uneven." /></p>

<p>I should have spent a little more time filing down the sprues on the grille. I thought they would go the other way around, but they are very obvious. Maybe I installed it upside down.</p>

<p>Like with the clear window parts on the Skyline, the AK pens do not seem to work very well on chrome pieces. The bumpers didn’t come out as nicely as I wanted, and I think I would have preferred my original plan of sticking them all in bleach and then painting them body colour or flat black instead. Maybe for the next AMT kit.</p>

<p><img src="/assets/gmt400-amt/roof-damage.jpg" alt="There is a fingerprint of damage right above the driver's door." /></p>

<p>While putting the interior into the cab, disaster struck again. I got super glue on my finger, and then without thinking touched a painted part of the roof. That’s the same thing that caused horror on the Skyline, and I had done it once again. However, the spot wasn’t <em>too</em> bad, and I decided to push through it.</p>

<h2 id="hand-painting-time">Hand-painting time</h2>
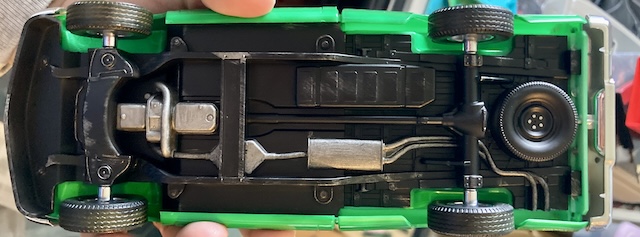
<p>It was time to paint the exhaust and other fine parts on the underbody. I decided to brush paint with Tamiya acrylics, which has always made me a little nervous. This time, I had picked up some of the AK 3rd Gen thinner from Maple, which gave me some confidence to experiment. That thinner worked really well! I had no problems with brushstrokes or lifting the existing Tamiya acrylic paint off of the underbody as I painted the muffler/midpipe, header and axleback exhaust.</p>

<p><img src="/assets/gmt400-amt/hand-painting-actually-worked.jpg" alt="The underbody has a painted muffler, and some dry brushing for accents. It looks like Dean has hit some rocks with this thing." /></p>

<p>For a little victory lap, I also did some dry brushing. I was shocked at how easy it was to add the illusion of depth and complexity to the underbody with such an easy and fun technique. I’m definitely doing this again.</p>

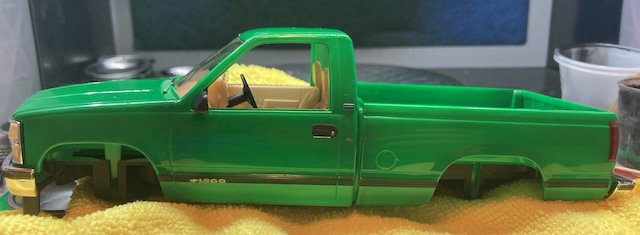
<p><img src="/assets/gmt400-amt/body-test-fit.jpg" alt="The body is together. Note how the bed is NOT crooked before it goes into the chassis." /></p>

<p>Once I had repainted the bed and tailgate separately, I put them together. The tailgate kept falling down, so I ended up gluing it into position. If I had done this in the first place, I would have been able to save a lot of paint!</p>

<h2 id="weathering">Weathering</h2>
<p>I hit the tires with some Tamiya yellow-brown filter liquid to give the impression of dirt. I think this worked well, but it’s hard to tell it’s supposed to be dirty from a distance.</p>

<p>On camera, it provides contrast that helps make it easier to see the treads. I liked the effect, so I’ll do it again in the future. The colour is a little too yellow for my taste, which makes it look like junkyard mud instead of forest mud, so I am going to try and find the Mr. Color brown filter liquid.</p>

<p>The chrome wheels mostly rejected the black panel liner, which is not surprising.</p>

<h2 id="conclusion">Conclusion</h2>
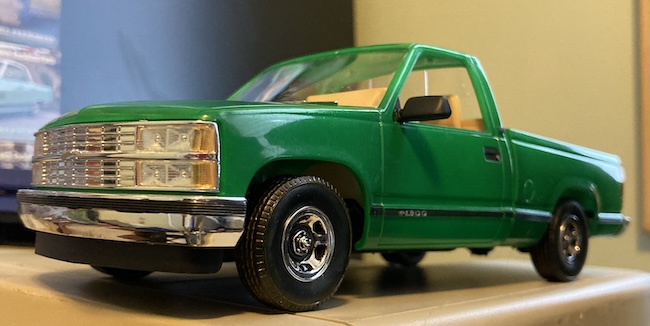
<p>This thing came out really nicely, although the colour is hard to see properly with my indoor lighting. It has been raining all week so there’s been no chance to do the usual outdoor photo!</p>

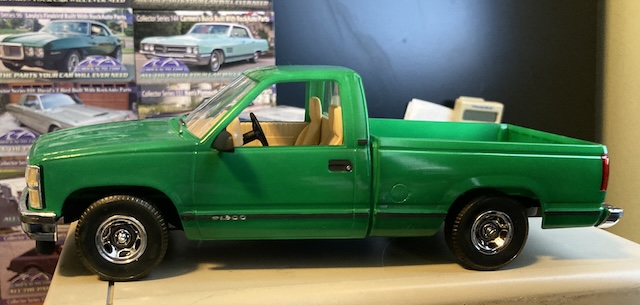
<p><img src="/assets/gmt400-amt/put-together-front-quarter.jpg" alt="The truck is sitting on top of a Macintosh SE." /></p>

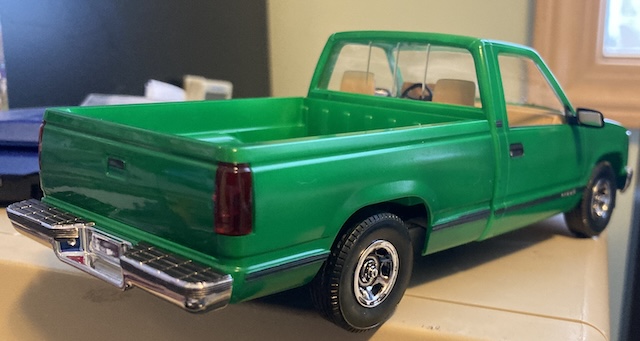
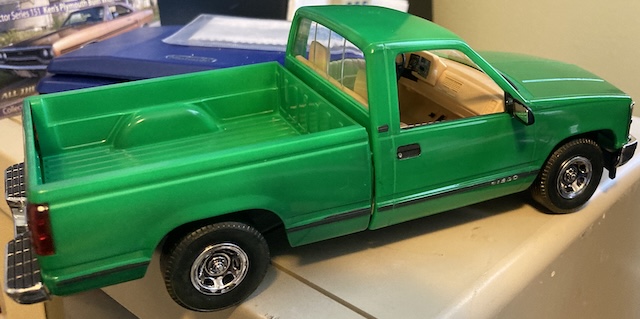
<p>Barring the obvious mistakes I made, I think the truck came out pretty well. This was meant to be a quick long-weekend build, and I accomplished that goal. I’m happy that I got a relatively even paint job from a very transparent paint.</p>

<p>I think I did not quite hit the exact paint colour I was going for. Acadia Green is at least one shade darker than this: maybe a few drops of black would have made it closer. A lot of the GX colour range seems to be designed for eye-popping anime colours, which is generally what I want anyways. Still, it looks fairly realistic. I’d drive a truck in this colour, especially with this little rust.</p>

<p>Technique-wise, the most obvious flaws in this thing (besides the thumbprint on the roof) are the sprue gates. I didn’t do a very good job cleaning them up before painting, and it’s most obvious on the chrome pieces and dash binnacle. Usually, I spend at least a day in the shop just cleaning up pieces, but that’s not as much fun as painting.</p>

<p>Maybe the biggest lesson was that I should trust myself more on the kit. I knew going in that old AMT kits have kind of wonky fitment and I’d have to tactically ignore the instructions. Every time I second-guessed a modification I was going to make, I ended up regretting it. For instance, the floppy tailgate that I just glued in at the end.</p>

<p><img src="/assets/gmt400-amt/crooked-bed-side.jpg" alt="The bed does not align well with the cab." /></p>

<p>The biggest flaw in the kit is the saggy bed: when I was first test fitting the body, I thought this might happen, but I couldn’t figure out a good way to glue the cab and bed together, and I was worried about if both of them would fit into the chassis afterward. It seems like the cab rides too high on its end, and the bed latches into the chassis, so it may be as simple as removing the cab and shortening the mounting pins so it can ride lower. Good thing I didn’t glue them in!</p>

<p>In retrospect, I could have probably spent more time on that, maybe even using a clamp and shim through the back window so I could glue the cab and bed together, which would have saved a lot of time painting the bed and cab individually. But, I’d never painted a truck before, so that’s a lesson for next time.</p>

<p><img src="/assets/gmt400-amt/tailgate.jpg" alt="The passenger side and now-glued-shut tailgate." /></p>

<p>I also thought it would have been a good idea to strip all the chrome and do either body colour or blacked out parts. It would probably have made the wheels look better, for sure. Getting things done quickly won out over doing it right in this case, but I should trust my instincts on this more in the future.</p>

<p><img src="/assets/gmt400-amt/passenger-side-interior.jpg" alt="The passenger side and interior. You can see I painted the pedals." /></p>

<p>While we’re on the subject of things I wish I had been able to do, bedliner would have been a good one. I’ve seen people do it with Surfacer 500, but I haven’t been able to find that stuff at any store. I think it would have added very nice contrast to the bed, and I certainly wouldn’t throw junkyard parts into the back of a nicely painted truck.</p>

<p>By far the best part of this was getting the sash trim and the hand-painting on the underbody to look nice. Brush painting Tamiya acrylics is not super trivial! It’s a shame that it’s hard to see the underbody, especially in a display case. I’m way less afraid of hand-brushing (coarse) detail now.</p>

<p><img src="/assets/gmt400-amt/drybrush-engine-installed.jpg" alt="The fake engine is installed into the drybrushed frame." /></p>

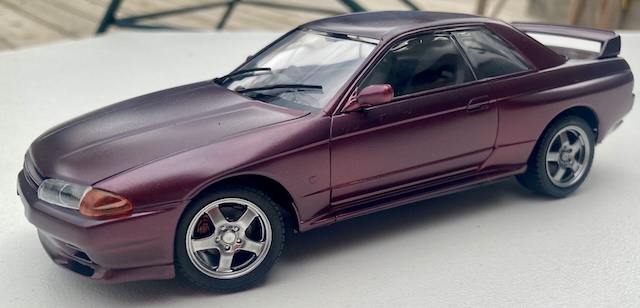
<p>Thanks for reading!</p>]]></content><author><name></name></author><category term="mokei" /><category term="amt" /><category term="gm" /><category term="car" /><summary type="html"><![CDATA[Sometimes it’s fun to build a kit with lower detail. This regular-cab Silverado pickup truck model has no engine, almost no parts, and very limited underbody detail. I figured it would give me an opportunity to have a quick and relaxing long-weekend build.]]></summary><media:thumbnail xmlns:media="http://search.yahoo.com/mrss/" url="https://plasmadash.com/assets/gmt400-amt/tailgate.jpg" /><media:content medium="image" url="https://plasmadash.com/assets/gmt400-amt/tailgate.jpg" xmlns:media="http://search.yahoo.com/mrss/" /></entry><entry><title type="html">Who does a Skyline live for?</title><link href="https://plasmadash.com/2026/08/27/tamiya-skyline-r32-build-paint.html" rel="alternate" type="text/html" title="Who does a Skyline live for?" /><published>2026-08-27T00:00:00+00:00</published><updated>2026-08-27T00:00:00+00:00</updated><id>https://plasmadash.com/2026/08/27/tamiya-skyline-r32-build-paint</id><content type="html" xml:base="https://plasmadash.com/2026/08/27/tamiya-skyline-r32-build-paint.html"><![CDATA[<p>Let’s get around to actually making a Tamiya kit. A perfect candidate is this R32 Nissan Skyline that I found at a local hobby shop! Through only a little bit of struggle – mostly my fault – I still managed to turn this late-80s supercar into a pretty nice model.</p>

<h2 id="body-prep">Body prep</h2>
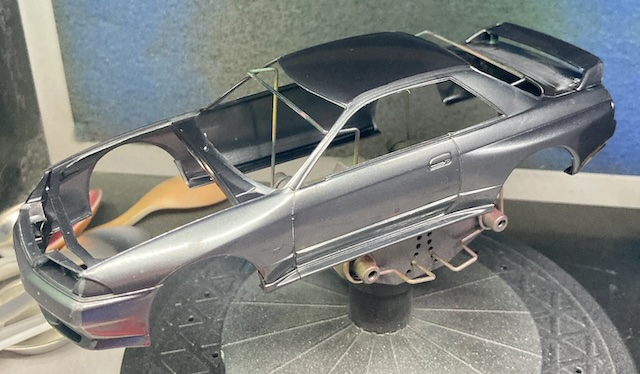
<p>I started out trimming part lines from the body, they’re not bad, but they are in annoying contoured places (like the inside of headlight buckets) and they needed some sanding to clean up after that.</p>

<p>Because the spoiler felt fiddly, I glued it on rather than worry about ruining the paint job on the trunk lid later. It was surprisingly tough to glue it on as the hole in the lid didn’t seem fully formed, and the pegs seemed quite small. Bad first impression for a Tamiya!</p>

<p><img src="/assets/tamiya-skyline/skyline-with-spoiler-prep.jpg" alt="The Skyline's spoiler is attached, and there's lots of sanding dust in every seam." /></p>

<p>Gluing it onto the body this early was a mistake, as the trunk turned out to have more flaws than I initially saw, making it harder to correct them. Some glue also seeped out, but it did make the unpainted body look cool.</p>

<p>While unboxing the rest of the car, I was surprised to find out the hood is clear! That’s a cool idea. It also seems to attract cat hair and dust more readily than the “usual” kind of plastic.</p>

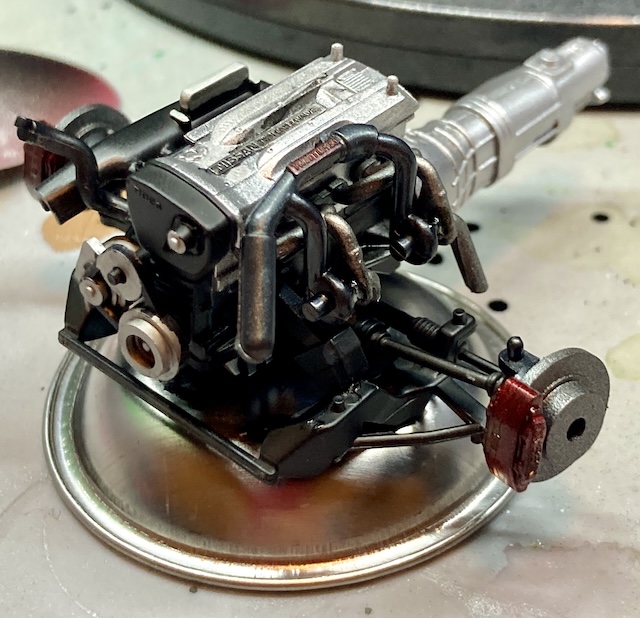
<p>I glued the engine/transmission together, to make them easier to handle, and blasted the whole assembly with chrome silver. I knew that the lower half had to be painted black, but either way I would have to mask some of the transmission bellhousing section, and it seemed easier to do it while the entire thing was glued together.</p>

<p>Lots of gunk ended up in the places where I scribed the body. I tried to clean them out with various things including folded sandpaper and was only sorta successful. I ended up washing the body several more times and also giving it a light scuff in places that looked worked.</p>

<h2 id="engine-and-transmission-painting">Engine and transmission painting</h2>
<p>Tamiya seems to like starting you off with building the engine of the car, so you can appreciate the mechanicals off the bat. In the case of the early R32 Skyline GT-R, this engine is an inline-six RB26DETT (that’s two turbos) and it’s bolted onto an all-wheel-drive longitudinal transaxle.</p>

<p>As I read over the instructions, I noticed that pretty much every step asked you to paint <em>something</em> with X-18 semi-gloss black. My local hobby stores just so happen to continually be out of it, so I ended up ordering a bunch of paint from a dealer in Ontario.</p>

<p>Initially, I tried brush painting the lower part of the engine block, but I think I over-thinned and ended up with runny paint that crept under the masking tape. To fix the valve cover, I tried re-brushing it with much less thinner. I am finding that brushing Tamiya paint needs to be “one and done,” because going back over it before it has dried makes obvious brush strokes. Brush painting is hard!</p>

<p>After that, I set up many huge batches of semi-gloss black parts. I need more little clippy things to hold up small parts.</p>

<p>The only problem I had assembling the engine is that there is a “don’t cement these” step when you are putting the radiator hose and transaxle together. I misunderstood the instruction, and thought it applied to <em>everything</em> in that step.</p>

<p>It turns out there’s actually a faint little “don’t cement this in particular” icon next to the radiator hose only. That’s so you can pivot the radiator hose into the radiator on a later step and glue it.</p>

<p>This was found out only once I had loosely (and frustratingly) stacked everything together in the subframe. As a result, my oil pan/transaxle is very loose, but it seems to be holding in there alright.</p>

<p><img src="/assets/tamiya-skyline/engine-assembled.jpg" alt="The engine assembled (minus the cooling fan.)" /></p>

<p>Dang, that looks super good. I used Gundam markers to make the calipers red, in violation of Tamiya Law.</p>

<p>Even more semi-gloss black painting followed after that. You can make your own joke about 90s Nissan here.</p>

<p>For some reason, the next step after building the engine is to paint the entire unibody so that the radiator has somewhere to be installed into. Okay, Tamiya – I’ll take the fun part in the middle, sure.</p>

<h2 id="body-prime">Body prime</h2>
<p>Having learned from many misses and near-misses in previous blog entries, I test fit all the body parts before I painted anything. In retrospect, I should have test fit even more parts, but we’ll get to that.</p>

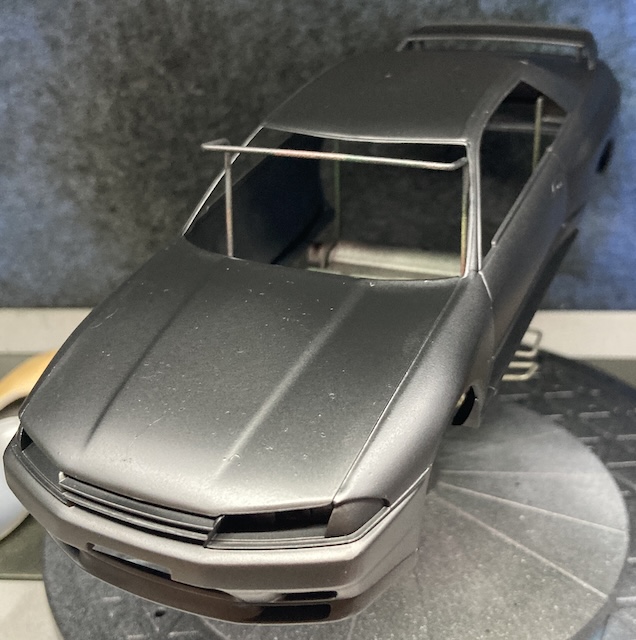
<p>The hood, perhaps because it is a clear part, or simply just to hold it in place on the body, needed a lot of force to wedge into the body. I felt like it needed so much pressure that it would damage something later when I had everything painted. To fix this, I sanded down the edge of the hood until it fit a little bit less tightly.</p>

<p>As always, to get rid of my copious amounts of fingerprints and sanding dust, I gave the thing another bath in the sink before priming out the body. Counting the drops of primer would give me a good clue about how much body colour and clear coat I would have to mix up later to cover all of this car again, right? Right…</p>

<p>I’m never really sure how to paint hoods. On <a href="/2026/07/16/amt-scout-ii-build.html">the AMT Scout II</a>, as with this one, I gently taped the outside of the hood to the body in order to paint the inside all in one paintjob. Then I moved the tape to the inside, and painted the outside all in one paintjob.</p>

<p>This was not a great idea, as I ended up putting an ungloved thumbprint in the edge of the hood while manipulating it. Having a glove on my right hand screws up my airbrush trigger feel; unfortunately, I am right handed and keep trying to do things with my greasy thumbs. Maybe I should learn to paint with my left hand.</p>

<p>There’s also a significant amount of “Skyline parts” covered up by the hood that need to still be painted, such as the entire windshield wiper area. I should have painted the hood separately taped to a bamboo stick or something. The hood got pulled shortly after this to be sanded down and repainted separately from the car later, taped to a skewer after priming.</p>

<p><img src="/assets/tamiya-skyline/fingerprint-hood.jpg" alt="An obvious fingerprint mark is present on the surfaced hood." /></p>

<p>Priming went worse from there: although I tried mixing it in a mixing bottle for the first time, my initial estimate of “probably 200 drops” turned out to be inaccurate. The airbrush then clogged when I was trying to mix some additional surfacer in the (overfull) bowl, so I had to dump out the bowl. That then caused me to have to mix another 100-ish drops in the mixing bottle but then losing count of the thinner, producing overly-thin surfacer.</p>

<p>As a result, I had absolutely no idea how much body colour and clear coat I’d need for the next couple of stages, and I found out that my kitchen scale is too inaccurate to measure by weight.</p>

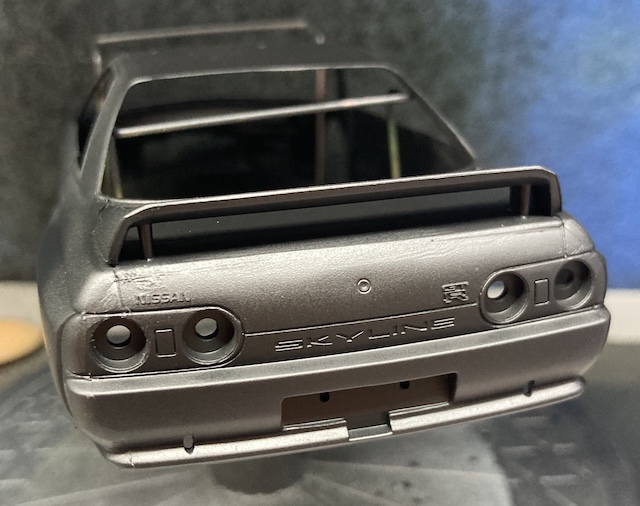
<p><img src="/assets/tamiya-skyline/rear-flaws-surfacer.jpg" alt="There are several obvious flaws around the tail lights and trunk lid." /></p>

<p>In a similar vein, I wish I had held off on gluing the spoiler on the car. It made it difficult to clean up the mould line on the trunk lid, which immediately popped up when I put the surfacer on it. I was worried about accidentally obliterating the adjacent “NISSAN” detail when sanding it down.</p>

<p>Also, the body kept falling off the stand. I decided to come up with something to hold the body so that I can tape it onto the next one. My old standby, a 500mL Coke bottle, was too tall for the fume hood.</p>

<p>After re-priming the hood, I was ready to mix up some paints and get to work.</p>

<h2 id="body-paint">Body paint</h2>
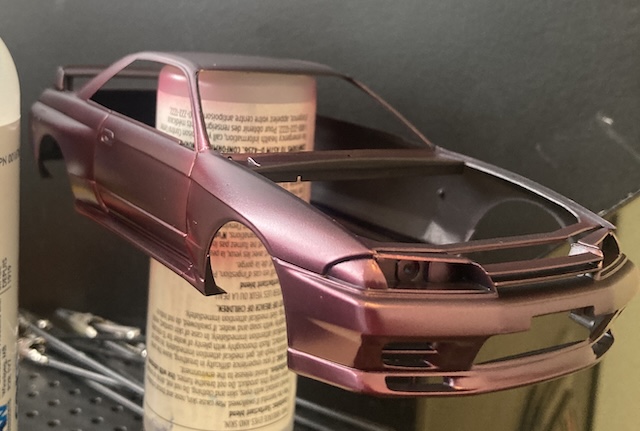
<p>My chosen body colour is Mr. Color Gundam UG-24 “Trans Am Red Pearl.” It looks very good on spoons, so I figured it would look good on a Skyline too. And the pearl is nice at covering up all kinds of body flaws, like the trunk lid!</p>

<p>To make sure I didn’t run out of paint halfway through and have to mix again, I did 8mL:12mL (as shown by my eyedropper) mix in a 20mL AliExpress squeeze bottle. My measurement might have been off a bit, as the 20mL bottle had a lot of headroom after adding what I thought was 20mL of thinned paint.. but I continued on.</p>

<p>Because of the black surfacer, the end result was a nice black cherry colour. I had figured out from previous experiments with Mini 4WD bodies and fades that the red UG pearl is not especially opaque, so I made sure to take this into account. I think this makes it look more like it’s been resprayed in the R33 era as a show car.</p>

<p><img src="/assets/tamiya-skyline/first-colour-coat.jpg" alt="The colour is on. It looks like a nice black cherry colour." /></p>

<p>Pearl is challenging to paint. I did keep chasing spots where I thought they had been underpainted, only to find out it was just reflections from a black object in the vicinity. There was a lot of tilting and squinting to make sure I didn’t accidentally overspray the front fenders in particular. You can see this effect in the above picture very clearly.</p>

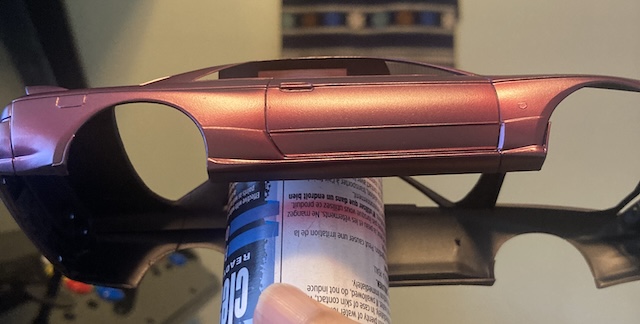
<p><img src="/assets/tamiya-skyline/first-colour-coat-hilites.jpg" alt="A highlight on the colour coat shows all the flaws, but it also looks pretty, too." /></p>

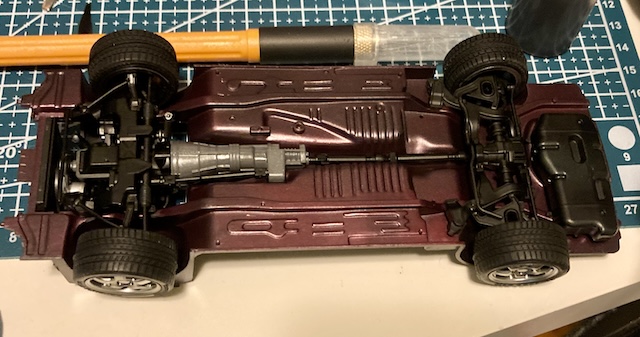
<p>For my colour shots, I decided to do 3 coats from far away and then one coat up close and slow. That seems to have produced a nice effect. On the underbody tray, I did only 2 coats, which ended up making it look pleasantly darker. Nissan wouldn’t have done a show-car finish on the underside of the unibody either.</p>

<p>For a stand, I was desperate and grabbed a mostly-empty bottle of airbrush cleaner and turned it upside down. That works! Hopefully the lid doesn’t leak, that stuff was expensive.</p>

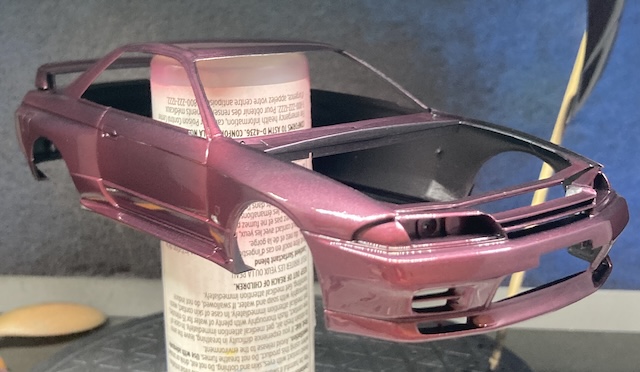
<p>I was afraid to ruin this by wet sanding, so I went right to a Mr. Color GGX “UV-cut” gloss clear coat. Based on some success I had with a spoon, my technique was to do three fast coats from a distance, and then three slow coats close up. I’m still a rank amateur at clear coat, and I was worried about wrecking the pearl layer, but I think things were mostly successful.</p>

<p><img src="/assets/tamiya-skyline/cleared.jpg" alt="The clear coat has been applied to the model, making it shinier. It hasn't dried yet, so it's really shiny." /></p>

<p>Lots of dust and hair got trapped in the clear coat. As is legally mandated, I got a hair dead centre of the hood. It also produced a fair bit of orange peel as it dried, but I still don’t have any polishing compound, so I moved on.</p>

<h2 id="underbody">Underbody</h2>
<p>Now that I’d painted the bottom half of the “unibody,” it was time to offer up the subframe. Everything glued in nicely, although I had trouble getting the front subframe to line up perfectly. The lower unibody portion had to be stretched a bit to reach all the pins, which was worrisome with the radiator already installed.</p>

<p>There’s a bit of a crooked gap at the back, but it will be hard to tell when the car is on the ground.</p>

<p>The surprisingly complex rear subframe went in easily, and I remembered I hadn’t painted the wheels or exhaust as soon as I needed those. Whoops!</p>

<p><img src="/assets/tamiya-skyline/wompy-wheels.jpg" alt="The wheels all have an exciting combination of toe and camber, none seemingly the same. The front wheels are especially toed-in." /></p>

<p>Maybe I misunderstood the instructions, but there’s quite a bit of slop around the “pin” at the top of the brake rotors and the subframe part that you glue it onto. As a result, the brake rotors/calipers went on wonky, and the rear-left one fell off repeatedly when I was trying to install its corresponding wheel. As a result, all of the wheel alignment feels at least a little off, and two of the wheels don’t turn since I got the little poly bushing stuck with super glue. Not super happy about this aspect, but I don’t think you can really tell once the body is on.</p>

<p>I think it would have been better to scrape the paint off the mating surface on both of these and then use Tamiya extra thin cement to get a really good, straight alignment into the rear subframe. I’ll probably try that for the next kit.</p>

<p>The exhaust, crossmember, and front skid plate went in just fine. In fact, the skid plate is so precise that it seems as if it could hold in place without adhesive, which is probably deliberate. Exactly what I expected from Tamiya.</p>

<h2 id="interior">Interior</h2>
<p>After producing dozens of little black pieces and a half-dozen little silver pieces, I was finally ready to paint and assemble the interior. Rather than do the two-tone black bits with an airbrush, I chose to fall back on the AK rubber black pen for things like the gauge surround, the stereo, the pedals, the heater vents, and the speaker grilles.</p>

<p><img src="/assets/tamiya-skyline/dashboard-binnacle-two-tone.jpg" alt="The gauge surround, stereo, and vents are a nice subtle black." /></p>

<p>I think they came out nicely!</p>

<p>In a similar fashion, I also skipped doing the Sea Grey accents on the inside of the seat cushions and door cards. The entire interior will just be German Grey. This makes it look a little boring and monotone, but it also saved a lot of masking. The German Grey seemed to go on very soft – I scratched it with my fingernail a few times putting parts on – so I’m glad I didn’t have to worry about tape pulling it up.</p>

<p>I was a bit surprised to see big ejector marks on the floor-mat areas of the mould. When considering this model, I did see a lot of kits for felt “Skyline carpets” that you could glue in, and I guess this is why.</p>

<p>Amazon also had some self-adhesive craft felt that could be cut up and inserted, but it’s quite expensive and I couldn’t immediately find a substitute at the dollar store. I thought about experimenting with gluing down tissue paper and then painting it, but I didn’t want to run the risk of it not working this late in the project. As with the Scout II, I decided to ignore it. Chances are I will never notice this once the dashboard is in.</p>

<p><img src="/assets/tamiya-skyline/interior-installed.jpg" alt="The interior is sitting in the chassis." /></p>

<p>I just barely managed to get away with airbrushing the interior. I had been having repeated problems with paint building up on my needle and clogging my airbrush, and found that the o-ring in the fan tip had swollen up and gotten pinched in the thread. When I tried to dismantle it to clean it out, I found that the o-ring on the nozzle was also melting.</p>

<p>This is probably because I haven’t been using proper airbrush cleaner, which presumably contains lubricants, but instead farting lacquer thinner through it at the end of each session. Clearly, I need to take better care of my equipment.</p>

<h2 id="the-windshield">The Windshield</h2>
<p>I was dreading doing the frits on the windshield, and ended up making a bit of a hash of it. The rubber-black AK pen doesn’t look very good on clear parts, and it’s probably what I’m most disappointed in on this kit after the wheels that don’t turn. I decided to skip doing the exterior window trim, as I wasn’t feeling confident and didn’t want to screw up my nice body paint job.</p>

<p>When I finally slid the windshield in, it didn’t seem to fit very well. It sort of floated around from side to side and end to end, unless I held it hard against the roof. I thought there would be more positive retention, like the body should pinch it in place, but I couldn’t figure out how to do it. I did my best to align it and glued it down with Elmer’s glue, then let it sit.</p>

<p>That really did not work, so a few hours later, I pulled it all back out (it had barely gotten sticky) and started again. Despite being warned against it, this time I tried using some super glue. It ended up fogging the window, getting stuck to the window, <em>and</em> eating away a glob of paint on the fender. And it still didn’t stick the window well.</p>

<p>UV epoxy came to the rescue, although I slipped near the end of the cure and dragged a bit up into the visible section of the windshield. Lesson learned there was to put the epoxy into a dish or cup and then apply it more finely with a toothpick or other tool, not to apply it directly to the body in a glob. But at least it was in. Ugh.</p>

<p><img src="/assets/tamiya-skyline/wacky-glass.jpg" alt="The windshield is visibly crooked in the frame, with lots of dried glue all over it. The frit also looks terrible." /></p>

<p>My next task was to glue on the rear wiper, which I did with Elmer’s glue and some time. Luckily, gravity was able to hold it in place, though you can also see evidence of the glue. I’m not sure how you’re supposed to do this. Tamiya clear cement?</p>

<p>Even after this whole disaster, I got the two parts unified and now it was time for the mirrors. I was glad that I went to the trouble of pre-mixing the body colour, as I now had to paint the little wing mirrors and stick them on. It would have been nice if I could have glued them to the body before, so that the car could be painted in one shot, but the mirrors practically hang off the glass in this kit. It seems like the windshield needs to be installed first.</p>

<p>The mirrors painted easily: I just did a few freehand coats until it “looked right” instead of the full multi-coat plus clear. I ran a Sharpie over the inner mirror glass parts instead of mixing up some fresh paint just for those, and I think it looks alright.</p>

<p><img src="/assets/tamiya-skyline/finished-passenger-side.jpg" alt="The mirrors are mounted onto the body." /></p>

<h2 id="the-last-little-bits">The Last Little Bits</h2>
<p>I did the rear tail light lenses and the front corner markers in their respective Sharpie colour. Yes, not as nice as a Tamiya Clear Red/Clear Orange, but I also wanted to be done at this point.</p>

<p><img src="/assets/tamiya-skyline/tail-lights.jpg" alt="The tail lights are installed." /></p>

<p>Using Sharpies does leave a sort of “brushstrokes,” but the ink dries fast enough that you can cover up the missing parts fairly easily. I think the tail lights came out great. I really love coloured clear parts.</p>

<p>The orange corner markers stayed sticky for a few days, so I’m not sure what was going on there, but they did glue in nicely as well. Oddly, the orange corners have little aerodynamic winglets moulded into the bottom edge, which I don’t remember seeing on any of the R32s I’d ever worked on. Maybe this was just a first-year thing, as Google images seems to return both kinds of corner lights.</p>

<p><img src="/assets/tamiya-skyline/headlights-crooked.jpg" alt="The headlights are installed, although the passenger-side headlight is popped up a little bit." /></p>

<p>The headlight lenses popped in well once I figured out how to glue them up. The passenger side headlight looks more crooked than it actually is in this picture; it settled and got a bit better as the glue dried. Even with my bad job of cutting nibs, the precision on all these clear parts really made me wonder what went wrong with the windshield.</p>

<h2 id="conclusion">Conclusion</h2>
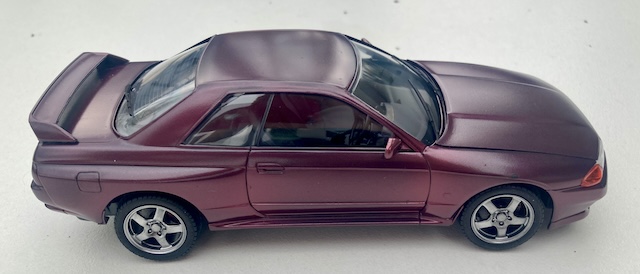
<p><img src="/assets/tamiya-skyline/driver-side-done.jpg" alt="The driver's side profile of the car. You can see the black spot on the front fender where I erased some paint, and also some of the places I sprayed the pearl with excess thinner while trying to put the clear on." /></p>

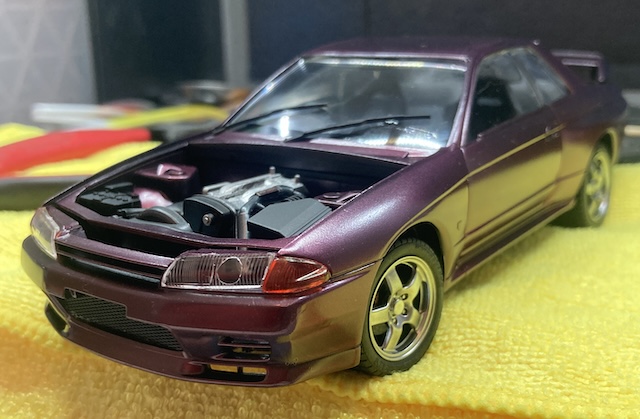
<p>A lot went wrong with this kit, and I’m not sure what lessons to take away from it. Maybe in time and with distance from the project, I’ll be able to look at it more objectively. For now, I’m just going to go with the old standby of “the next one will be better.”</p>

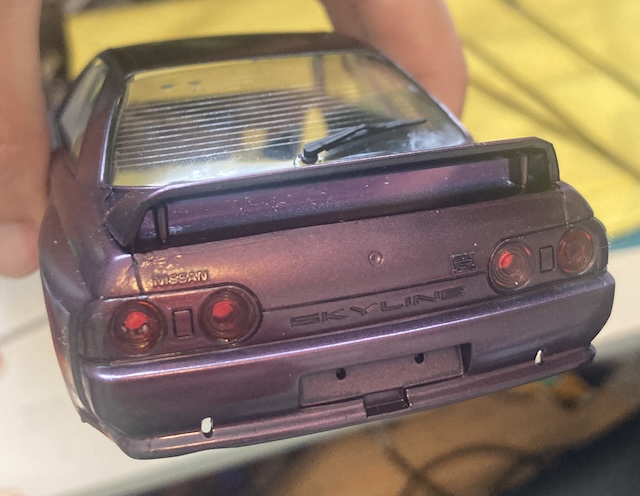
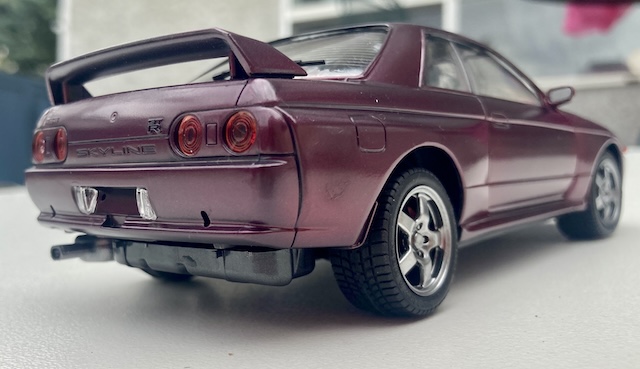
<p><img src="/assets/tamiya-skyline/rear-quarter-done.jpg" alt="The rear quarter of the car. You can see there is a run in the paint that I hadn't noticed until now." /></p>

<p>I did learn a lot about gluing up work, and I think the body paint looks very nice outside of a few inconsistent spots. Mould line elimination went really well, barring the nasty trunk spots up close. The interior looks basic but super nice. And this is certainly my most complex model so far.</p>

<p>Even with all of my complaining, I’m proud enough of it to have bought a display case!</p>

<p><img src="/assets/tamiya-skyline/passenger-side-done.jpg" alt="The passenger side of the car. You can see how the wheel is not straight." /></p>

<p>I’m disappointed mostly in how crooked the glass went in, and how wonky the wheels went on as well. I couldn’t escape the thinking that I had simply put the glass in entirely wrong, as the rest of this kit seems really precisely moulded. I also could have done without wrecking my airbrush nozzle in the process, but some parts are showing up soon for that.</p>

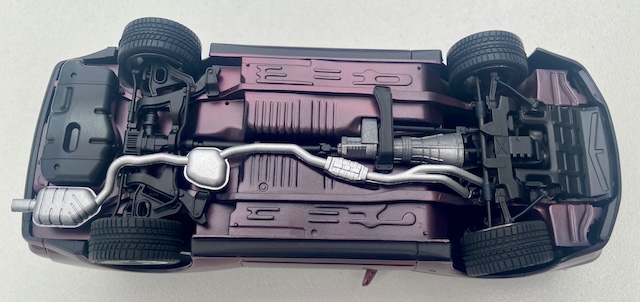
<p><img src="/assets/tamiya-skyline/underside-done.jpg" alt="The underside of the car. I like how the transmission came out." /></p>

<p>I’m looking forward to trying another Tamiya kit in the near future, but for now I may take a break and go back to my janky Ariis.</p>

<p>Thank you for reading!</p>]]></content><author><name></name></author><category term="mokei" /><category term="tamiya" /><category term="nissan" /><category term="skyline" /><category term="car" /><summary type="html"><![CDATA[Let’s get around to actually making a Tamiya kit. A perfect candidate is this R32 Nissan Skyline that I found at a local hobby shop! Through only a little bit of struggle – mostly my fault – I still managed to turn this late-80s supercar into a pretty nice model.]]></summary><media:thumbnail xmlns:media="http://search.yahoo.com/mrss/" url="https://plasmadash.com/assets/tamiya-skyline/rear-quarter-done.jpg" /><media:content medium="image" url="https://plasmadash.com/assets/tamiya-skyline/rear-quarter-done.jpg" xmlns:media="http://search.yahoo.com/mrss/" /></entry><entry><title type="html">Jimny Wide</title><link href="https://plasmadash.com/2026/08/06/jimny-wide-mini4wd.html" rel="alternate" type="text/html" title="Jimny Wide" /><published>2026-08-06T00:00:00+00:00</published><updated>2026-08-06T00:00:00+00:00</updated><id>https://plasmadash.com/2026/08/06/jimny-wide-mini4wd</id><content type="html" xml:base="https://plasmadash.com/2026/08/06/jimny-wide-mini4wd.html"><![CDATA[<p>Although the racing Mini 4WDs are fun, there’s a lot of off-track fun to be had, too. Summer means off-roading, even if it is just in a straight line. I picked up this “Wild” Mini 4WD Suzuki Jimny in Japan, and I want to do a reasonable job building it. Let’s <em>wide</em>!</p>

<h2 id="wide">Wide?</h2>
<p>I’d never heard of a Jimny <em>Wide</em> before, although I had been exposed through cultural osmosis to Japan’s obsession with all things Suzuki Jimny. While the regular Jimny is kei-class, the Wide – as you might expect – <a href="https://www.subcompactculture.com/2025/07/we-bought-suzuki-jimny-wide.html">adds widebody fenders and extends the track width</a>. Since it then breaks out of the low-tax kei class which restricts engine displacement, Suzuki did everyone a solid and slammed a big block G13BA 1.3L four-banger in there.</p>

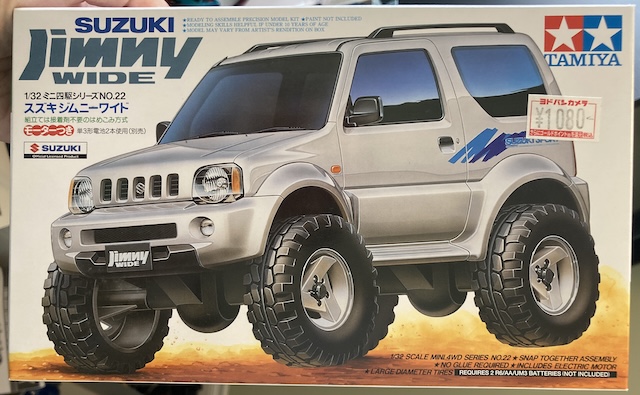
<p><img src="/assets/jimny-mini4wd/box.jpg" alt="The box, with an ¥1080 price tag from Yodobashi Camera." /></p>

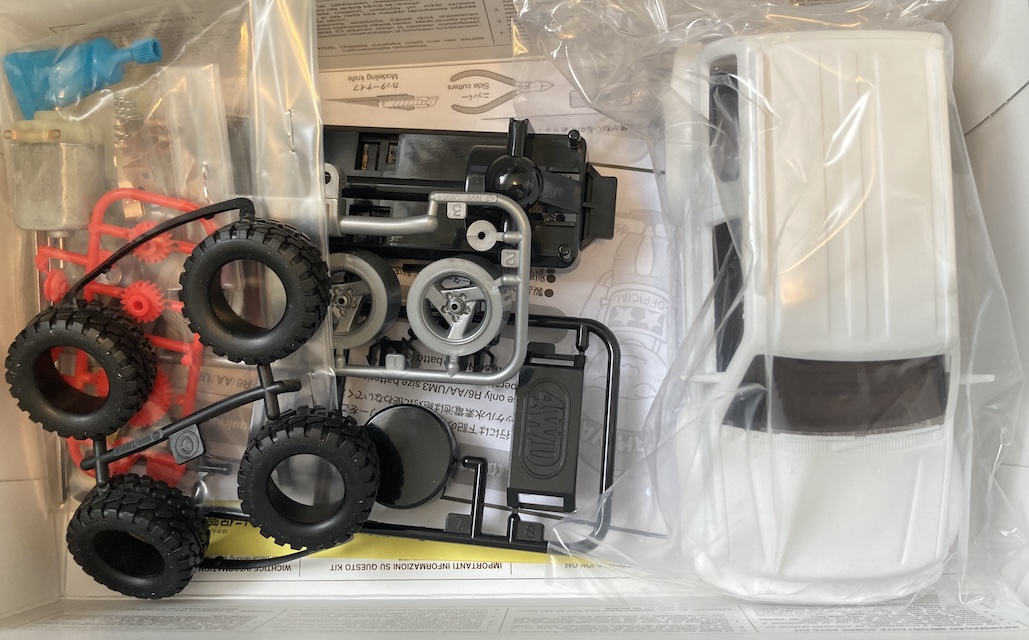
<p>In the box is the normal early Mini 4WD stuff, including multiple instruction manuals, a tube of grease, several runners of drivetrain parts, a tinted “window” insert, and big chunky rubber tires.</p>

<p><img src="/assets/jimny-mini4wd/in-box.jpg" alt="The box is opened, showing rubber tires, wheels, stickers, the body shell, and all the chassis parts." /></p>

<p>If you’ve built a Lunchbox Jr, this is the same kind of thing. If you <em>haven’t</em> built a Lunchbox Jr, go find whatever shop near you sells Mini 4WDs and build one.</p>

<p><img src="/assets/jimny-mini4wd/hood-part-line.jpg" alt="A faint part line is on the hood. Check out the sharply defined windshield washer sprayer nozzles." /></p>

<p>The polystyrene body is in nice shape, with the standard Tamiya caveats. I couldn’t find any mould lines other than a faint one on the hood, which I figured I could cover up with paint. I went ahead and washed it, and prepared it for paint.</p>

<h2 id="base-coat">Base coat</h2>
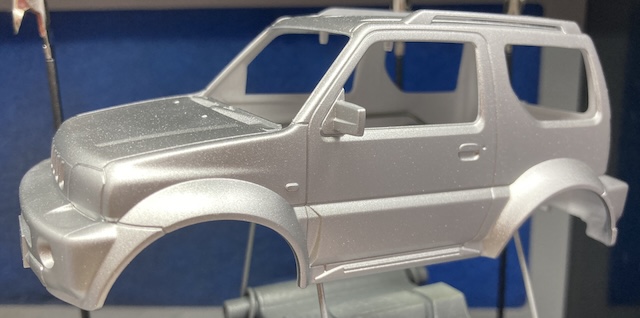
<p>When I had to paint some very tiny pieces of another kit with Tamiya Chrome Silver, and I had a bit left over in the brush, I decided that now was the time to also base-coat the entire Jimny body, because it was within reach.</p>

<p><img src="/assets/jimny-mini4wd/painted-silver.jpg" alt="The Jimny body is now silver." /></p>

<p>It got a whole load of Chrome Silver; I went from “a bit left over” to mixing up a whole second bowl because I missed tagging one of the mirrors. Was this a well-considered idea? No. Was the body prepped well enough to make it durable? No idea.</p>

<p>I do know that I discovered where the parting line really was the second I put some paint on the rear hatch. I let the freshly-silvered body sit to cure for a few days while fate decided what the colour coat would be.</p>

<p>After it had cured for a day or so, I went back to touch it to see what the finish was like. I was a bit surprised to find that the surface was pretty rough. I assume that I had built up the flakes of the metallics so much that it was making an improvised sandpaper out of them.</p>

<h2 id="colour-coat">Colour coat</h2>
<p>Initially, I tried to put on some Mr. Hobby C151 white pearl. I was planning to use that paint for another model in the future, and I wanted to learn how to spray it on a lower-risk model.</p>

<p>Unfortunately, it turns out that I didn’t mix it right, and I basically ended up with a bunch of white pearl pigment in the bottom of my bowl and hitting the chrome silver paint job with just thinner. This caused a couple runs that were visible under any topcoat. The lesson here is probably “don’t mix heavy pearl in the airbrush bowl.” We’ll find out if that’s correct the next time I try to put pearl white on something.</p>

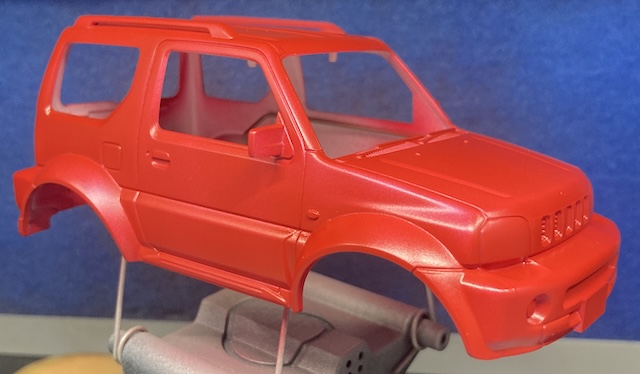
<p><img src="/assets/jimny-mini4wd/red.jpg" alt="The Jimny body is now red." /></p>

<p>After a thorough cleaning of the entire airbrush, I switched to Dspiae Mecha Red 1, and that laid out beautifully. I wasn’t sure if the silver backing would show up at all with the heavy opaque pigmentation of the red, but certain angles of light seem to make a nice pink iridescence. The coat was acceptably even.</p>

<p>Once that paint had been allowed to cure over the course of a day or two, I got ready to do all the detail painting. Tamiya wants you to colour the roof rack, the wiper tray, the wing mirrors, the rear wiper, and part of the bumper in semi-gloss black. The fender-mounted turn signals can be done in yellow.</p>

<p>Time for extra credit? Despite my suspicions, a quick image search revealed Jimny Wides with both black <em>and</em> body-colour door handles. Must be a trim level thing. I decided to not paint the door handles black.</p>

<p>There were a few parts too small to mask: the rear wiper blade for starters. I tried the AK “Rubber Black” pen on it. This worked amazing! I will be using this more often. I went on and did the wiper jets and the grille inserts with it as well.</p>

<p>Sadly, when I pulled the tape off, some of the paint came with it. I thought it was just limited to the cheap dollar-store painters’ tape I was using, but the Tamiya tape did (much less) damage, too.</p>

<p><img src="/assets/jimny-mini4wd/red-flaking.jpg" alt="A bunch of red paint is missing from the hood." /></p>

<p>My immediate reaction was that I should have clear coated this before masking it, and removed the tape much more gently. Lesson learned for next time, but really discouraging. At least the masking was really clean, except for a small glob on the A-pillar and an accidental downdraft on the passenger-side door.</p>

<p>When spot-testing with tape afterward, I quickly found that no amount of gentle tape removal would have saved it. More and more paint came off, to the point where I resigned myself to repainting the car. It went back into the box for now, awaiting a full repaint.</p>

<h2 id="strip-it">Strip it</h2>
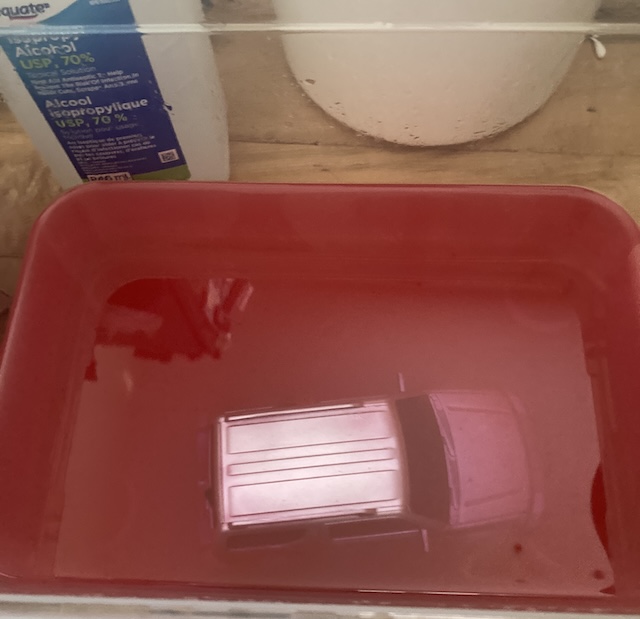
<p>I went to the hardware store and got a couple bottles of 70% isopropyl alcohol, and a plastic container with a locking lid. Then I chucked the model in there and started making acrylic soup.</p>

<p>In retrospect, I probably could have used a much smaller container for a car of this scale, but it started working immediately. The Mecha Red came off as the isopropyl was still being poured in, followed shortly by the flat black. There was a distinct silver tone left behind for a few days, but it came off quickly with a toothbrush.</p>

<p><img src="/assets/jimny-mini4wd/paint-stripping.jpg" alt="The car body sits in a pile of red soup. It still looks silver." /></p>

<p>I left it in for a week after that, which seems like it was a bit too long, as some of the red staining proved very difficult to remove even with scrubbing. Luckily, most of it was on the inside, where nobody will ever see it.</p>

<p>Although a good theory is that the very rough silver flake is not actually a solid substrate for paint, I am suspecting that the Dspiae paint and the Tamiya silver paint are not compatible, for whatever reason of chemistry. More experimentation is necessary. I’m glad I found out here and not on a more complex kit – I was also planning on using this Mecha Red on a Skyline model. It still sucks to lose that nice masking for the flat black, but I’ll live.</p>

<p>Did I fix the part lines while the body was unpainted? I most certainly did not.</p>

<h2 id="repaint-it">Repaint it</h2>
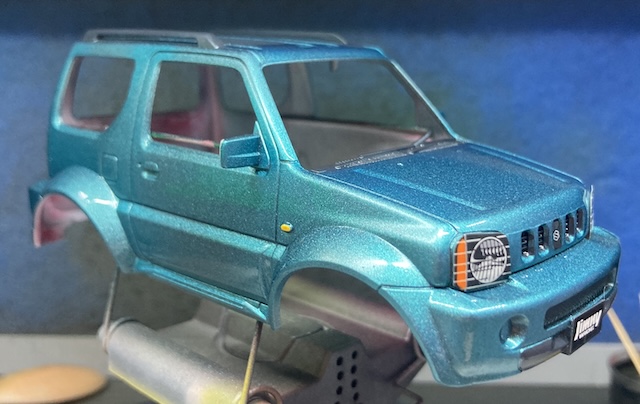
<p>This time around, I decided to try lacquers. I put a bunch of black finishing surfacer on, and then moved right into the topcoat. There was a Mr. Color (C57 - Metallic Blue-Green) that I liked the look of, but is too bright, so I thought this undercoat would mute it a bit.</p>

<p><img src="/assets/jimny-mini4wd/in-blue.jpg" alt="The headlights and badge are finally on it, and it's a nice metallic blue." /></p>

<p>Spraying it out looked quite good, and the tape test about 24 hours later proved that the paint adhered a lot better! Even so, I ended up filling in the roof rack and front areas with AK rubber-black marker instead. I was too afraid to do the window trims.</p>

<p>The corner markers were ticked with a yellow Gundam marker, and I went on to put some stickers on.</p>

<p>Unfortunately, the tail-light stickers kept falling off where they bend around the edges, so I ended up removing them for the clear coat (X-35 Tamiya semi-gloss clear; 4 coats.) I tried to paint them in later with the red Gundam marker, but it was much less opaque than I wanted.</p>

<p><img src="/assets/jimny-mini4wd/clear-coated.jpg" alt="The body is clear coated and has a nice glossy sheen to it." /></p>

<p>The wheels got treated to some panel liner to make them look a little less monotone, and soon it was time to put the truck together.</p>

<p>The headlight stickers also kept popping off, even after the clear. I ended up putting a little bit of Elmer’s glue behind them and then really mashing them on with my thumbs for a few minutes. That seemed to hold?</p>

<h2 id="assemble-it">Assemble it</h2>
<p>One odd thing about this kit: it comes with a push bar, and stickers for the lights on the push bar, but the manual never mentions it and there doesn’t seem to be a place to put it. Even if you install the “track bumper,” it goes on the rear. I just ended up leaving it in the box, but if you know better than me how to mount it, let me know.</p>

<p>Putting the rest of the drivetrain together is simple. There’s only a few parts, and although the illustrations in this manual aren’t the most clear, you can figure it out pretty easily. Just how the wacky “clutched” driveshaft works is still a mystery to me.</p>

<p>Installing the body isn’t as straightforward as the Lunch Box Jr, but it’s still pretty easy. There’s a slot in the front bumper, there’s a tab on the chassis, and you line them up and click it together.</p>

<h2 id="complete">Complete!</h2>
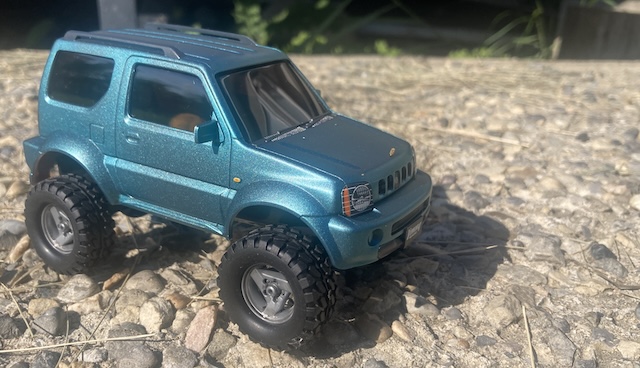
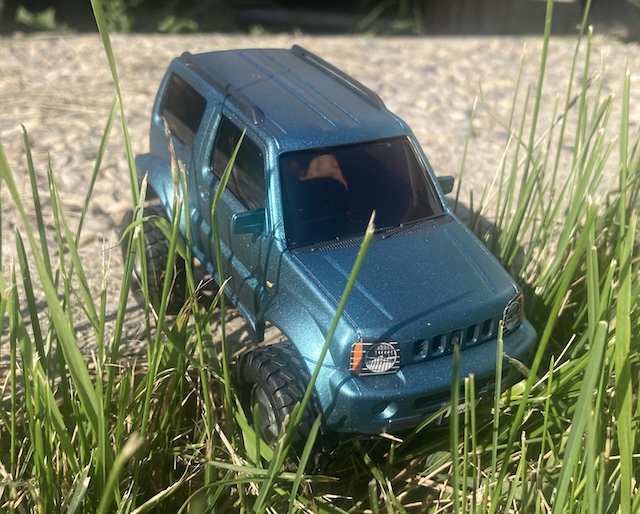
<p><img src="/assets/jimny-mini4wd/done-outdoors.jpg" alt="The Jimny is outdoors, driving on a concrete pad. A grass seed has landed on the hood." /></p>

<p>It looks really good in the sunlight!</p>

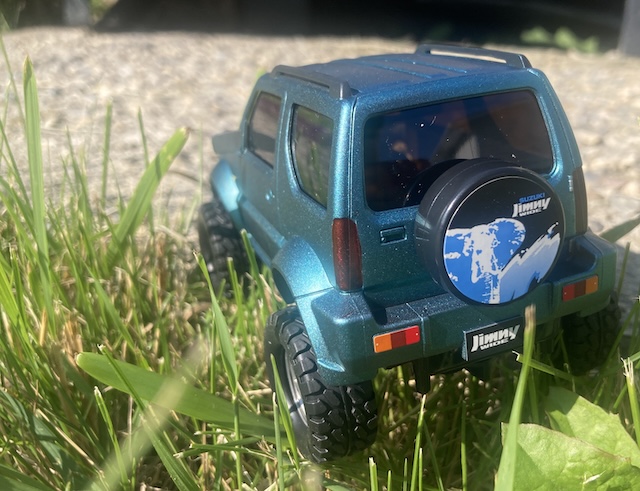
<p><img src="/assets/jimny-mini4wd/outdoors-rear.jpg" alt="The tail lights are obviously drawn with marker." /></p>

<p>I’m disappointed in how the tail lights came out: I should have held out and tried to make the tail light stickers work. It still remains to be seen how long the Elmer’s glue fix for the headlights will hold.</p>

<p><img src="/assets/jimny-mini4wd/crawling.jpg" alt="The Jimny is descending into the grass, ready for an adventure." /></p>

<p>I can already tell you that this thing is a pretty good crawler, though. It has way more approach angle than my Mini 4WD Lunchbox does.</p>

<p>Here’s what I think I learned on this project:</p>
<ul>
  <li>The virtues of lacquer-based model paint;</li>
  <li>How to strip paint when you screw up;</li>
  <li>Additional stubbornness.</li>
</ul>

<p>Thanks for reading!</p>]]></content><author><name></name></author><category term="mini4wd" /><category term="tamiya" /><category term="suzuki" /><category term="jimny" /><category term="car" /><summary type="html"><![CDATA[Although the racing Mini 4WDs are fun, there’s a lot of off-track fun to be had, too. Summer means off-roading, even if it is just in a straight line. I picked up this “Wild” Mini 4WD Suzuki Jimny in Japan, and I want to do a reasonable job building it. Let’s wide!]]></summary><media:thumbnail xmlns:media="http://search.yahoo.com/mrss/" url="https://plasmadash.com/assets/jimny-mini4wd/in-blue.jpg" /><media:content medium="image" url="https://plasmadash.com/assets/jimny-mini4wd/in-blue.jpg" xmlns:media="http://search.yahoo.com/mrss/" /></entry><entry><title type="html">AMT International Scout II build</title><link href="https://plasmadash.com/2026/07/16/amt-scout-ii-build.html" rel="alternate" type="text/html" title="AMT International Scout II build" /><published>2026-07-16T00:00:00+00:00</published><updated>2026-07-16T00:00:00+00:00</updated><id>https://plasmadash.com/2026/07/16/amt-scout-ii-build</id><content type="html" xml:base="https://plasmadash.com/2026/07/16/amt-scout-ii-build.html"><![CDATA[<p>I haven’t thrown together an American-made car model since I was a kid. Back then, I didn’t have the luxury of airbrushes, or the most important tool of all: patience. This “retro” kit tested both my painting and modelling skills in a bigger way than I thought it would!</p>

<h2 id="the-kit">The kit</h2>
<p>This kit is an AMT International Scout II that I got from my local hobby store. The box claims that it is a retro re-release, which I hoped didn’t mean worn-out tooling. I love the Scout II; it’s a much less bourgeois vehicle than the other trucks of its generation, which have all become show vehicles that are impossible to obtain.</p>

<p>Please don’t email me with how much a Scout II costs in your local market. I <em>know</em>.</p>

<p>Like I said earlier, this is a kit that will need painting. I had very low success painting kits as a kid, mostly because I’d get impatient or have nasty brushstrokes. Now I had the power of air on my side!</p>

<p>To get started, I opened the box and found out that the chassis/interior part is all one part, moulded in bright yellow, like the body. This is actually pretty good for me, since it will be obvious where I missed painting it. After washing it in dish soap and water, I decided to paint the whole thing in Mr. Hobby Aqueous flat black. There really aren’t many parts in this kit, so I was excited to have a good testbed that wouldn’t land me in eternal glue hell.</p>

<p>I don’t know if it’s weird to say so, but the plastic baggies that contain the sprues and stickers feel really good. Whoever bought those bags at AMT did a good job.</p>

<p>Painting-wise, this time around, I had done a little bit of prep the previous summer. That prep mostly consisted of buying tools and paint to make sure that things would go better for me. On impulse, I bought a $5 cookie tray from Canadian Tire, so small parts and tools wouldn’t have to be precariously balanced on a piece of cardboard. That turned out to be a great investment.</p>

<h2 id="bathtub">Bathtub</h2>
<p>I decided to flat black the entire bathtub, inside and out. The floor of the Scout doesn’t have a lot of detail except for the automatic brake and throttle pedals, which you cannot really see in this picture. In fact, I didn’t even notice they were there until I started painting!</p>

<p><img src="/assets/amt-scout-ii-build/painted-interior-rough.jpg" alt="The interior has a nice flat black to it, and detail can still be seen." /></p>

<p>I’m pretty happy with how it came out. There’s lots of injection marks and other tooling marks on the original plastic, but it’s hard to sand those out without damaging the textured floor. I think it would be cool to get rid of those marks and then fabricate a little carpet or bedliner texture, but let’s try to stick to one new technique per model. It’s a truck. Trucks do truck stuff.</p>

<p>The lack of colour is not a big deal, as the interior is mostly occluded by the bucket seats and dashboard, which I planned to paint some lighter shade so it would be legible when looking in through the windows.</p>

<p>I had some challenges at this early stage. One was that I didn’t mix my paint properly, so I ended up with either little thin spackles or big wads of shot. Luckily, the flat black is pretty forgiving, and I got better as I put successive bits of paint through.</p>

<p>As the compressor heated up, it also seemed to be having trouble making pressure. After about 30 minutes of use, I had to start adding a beat or two of delay from when I went from “just air” to “air and paint” on the trigger, because it would seem initially to have nothing coming out before I got a shotgun blast. Chances are I am pushing this el-cheapo Amazon nail-art compressor a little bit too hard. It’s also likely that I’m clogging the brush, and need to be more disciplined with stopping the flow of paint before stopping the air.</p>

<p>After all this outdoor-painting nonsense, I decided to move indoors. You’ve already seen some of the results of me keeping the airbrush indoors, and the rest of this kit was all done in the comfort of my very own home.</p>

<h2 id="underbody">Underbody</h2>
<p>Although this is a simple kit with very few parts, there’s a handful of suspension details to work out here when painting. I flat-blacked most of the parts, being careful to pay attention to what would be visible when the parts were installed.</p>

<p><img src="/assets/amt-scout-ii-build/front-diff-no-axle-mushroom.jpg" alt="The front axle is missing the final &quot;mushroom&quot; that the rear axle has." /></p>

<p>I’m going to complain a lot about the worn-out “retro” tooling on this kit, but it was mostly not a showstopper except for here. The moulding on the wheel mounting stubs on the front differential/axle had melted into the sprue, so I was not able to get a nice clean separation as the manual indicates. I had to end up fabricating my own stubs on the front by gluing on bits of sprue that I thought <em>used</em> to be the wheel hubs. The wheels went <em>on</em> what was left of the axle stubs without those nubbins, but they didn’t stay on or roll.</p>

<p>Being moulded in yellow definitely helped me to figure out where there were thin or missing paint spots. Using the paint booth made knocking out all these underside suspension parts super easy. I particularly enjoyed how the gas tank came out.</p>

<p>I debated doing these parts in gloss black, as I was worried they would disappear into the flat black underbody, but they seem to have come out OK. I think the visual contrast of the exhaust system helps highlight the change in depth.</p>

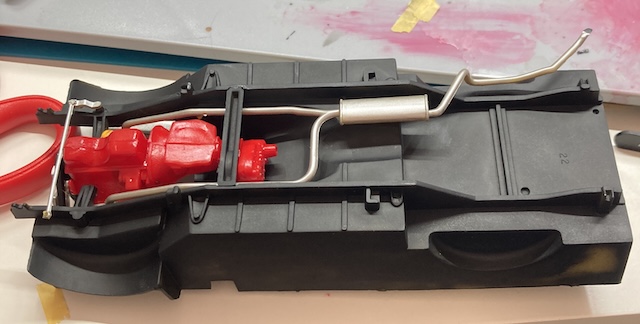
<p>All of the exhaust system got a nice spray of Tamiya silver. How nicely metallics come out of the airbrush surprised me. When I was a kid, anything silver was always an opportunity for brush strokes and uneven coating to ruin my project. Not so here!</p>

<h2 id="engine">Engine</h2>
<p>Again, the tooling on the engine/transmission and all of its various parts seems to be really worn out. Not only are the alignment pegs tiny, they don’t really do anything to align. The intake manifold has pegs but they don’t go into anything on the block!</p>

<p>I had to use tape to hold things in place during the gluing of the short block, and there is still a very visible gap in the join line from the bottom.</p>

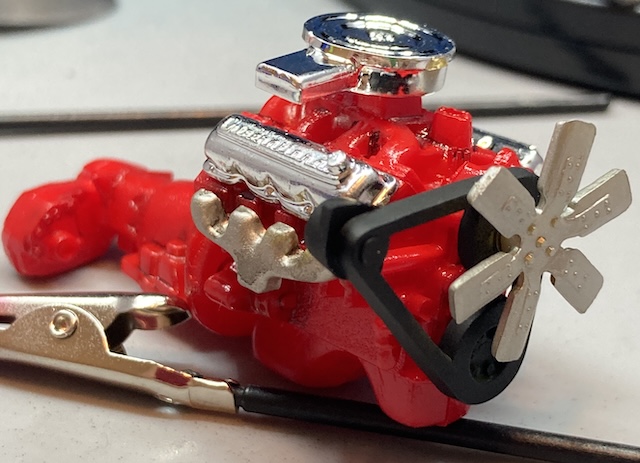
<p>Following the instructions, I decided to do the engine block and non-chrome accessories (intake manifold, front cover, transfer case, automatic transmission) in gloss red. <em>Rejecting</em> the instructions, I painted the belt drive, the exhaust headers, and the front fan separately, of course. Belts shouldn’t be red.</p>

<p>I ended up using Tamiya X-7 “red,” which went on nicely but made it look a bit toylike. I applied a little bit of panel liner here and there to draw out some of the detail, but since it’s my first time, I’m not sure I did anything other than make it look dirty.</p>

<p>Figuring out how to clamp up the engine/transmission/transfer case for painting was the hardest part. Because the part is long and awkward, all the traditional grabbing spots (top of the intake manifold etc) make it wobble around under air pressure, so I had to settle for somewhere that would obscure some paint initially and require me to move the clamp around (without destroying the still-wet paint.)</p>

<p>I started by using an alligator clip on the oil filter, and then eventually moved to the rear output shaft of the transfer case after painting that part and letting it dry for a bit. It’s hard to know when it’s dried enough to be safe to move it, and I fear that I rushed it still.</p>

<p>I was having some trouble with the quick-set Tamiya extra-thin, which I used on most of my previous projects, stripping the paint. I switched to gel super glue because that’s what I had on hand, but I’m going to see if I can get some of the fancy Bob Smith stuff from KMS Tools.</p>

<p>The valve covers were a surprise. They attach to the block using little pegs. On the passenger side, I had to hog out one of the holes in the block with a knife in order to make it big enough for that valve cover to mount.</p>

<p>On the <em>driver</em> side, they simply didn’t drill enough holes for the valve cover. While the passenger valve cover had 2 studs and 2 holes, the driver side valve cover had 3 studs and only 2 holes.</p>

<p><img src="/assets/amt-scout-ii-build/too-many-posts-in-valve-cover.jpg" alt="The chrome valve cover lying on the ground has 3 male studs and the block has just 2 female holes. Please ignore my terrible colouring of the oil filter." /></p>

<p>I’m not sure if they just screwed up moulding this, or there was a change made to make it “easier” and they forgot to update the chrome-parts tree, but this made me pretty grumpy. I clipped the last stud off and loosely positioned it. The remaining holes were already out of spec enough that it cured just a little bit crooked, but I think overall it’s a nice looking engine.</p>

<p><img src="/assets/amt-scout-ii-build/engine-air-filter.jpg" alt="The engine is fully assembled." /></p>

<p>Masking and painting the alternator was clearly too much work, just like it was apparently too much work for AMT to make a mounting bracket to hold it to the front matter of the engine.</p>

<p>Isn’t it <em>weird</em> that the cooling fan on the Scout’s IH 345 V8 comes off the camshaft? Maybe it’s just weird to me.</p>

<h2 id="interior">Interior</h2>
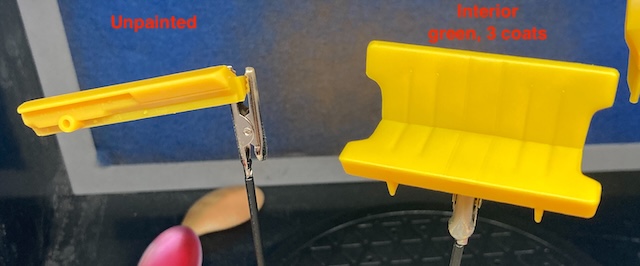
<p>Because it says so on the label, I decided to paint the seats and dashboard the Mr. Hobby Aqueous H58 “<em>Interior</em> Green.” From the jar, it looks like a nice, opaque avocado colour, perfect for a machine with one foot in the 70s.</p>

<p><img src="/assets/amt-scout-ii-build/badly-painted-seats.jpg" alt="There is virtually no visible difference between the unpainted dashboard and the rear seats, which have three coats of Interior Green paint." /></p>

<p>Unfortunately, it’s not as opaque as I thought, and it’s nearly impossible to see a difference between the interior green, and the base yellow colour of the AMT plastic. Whoops! This needed to be primed.</p>

<p>I repainted these in the Golden high-flow “Titanium White,” because it seemed like it would be easier than mixing up some Tamiya white. This is my first time using these supposedly pre-thinned Golden paints, so I was curious how it would work. Everything seemed to go well, although it was a lot more difficult to clean out of the cup of the airbrush than other paints. Some flecks also seemed to “dry” in mid-air and stick to the work, but in this case the additional texture was welcome. It was left to cure for a day before I tried to top coat it again with the Interior Green.</p>

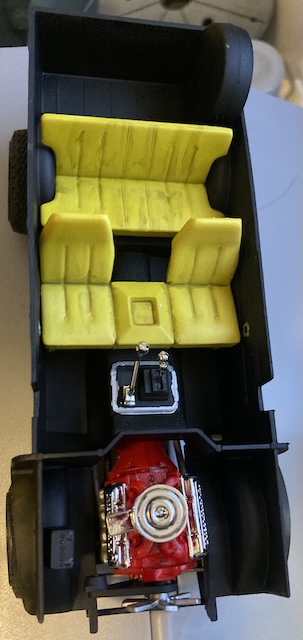
<p><img src="/assets/amt-scout-ii-build/interior-green-with-weathering.jpg" alt="The interior green seats are pretty gunked up with black panel liner." /></p>

<p>That seems to have gone well, although I think the Interior Green is a lot brighter backed with white than I originally wanted. Probably the right thing to do here would have been a light matte grey mid-coat. Instead, I gunked some black panel liner on there until the seats looked grubby.</p>

<p>I touched up some interior parts with a silver Sharpie, like the pedals and the door latches. I made a bit of a mess freehanding it around the tight confines of the transmission tunnel bracket, but it’s probably fine.</p>

<h2 id="installing-the-suspension">Installing the suspension</h2>
<p><img src="/assets/amt-scout-ii-build/underside-engine-installed.jpg" alt="The transmission crossmember is holding the transmission/transfer case in place." /></p>

<p>At this point I had to repaint the transmission crossmember, because I painted the wrong side of it. From now on, I’m just going to paint both halves of any part that small. Luckily, the transmission crossmember fit without trimming, so my guess at how to clock the transfer case was at least in the ballpark.</p>

<p>This guess was not super great in the end, as the front and rear driveshafts didn’t line up with the transfer case super well. This ended up pushing the front and rear axles around, which meant some frustrating gluing for the suspension pickup points. Defying the instructions and installing the crossmember first, so that you have a solid reference for the entire engine/transmission and transfer case, is probably a better way to go. Ah well, the truck stays up under its own weight.</p>

<h2 id="front-axle-fix">Front axle fix</h2>
<p>It was now time to put the wheels together and put them on the car. Although I don’t particularly think the chrome looks good on this thing, I didn’t want to go through the process of learning how to strip chrome on this car. I’ve learned enough already here. That’ll be a future model’s project.</p>

<p><img src="/assets/amt-scout-ii-build/homemade-axle-pins.jpg" alt="The homemade axle pins are mostly okay, but you can tell one side is longer than the other." /></p>

<p>As previously mentioned, the tooling had obliterated both nubs that hold on the front wheels. In order to hang the wheels off the front axle, I needed to fabricate and install another wheel-retaining nub.</p>

<p>I looked at the surviving nubs on the rear axle and rough-cut a piece of sprue to look about the same, then affixed it with CA glue and a little bit of Tamiya extra thin to make it flow together. Being an amateur to gluing of all kinds, I was not reassured that this would make a strong enough joint, but I decided to try it anyway.</p>

<p><img src="/assets/amt-scout-ii-build/crooked-wheel-bad-suspension-mount.jpg" alt="The front right wheel has a lot of negative camber." /></p>

<p>The wheels stayed on, but the right front wheel is pretty wobbly. That’s not too much of a surprise, as I’m pretty sure the axle is longer on that side, so the pin isn’t holding it tight against the inner “bushing” surface. I’m just happy the wheel didn’t instantly fall off.</p>

<h2 id="finally-the-body">Finally, the body</h2>
<p>There was a lot of prep for the body. First, I test fit it to make sure that there was nothing egregiously wrong. If I had a real problem at this point, the best thing to do would be to move into the woods and never return.</p>

<p><img src="/assets/amt-scout-ii-build/body-test-fit.jpg" alt="The upper body is test fit onto the underbody. The glass and hood are present." /></p>

<p>Whoa, hey! It’s a <em>truck</em>. I wish this thing didn’t have moulded-in windshield wipers, but I understand that’s a common complaint with AMT kits.</p>

<p>After that, I moved around with my trusty Olfa knife, smoothing hard edges, cutting off flash, and removing part lines. There was a pretty nasty one of the latter near the passenger-side tail light. That part line absolutely would have shown up as soon as it got into primer. As it stood, I wasn’t sure that there weren’t going to be more obvious ones emerging still, but that’s the primer’s problem. I hedged my bets by meticulously going around the edges and using my fingernail to feel for any catches.</p>

<p>Because of lack of options on hand, I decided to prime with pink Surfacer 1500. As the Mr. Hobby products contain <a href="https://www.facebook.com/MiHobbies/posts/industry-update-gsi-creosmr-hobby-update-continued-from-september-5-postthe-news/1300832131837661/">2-butoxyethanol solvent in excess of Industry Canada regulations</a>, they were banned from import. This situation has continued for awhile now. As a result, all of the local hobby stores have run out. This pink Surfacer managed to come from a little figurine store in my local Chinatown that hasn’t sold through their inventory yet. It made a big difference <a href="/2026/07/03/arii-honda-z-gss.html#painting-again">behind the orange on the Honda Z</a>, but I expected the green to be opaque enough that you’d barely even notice it.</p>

<p><img src="/assets/amt-scout-ii-build/pink-surfacer.jpg" alt="A very blurry and dark picture of the body, which is now in pink surfacer." /></p>

<p>I think the priming came out fine: many fewer obvious flaws jumped out than did with the Arii. This is probably because I spent so much time processing the body. It laid down fairly smoothly.</p>

<p>This time, I decided to reach for a new airbrush: an Eastwood side-cup<sup id="fnref:hs32" role="doc-noteref"><a href="#fn:hs32" class="footnote" rel="footnote">1</a></sup> that I’d had lying around in my car parts pile. I don’t remember when I bought this, or why, but it has to have been at least 15 years ago. I was curious if it would be demonstrably different from my cheapo Gocheer. For the most part, it wasn’t: but it’s a lot easier to clean, the action is smoother, and there’s a limiting screw on the back. So I’ll stick with this one for a little while, and probably relegate the Gocheer to “metallics duty.”</p>

<p>I wanted to use a metallic green colour, but upon further inspection, it turned out that my metallic green is <a href="https://mecorx.home.blog/2019/05/14/acrysion-the-miracle-paint/">Mr. Hobby Acrysion – which can’t be painted on top of acrylics such as the pink surfacer that I just put down</a>. So I switched to Tamiya XF-4 “Yellow Green,” which I think gives it sort of an unripe banana vibe. Perfect for the 70s.</p>

<p>Achieving an even coat with yellows has been tricky for me in the past. Here there is still some unevenness, but it’s hard to see with the eye. The paint also laid down fairly roughly, which I think hurts the gloss in the long run. I should have done more (any?) sanding.</p>

<p>Because of some recent nightmares where Tamiya masking tape was pulling paint off of the surface, I decided to quickly clear coat the body before moving on. I grabbed a little jar of Tamiya semi-gloss clear and mixed it in a 1:2 ratio, which seemed to lay out fairly well. For this intermediate phase, I gave it two coats, mostly because I ran out of clear at that point. Then I let it cure for 24 hours before sticking the tape on it for any detail painting.</p>

<h2 id="detail-painting">Detail painting</h2>
<p>For the grille, I globbed on some black panel liner and hoped that it would stick around long enough to give some contrast. Hooray, it did! I thought about simply giving it a wash with black acrylic paint, but I didn’t want to get my brush out for that.</p>

<p>Actually gluing the grille on was harder. I first put a generous glob of glue on the ejector pegs, but then it fell off and left glue gunk all over my bumper area. To fix that, I ended up gluing the grille onto the body from the inside of the headlight buckets.</p>

<p><img src="/assets/amt-scout-ii-build/side-trim.jpg" alt="The side trim is silver and black." /></p>

<p>The side trim came out nicely. I did it by first filling the inner area with my AK rubber black pen, then hitting the high spots with a silver Sharpie. It looked a bit uneven at first, so I gave it another “coat,” and now it looks alright to my eye. The window trim was so-so, and I accidentally made too much of the drivers’ side trim silver. At this point, I was in “moving on” mode, so we kept going.</p>

<p>I was excited to do the waterslides, and even more excited to find they slid off the paper super easily compared to my last waterslide ordeal. New decals make a difference! Unfortunately, all of them tore and fell apart while I was manipulating them, so I ended up having to colour in the side badges using a Sharpie – to varying effect.</p>

<h2 id="final-assembly">Final assembly</h2>
<p>I glued in the windshield and the tail lights using clear Elmer’s glue, and then let it sit for a really, really long time. Let glue dry.</p>

<p>For the bumpers, I knew from the grille that I would have trouble getting chrome things to stick to the frame. So, I did a test fit, and then scraped the chrome plating off of the mating section of the bumper using my craft knife. At first, I thought the pegs on the bumper might be how it mounts, but they appear to be nothing more than ejection pins, as the frame doesn’t line up with them.</p>

<p><img src="/assets/amt-scout-ii-build/grille-and-bumper.jpg" alt="The grille, bumper, and upper radiator hose are all mounted." /></p>

<p>Putting the upper radiator hose in took some patience, as both the pin on the hose and the hole on the engine block were not well-formed for each other. After some struggle, I was able to prop it in place with my thumb for long enough for the glue to tack up.</p>

<p><img src="/assets/amt-scout-ii-build/mirrors-on-front-left-quarter.jpg" alt="The mirror is stuck on the drivers' side. It is pointing to outer space." /></p>

<p>I had heard from other people who built the same kit that the wing mirrors were a pain. There’s a just barely-visible section on the doors that you can mount the mirrors to. Unfortunately, the mirrors are not in the best shape coming off of the runner, nor do they have an unambiguous flat mating surface. I sanded off the chrome from one face of it and hoped for the best. Although these mirrors are pretty wonky, they actually look okay if you don’t think about it too hard.</p>

<p><img src="/assets/amt-scout-ii-build/mirrors-on-rear-quarter.jpg" alt="The mirror is now stuck on the passenger side. It is aiming weirdly also, but it's harder to tell." /></p>

<h2 id="complete">Complete!</h2>
<p><img src="/assets/amt-scout-ii-build/driver-side-sun.jpg" alt="The truck's driver side is in partial shade out on the deck." /></p>

<p><img src="/assets/amt-scout-ii-build/engine-detail-sun.jpg" alt="The truck's engine bay is exposed as the hood as been removed." /></p>

<p><img src="/assets/amt-scout-ii-build/passenger-3-4-sun.jpg" alt="The front passenger quarter of the truck is in the sun." /></p>

<p><img src="/assets/amt-scout-ii-build/passenger-side-sun.jpg" alt="The full passenger side of the truck is in the sun." /></p>

<p><img src="/assets/amt-scout-ii-build/hero.jpg" alt="The truck is driving away from the viewer, ready for some exciting off-road adventure." /></p>

<p>Despite all the obstacles, I really do like how this kit turned out. I keep looking at it on the display shelf and thinking about going on an off-road adventure.</p>

<p>Building it taught me a lot about dealing with flash, mis-moulds, and other weird aspects of old American kits. I really liked how I could detail the “tub” to varying degrees depending on how brave I felt; you could tinker with this forever.</p>

<p>It would have been nicer to have shinier paint – maybe I needed more coats of clear coat, or just to get closer to the work. I’m also not a huge fan of how the side moulding came out, although it looks good from a distance.</p>

<p>On my next kit, I plan to spend some more time processing the body, and maybe even use putty to get rid of some of the sink marks and flaws.</p>

<p>Although I couldn’t source the right surfacer this time, I also would make the interior much more opaque: I think black on the inside would have made a difference to how the light shows up around the door seams. When the truck is sitting in the sun, you can see light glowing through the thin plastic of the C-pillar.</p>

<p>Keeping with the opinions of the internet majority, I would also probably strip the chrome and repaint it. For detail purposes, it would also be really cool to have 1/24-scale “stuff” to put in the trunk, like a little Haynes repair manual or some empty coolant jugs.</p>

<p>I’m looking forward to building up more of my skills on the next kit. Thanks for reading!</p>
<div class="footnotes" role="doc-endnotes">
  <ol>
    <li id="fn:hs32" role="doc-endnote">
      <p>Update: I found a piece of paper in the original package that shows it to be a common “HS-32” airbrush. Since there is no branding, I suspect this is a clone of someone else’s design. I am thankful that the paper also included an exploded parts diagram so I could clean it. <a href="#fnref:hs32" class="reversefootnote" role="doc-backlink">&#8617;</a></p>
    </li>
  </ol>
</div>]]></content><author><name></name></author><category term="mokei" /><category term="amt" /><category term="international-harvester" /><category term="car" /><summary type="html"><![CDATA[I haven’t thrown together an American-made car model since I was a kid. Back then, I didn’t have the luxury of airbrushes, or the most important tool of all: patience. This “retro” kit tested both my painting and modelling skills in a bigger way than I thought it would!]]></summary><media:thumbnail xmlns:media="http://search.yahoo.com/mrss/" url="https://plasmadash.com/assets/amt-scout-ii-build/hero.jpg" /><media:content medium="image" url="https://plasmadash.com/assets/amt-scout-ii-build/hero.jpg" xmlns:media="http://search.yahoo.com/mrss/" /></entry><entry><title type="html">Learning lessons on a Honda Z GSS</title><link href="https://plasmadash.com/2026/07/03/arii-honda-z-gss.html" rel="alternate" type="text/html" title="Learning lessons on a Honda Z GSS" /><published>2026-07-03T00:00:00+00:00</published><updated>2026-07-03T00:00:00+00:00</updated><id>https://plasmadash.com/2026/07/03/arii-honda-z-gss</id><content type="html" xml:base="https://plasmadash.com/2026/07/03/arii-honda-z-gss.html"><![CDATA[<p>This model kit of a ‘71 Honda Z GSS was picked up at a Yodobashi Camera. I was drawn to its adorable 1/32 scale and its incredibly cheap price. Are these Owners’ Club kits junk? Do I have what it takes to paint and build this little car?</p>

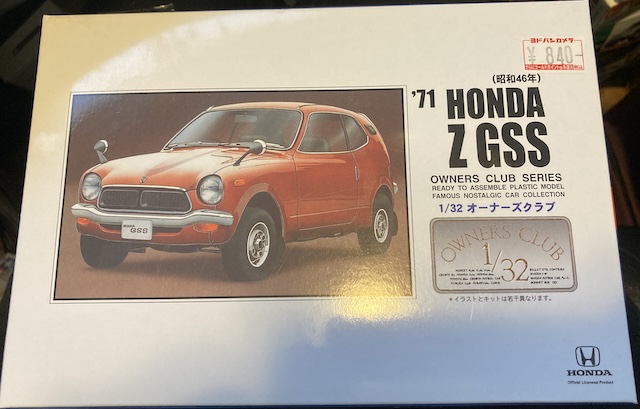
<p><img src="/assets/arii-honda-z/box.jpg" alt="The box as it arrives, showing a picture of a Honda Z and a ¥840 price tag." /></p>

<p>This is the very first car I’m actually airbrushing in colour<sup id="fnref:rising-trigger" role="doc-noteref"><a href="#fn:rising-trigger" class="footnote" rel="footnote">1</a></sup>. Sure, I’ve got a lot of stuff that I’ve primed out, but I fell in love with this little guy and decided it was time to give it a serious effort.</p>

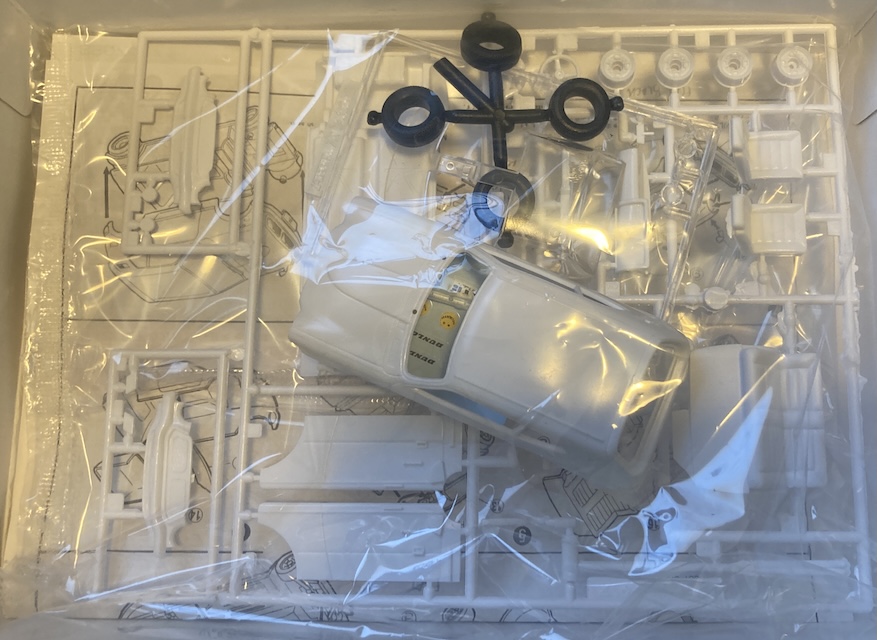
<p><img src="/assets/arii-honda-z/in-box.jpg" alt="Inside the box, showing the body and a single runner of white parts." /></p>

<p>My initial impressions were pretty positive. There’s moulding flash on a couple of the parts, but everything is so tiny and cute.</p>

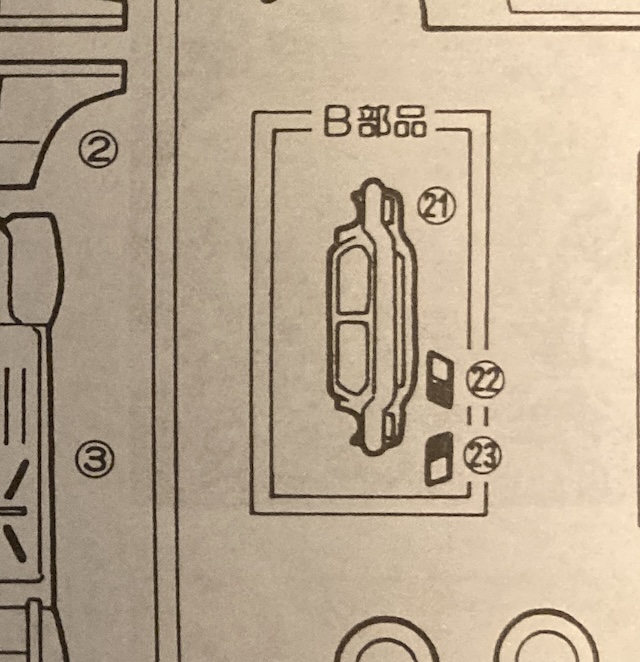
<p><img src="/assets/arii-honda-z/alternate-bumper.jpg" alt="The picture of the alternate bumper runner in the manual. It reads &quot;B parts&quot; and contains a bumper and two quarter panel badges, marked as parts 21, 22, and 23" /></p>

<p>I’m not sure how this lines up with model years, different Honda sub-dealers, or markets, but you can choose which form of Z you want to build. There are two sets of grilles and two sets of sail-panel badges. The manual only calls out one set of these, but they have identical runner numbers. I chose to paint both grilles. In case one was ruined, I could swap to the other one.</p>

<p>The instructions are a single-page Ikea-style infographic treatise that are almost entirely in Japanese, with only a couple of painting instructions that use Gunze colour codes.</p>

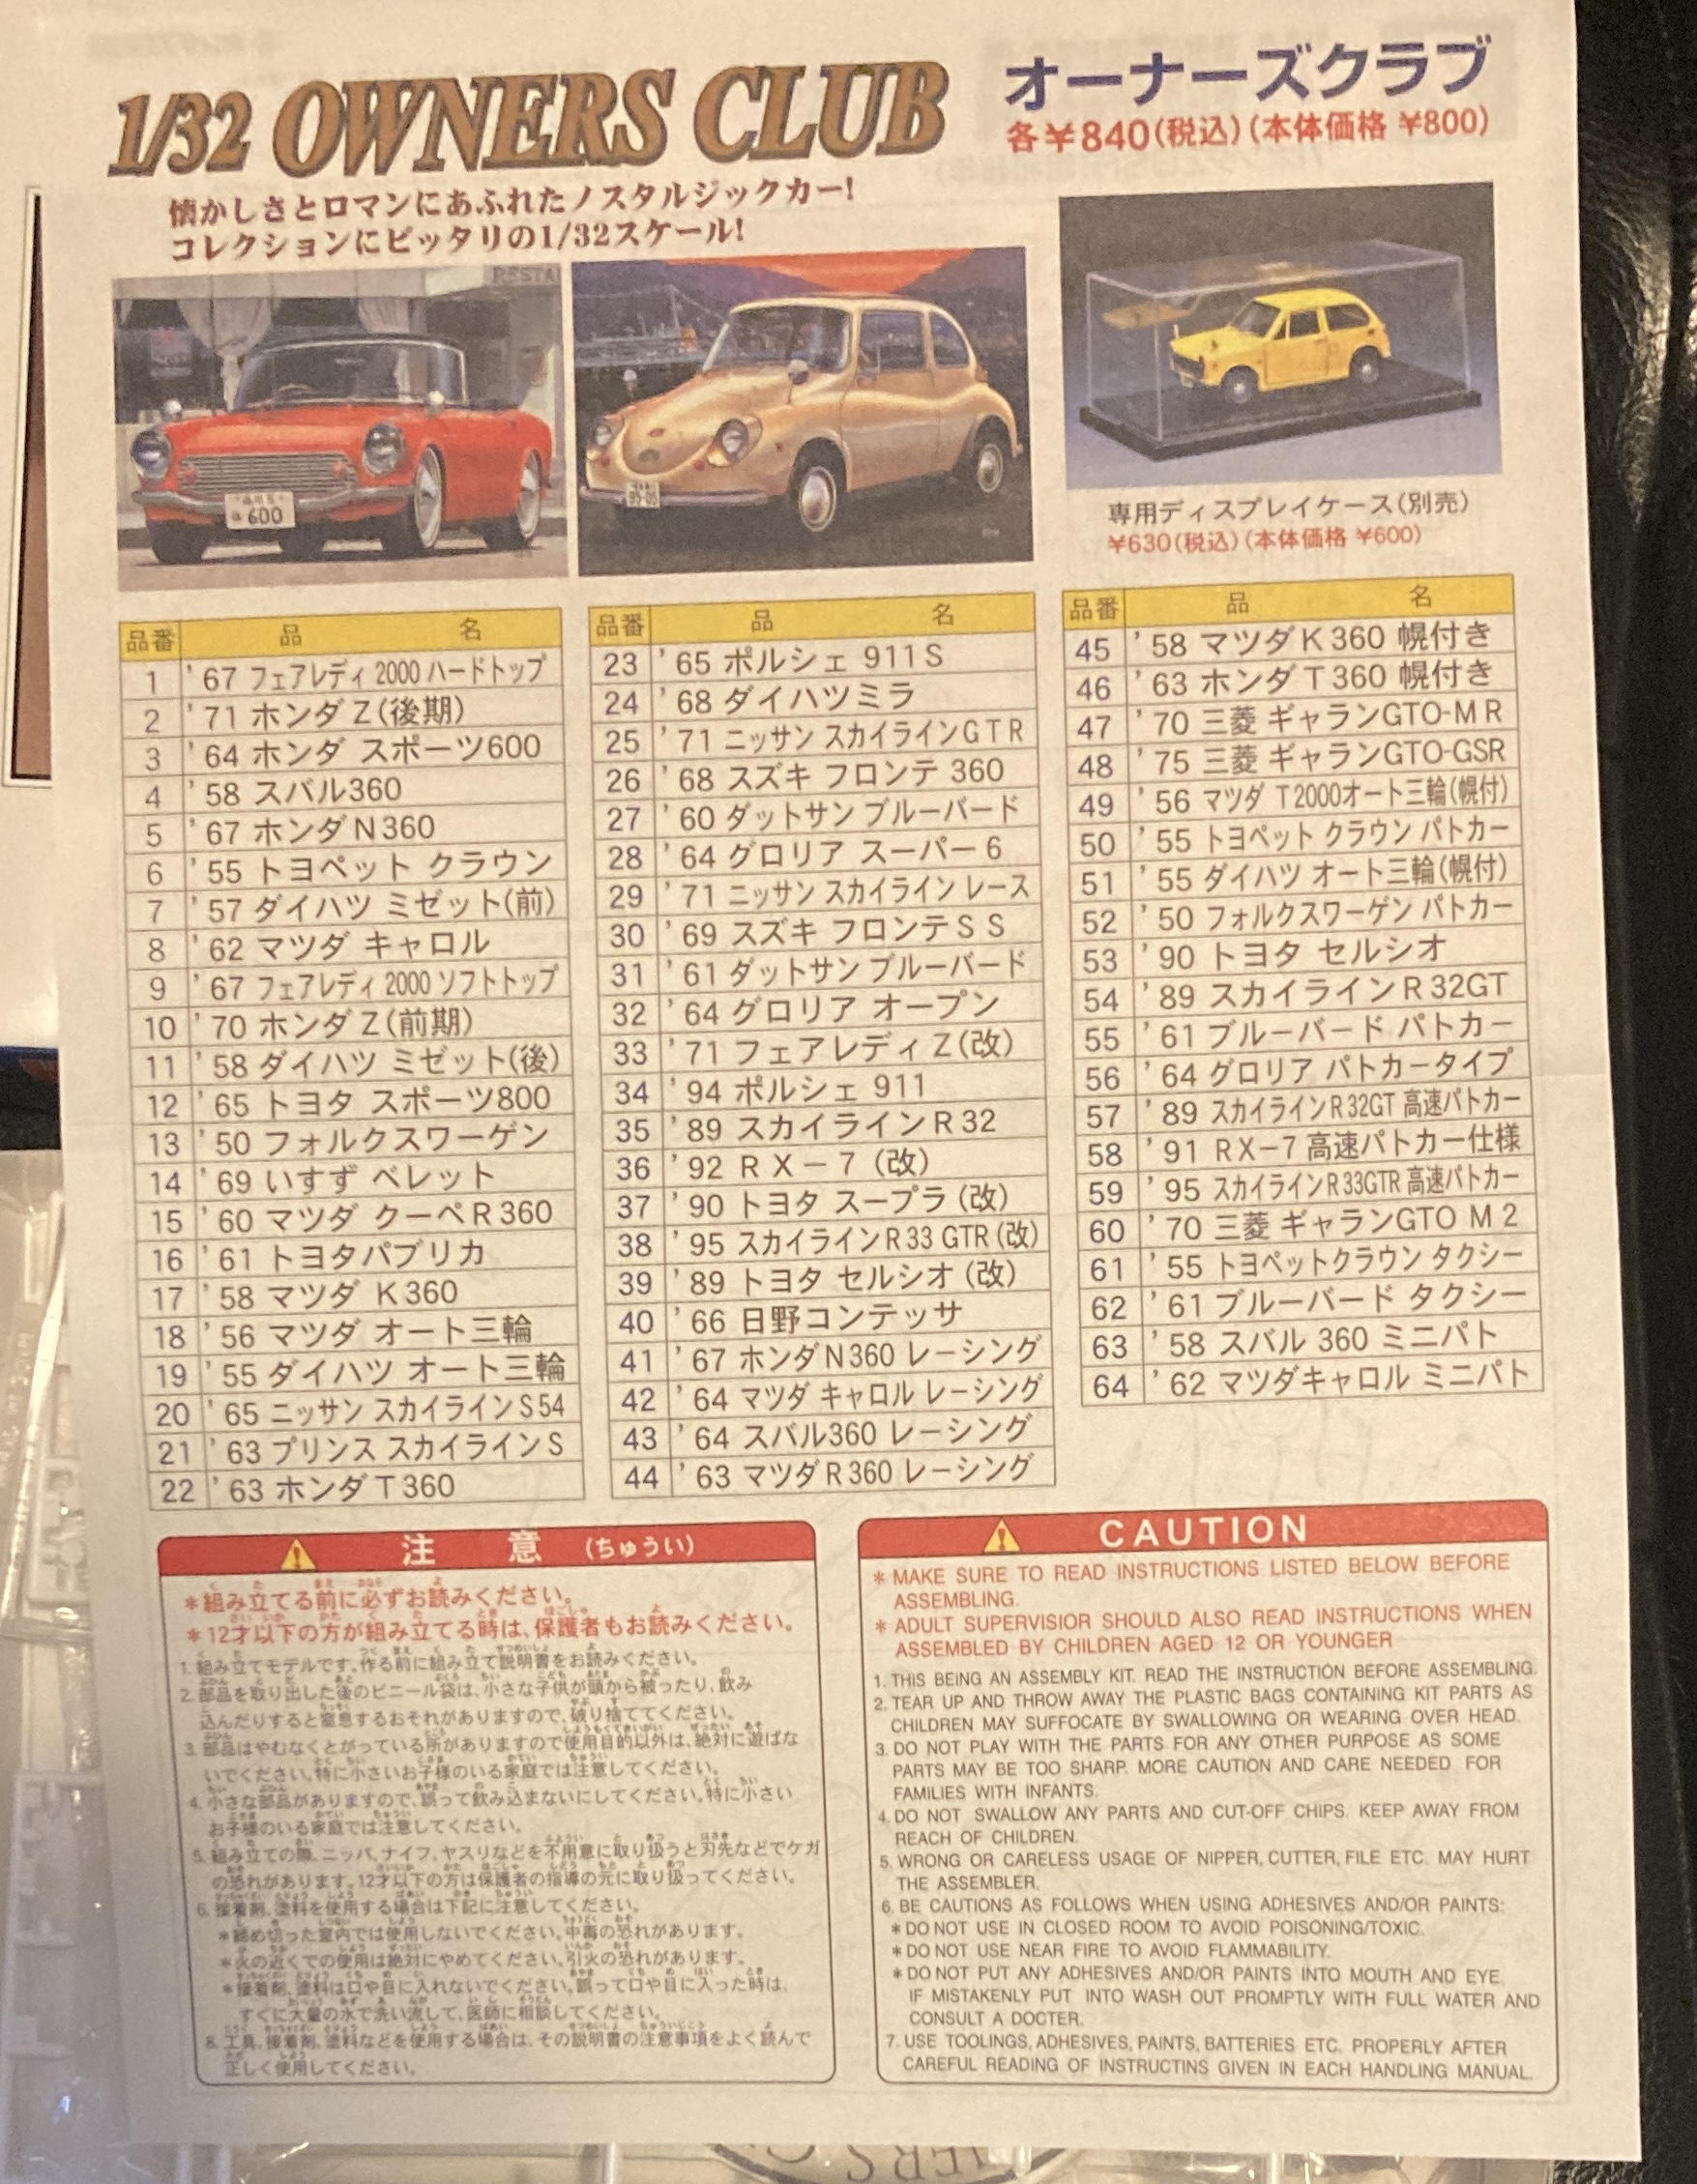
<p><img src="/assets/arii-honda-z/owners-club-catalogue.jpg" alt="The catalogue page of other Owners' Club cars." /></p>

<p>On the backside of those instructions, you’ll find a catalogue of other Arii goodies in the 1/32 Owners Club series. Those goodies include a very nice-looking display case. Wish I could order it from my local store for ¥600, or at all!</p>

<p>In true Japanese budget model kit fashion, roughly a quarter of the models available are the same car as another kit, but with police car lights on them.</p>

<p>Every kit is stated as being the same price. ¥840 with tax, or ¥800 without. I am not sure how this is possible, as consumption tax is now 10 percent, and I did indeed pay ¥840 and not ¥880 at Yodo. Maybe Arii is eating some of it?</p>

<p><img src="/assets/arii-honda-z/3-4-view.jpg" alt="The body is removed from the box, showing a relatively handsome white Honda Z body." /></p>

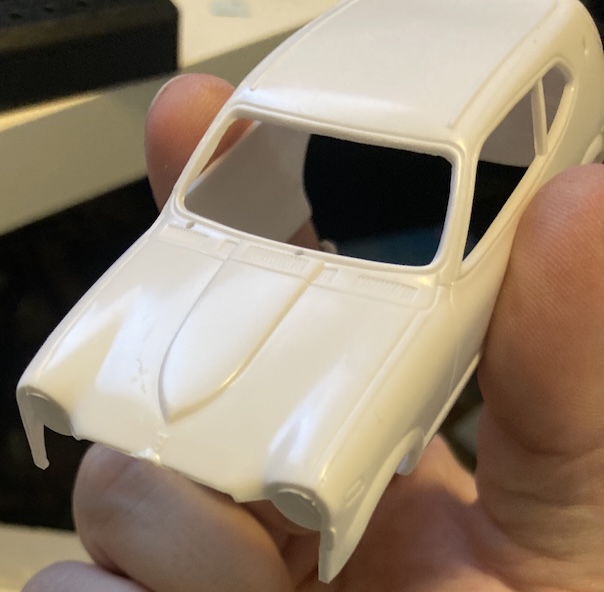
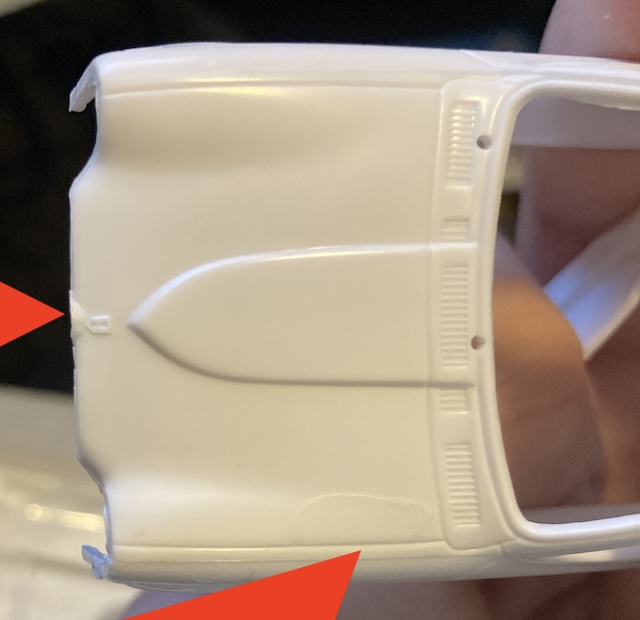
<p>As soon as I pulled the body out, I noticed some additional flash. There was some on the drivers’ side A-pillar, but the most annoying part was a leftover runner mark that had globbed up just under the logo.</p>

<p><img src="/assets/arii-honda-z/hood-flashing.jpg" alt="There is a glob of melted plastic just under the logo on the hood." /></p>

<p>I didn’t think that I had the appropriate tools for this, but I tried my best to clean it up with a sanding stick as <a href="/2026/04/23/tamiya-electric-handy-router-one-day-build.html">the Handy Router</a> was a much bigger risk than I wanted to take. The collection of Mini 4WD files I had were all too big as well.</p>

<p>Later, I realized that all I needed was my Olfa craft knife, but I’m getting ahead of myself.</p>

<p>Wanting to keep the embossed Honda logo made it very annoying to sand, as I had to go slow and keep looking to make sure I didn’t accidentally obliterate the bottom of it.</p>

<p>As soon as I had that glob knocked down a bit, I found that there was <em>also</em> a nasty uneven mark on the passenger side of the hood. It looks almost like there was a drip of plastic on the hood while the plastic was still soft.</p>

<p>I did not have a good plan on how to fix this flaw. My best idea was to fill it with putty and sand it flat, but without the right tools to do so, I figured I would only make things worse. I decided that if it looked bad after a colour coat, I would just flat-black the hood and pretend it was a race car.</p>

<p>Later on, while painting, I found a very tall mould parting line running the length of the body that I had missed. I decided that it was too late to fix at this point, but I wish I had seen it earlier. That sort of set the tone for the paint job in general, really.</p>

<h2 id="painting-al-fresco">Painting Al Fresco</h2>
<p>Despite my complete inexperience, and being told that yellow is one of the hardest colours to paint, I decided to paint this car yellow. This is actually the “Blue Angels” yellow Mr. Hobby Aqueous, which is a little more orangey than their regular yellow.</p>

<p>Part of the reason I picked yellow is that I had other yellow parts to paint at the same time, from the Holiday Buggy. I had pink Surfacer 1500 on hand, which I had bought specifically to prime yellow things, but I chose not to use it.</p>

<p>I then compounded the error of spraying directly onto the white body by doing it <em>outdoors</em>, in <em>direct sunlight</em>.</p>

<p>Most of the time, I could not see what I was doing, and would end up doing accidental “freak dots” or leaving big chunks of pigment when my rhythm was off. I also left some areas not as well painted, because faint yellow and white look almost the same in midday sun.</p>

<p>Like with other airbrush jobs in the past, the quality of my work increased dramatically as time went on. The topmost coats were much more even, and much better, as I had put them on super wet like I would have for a real car.</p>

<p>Whether this improvement is because I am getting a better “feel” for it, or the el-cheapo compressor overheating is somehow sending me good vibes, I don’t know.</p>

<p>What I do know is that my ability to see the leading edge of the paint improves also, and <em>that</em> makes a big difference. Welding and soldering were the same way, so I’m hopeful that my skills will improve here with practice as well.</p>

<p><img src="/assets/arii-honda-z/direct-sunlight-wet.jpg" alt="The body has orange speckles and uneven yellow. I also haven't fixed the flashing on the A-pillar." /></p>

<p>As you can see, the paint is very uneven, with the occasional orangey blob of running pigment. Because yellow is also very transparent, it’s <em>really</em> hard to cover up your mistakes on a previous coat with another coat.</p>

<p><img src="/assets/arii-honda-z/inside-after-drying.jpg" alt="The body has been curing for a few hours, and looks a little better in indoor light, but is still very uneven." /></p>

<p>I also had neglected to paint the inside at all; I had assumed that there would be more interior trim pieces covering it up, but consulting the web for pictures of the Honda Z interior shows body colour everywhere. From now on, I’ll start with the inside of the shell and paint the outside second – probably would have also put the ugliest of my paint mistakes on the inside, where they’d be harder to see.</p>

<p>After all that work, I was a little down about the outcome. The Holiday Buggy parts came out much worse, though, so I called it a learning experience about the dangers of yellow and brought it inside to dry.</p>

<p>I decided that instead of a new-from-the-dealer car, this was actually one that got crashed and repainted. A guy named Dean did it, in his parents’ backyard, in rural Alberta in 1985. There, now I feel better about it.</p>

<h2 id="painting-out-of-fresco">Painting Out of Fresco</h2>
<p>I also bought a paint booth, so I can do this indoors! Not having to carry all my stuff from the basement will at least help with my prep time, and I can finally live my dream of painting in the winter.</p>

<p>There were also some sprue nubs at the top of the windshield I didn’t notice until it was into paint. Filing those down returned it to white plastic in that region, but thankfully it was under a section that was going to get repainted as a window-moulding colour anyway.</p>

<p><img src="/assets/arii-honda-z/glob-on-rear-axle.jpg" alt="A glob of flash on the rear axle makes it very hard to install a wheel." /></p>

<p>I set about preparing the rest of the parts. There was a lot of flash on the second set of sprues, ranging from annoying (flaps coming off the seats,) to challenging (globs in between exhaust runners,) to extremely difficult, which you can see here with the glob around the rear axle. Slowly, I cleaned these up with the nipper and some very strategic use of sandpaper.</p>

<p><img src="/assets/arii-honda-z/interior-glob.jpg" alt="There is a glob of flash on the passenger side floorpan, it has even broken up the seat mounting bar." /></p>

<p>I wasn’t sure how to deal with this huge glob in the interior, which even interfered with the seat mounting positions. This spot would be visible as well! Ultimately, I decided to take a craft knife, and just very carefully clean up the area. Since it’s covered by the seats, it didn’t have to look good - it just had to let the seats sit flat. You can’t tell it’s there. We’ll pretend “Dean” had an accident with the jack, and didn’t do a good job repairing the floors either.</p>

<p><img src="/assets/arii-honda-z/interior-colour.jpg" alt="The interior pieces are all painted brown." /></p>

<p>I had a couple dark spots when painting the seats and door cards, so I decided to make the seats look a little lived-in. After installing the seats, I also noticed a bit of flash on the back that I had missed. Oh well. It’s not perfect, but they’re very tiny, and chances are they’ll be hard to see once they’re installed into the chassis.</p>

<p><img src="/assets/arii-honda-z/underbody-weathering.jpg" alt="Some brown weathering is around the detail spots on the underbody." /></p>

<p>With the leftover brown, I added a bit of wear and tear to the underside. Also, it covered up a couple spots where I had chipped the paint away by dropping the underbody while the paint was wet.</p>

<p>The suspension parts all got painted flat black. I was tempted to do something special with the front uprights, but there’s so little detail there that it wouldn’t be worth it. I got a little bit of quick-set cement on my finger as I was putting in the rear leafs, and wrecked the paint on one of the leaf shackles. Whoops! A black Sharpie fixed that up… as long as you don’t look too closely. Lesson learned about the dangers of quick-set extra thin. I switched to CA glue after this.</p>

<p>I also dumbly did not paint both halves of the springs, thinking that only the bottom half would be visible - turns out the top half is visible through the wheel well. You know, where it holds the <em>wheel</em> on.</p>

<p><img src="/assets/arii-honda-z/centre-caps-panel-lined.jpg" alt="The centre caps are painted Chrome Silver and then hit with black panel liner to give a nice enamel-like contrast. That's how you know it's a Honda." /></p>

<p>Miscellaneous pieces of trim that I wanted to be a brighter silver than the wheels – stuff like the shifter, centre caps, and rear view mirrors – got painted in Tamiya Chrome Silver. You absolutely cannot tell the difference between that and the Titanium Silver the wheels caught. I’m really happy how these centre caps for the wheels came out, mostly because I didn’t lose them. Unfortunately, the panel liner mostly evaporated after this, so it didn’t look quite that good on the finished car.</p>

<p><img src="/assets/arii-honda-z/has-tires-on-it.jpg" alt="The tires are on the bare chassis now. It looks kind of like a moon buggy." /></p>

<p>The centre caps were really hard to put on straight. The flare is a bit wider at the bottom than the design of the wheels allow for, but not wide enough to sit flat on those designs, so it can neither sit flush nor proud of the centre of the wheel. I sort of floated it with tweezers and held them in place with gel super glue, while looking at the sides to make sure it’s vaguely uncrooked, but it was extremely fiddly to do four times. If I did this again, I would probably try to sand some flats on the centre caps so it has something to lock into, but I’m not confident that I physically could.</p>

<h2 id="painting-again">Painting Again</h2>
<p>You know how it is. I started trying to clean up some of the flash inside the windshield frame, where it would be hard to see, and then I started cleaning up some of the more obvious flash on the front fenders. The front end didn’t seem to line up well, so I cleaned that up as well. Then I started scraping at the seam part line. All of a sudden, I had a lot of bare spots of white plastic on my little Honda, and it was decided for me that a full repaint was in order.</p>

<p><img src="/assets/arii-honda-z/hood-part-line-scraped.jpg" alt="The part line on the drivers' side front fender has been knocked down." /></p>

<p>You can still kind of see the part line near the A-pillar, but I was worried about obliterating the adjacent windshield frame’s detail with an errant knife slip. Hopefully my skill levels improve in the future and this kind of thing becomes less risky. The glob on the hood cleaned up really well with the knife, and so did the part line on the opposite side of the body.</p>

<p>Time to redeem the patchy paint job I did outdoors. Since there was already some paint built up, I decided to go over some of the door lines using a Hasegawa needle scriber. The plastic is <em>very</em> thin on this kit, so I ended up making some spots that are a little more transparent than I would have liked.</p>

<p>I scuffed the paint semi-thoroughly with 600 grit, 800 grit, and 1000 grit, and got ready to repaint. This time I decided to do it in Mr. Hobby Aqueous H24 Yellow-Orange, which I think is closer to the colour I had in my mind when I picked the Blue Angels yellow in the first place. Learning from my mistakes, I decided to paint the <em>inside</em> of the shell first.</p>

<p>To make sure I got an even coating of paint, I also picked a front end and glued it into place on the body. In retrospect, this was pretty risky – I should have used tape, or poster putty, to temporarily hold it – but I was fairly sure the headlights would still be able to go in and look good.</p>

<p>I started by painting the interior, because that would at least give me a good idea what was going on. As expected, the orange comes out very faint and yellow on the initial coats, and “oranges up” quickly, so it takes some discipline to make sure the number of coats is even. That technique was maybe 80% successful, but it will be hard to tell once the car is assembled. After the warning provided by that minor debacle, I decided that it would be a lot easier to track where I had and had not painted by re-priming the exterior.</p>

<p><img src="/assets/arii-honda-z/in-pink.jpg" alt="The Honda Z has become pink." /></p>

<p>Lucky for everyone, I had pink Surfacer 1500 on hand. This was a little unusual compared to other paints: for one, it didn’t clean up from the bowl very easily. I’m not sure I mixed it sufficiently, or maybe my brush was clogged, as the first couple minutes of spraying were very weak until I got some proper flow and it laid out nicely. Priming the car, of course, exposed all of the little slips I made while scribing panels. Oops. I’m new, give me a break.</p>

<p>Once it was cured, the surface felt nice and smooth, so I decided it was time to move directly to a topcoat. Sometimes surfacer is kinda rough, like when <a href="/2026/05/21/daxing-rising-trigger-build-and-paint.html">I used the spray can on the body of the Rising-Trigger</a>. It certainly did not cover up all of the damage I did with a scriber, but I was ready to get this thing into a reasonable colour and move on to the next kit.</p>

<p><img src="/assets/arii-honda-z/in-orange.jpg" alt="The Honda Z has become orange." /></p>

<p>I was bad at managing overlaps and probably some corners got painted more than others, but I was happy with the much more even orange-y colour that came out. It looked very yellow coming out of the airbrush, but dried a lot more orange.</p>

<p>Removing it from the LEDs of the paint booth, the natural light shows that it is in fact extremely orange.</p>

<p><img src="/assets/arii-honda-z/really-in-orange.jpg" alt="The Honda Z is now in daylight, and appears much more orange." /></p>

<p>Good enough for me. Now to do all the black and chrome parts!</p>

<h2 id="trim-painting">Trim Painting</h2>
<p><img src="/assets/arii-honda-z/rubber-back-after-masking.jpg" alt="The hatch looks OK, if overmasked." /></p>

<p>Even with some masking, I still pushed too hard with the Rubber Black pen and got it under the tape on the rain rails. I then tried to fix things with a pointy q-tip, but probably made it worse. At least the rear hatch area<sup id="fnref:abs" role="doc-noteref"><a href="#fn:abs" class="footnote" rel="footnote">2</a></sup> has come out very nicely: after this, I touched up the missing points very carefully.</p>

<p><img src="/assets/arii-honda-z/badge-and-corner-silver.jpg" alt="The Honda badge is nicely silver." /></p>

<p>A silver Sharpie touched up the corner turn signals and the Honda badge on the front. Then I tried to use a new Posca silver marker on the bumper, which turned into a huge disaster. It just wouldn’t dry: running all over the place, slinging off the bumper and under the tape. I ended up pulling the tape off, doing what I could to recover it with a q-tip, and then redoing the bare spots with a silver Sharpie.</p>

<p><img src="/assets/arii-honda-z/window-trim-silver.jpg" alt="The window trim is silver, but the bumper is almost entirely bare of silver. Thanks Mitsubishi!" /></p>

<p>I then went on to do the rear bumperettes, the badges, the grille surround, and the infill for the tail lights. Those went great, so I moved on to the window trim, which surprisingly went really well. The secret, it turns out, is to only take small little “bites” with the very tip of the Sharpie, and only push rather than push and pull. I still made the occasional slip when I got too eager, but this made me feel really good.</p>

<p><img src="/assets/arii-honda-z/rear-window-trim-silver.jpg" alt="The inner silver trim of the rear window is done. You can see one obvious slip." /></p>

<p>The rear “GSS” badge was barely decipherable even when the kit was bare, and it turns out that repainting the car made it even less visible. It just kind of looks like a glob instead of distinct letters. I should have tapped the marker to these letters very gently instead of trying to swipe.</p>

<p><img src="/assets/arii-honda-z/headlights-in.jpg" alt="The headlight lenses are installed. You can see a little bit of drippage from the Posca marker on the leading edge of the front fenders. Thanks again, Mitsubishi!" /></p>

<p>After sealing the back of the headlights with some more silver Sharpie, I ended up sanding them down substantially. As they come off the sprue, they’re not very round at all, and wouldn’t even fit in the opening. A lot of tactical filing and sanding made them round again, and then they fit great. Hey, it looks like a car now.</p>

<h2 id="tail-lights">Tail lights</h2>
<p>I noticed that the tail light section was fairly recessed. Although it was still pretty shallow, I figured maybe it would be possible to make it look nice. Arii didn’t include clear parts for the tail light, and just calls out “clear orange” and “clear red” for the colour, with presumably a chrome silver backing.</p>

<p>I had recently gotten a little UV resin kit. I’ve seen model makers on YouTube use the resin to fill in dashboard gauge lenses, and so I’ve thought about trying it for awhile. This seemed like the perfect application.</p>

<p>For those similarly uninitiated, UV resin comes out as a slightly sticky goop that you can push around with a toothpick and clean up with a Q-tip. It only becomes hard when you cure it using a UV flashlight (or presumably the sun, if you have a lot of free time.) My resin kit had a little eyedropper, although the opening was way too big for precision work. Even so, I dropped a glob onto the right tail light, popped some bubbles, mixed it around to release the surface tension, and watched it flow mostly into the shape of the tail light. Then I cured it.</p>

<p>On the left side tail light, I had quite a bit seep out, even after trying to clean it up with a Q-tip, and so there’s a lot of goop outside of the tail light bucket. However, this stuff cures optically clear, so it just looks like a partially-applied gloss clear coat, which I was going to do anyway.</p>

<p>Since I only have Aqueous clear red and clear orange, I didn’t want to brush paint them on. Instead, I bought a set of coloured Sharpies, and got out the red and orange ones.</p>

<p><img src="/assets/arii-honda-z/tail-lights-detail-painted.jpg" alt="The tail lights, consisting of a turn signal, brake light, and reverse light." /></p>

<p>Defying the instructions, I decided to keep the innermost part of the lenses unpainted, so as to act like a US-market reverse light. It also helps a little bit with letting some light in behind the coloured sections. In other words, the rear lights from the inside to the outside are coloured white/red/orange. This configuration doesn’t seem to exist in reality, as the US-market turn signals are also red instead of amber, but I think it looks better this way.</p>

<p>Did all of this extra work really come out with a better result? Not that I can tell. The red Sharpie is pretty opaque, and at this scale, it’s very hard to notice the additional depth, even if you’re looking for it with a directional light. That said, it was fun to try something new, and now I’m not going to be afraid to do this on gauge clusters or wheel centre caps.</p>

<h2 id="fiddly-bits">Fiddly bits</h2>
<p>For the last couple of trim pieces, I again was lazy and just used the silver Sharpie. The corner badges required some fiddling, but went on fairly straight.</p>

<p>After some deliberation, I skipped out on the fender mirrors: attaching them would be just too fiddly, and all of my dry fits looked terrible. Japanese fender mirrors are not parallel, with the drivers’ side mirror being closer to the headlights than the passenger side.</p>

<p>I also skipped the rear-view mirror for the aforementioned reasons of fiddliness. There’s a place on the canopy where it <em>looks</em> like it might attach, but there’s no receptacle for the mirror’s peg on it.</p>

<p>Should I clear coat this whole thing? I thought about it, but ultimately decided I wouldn’t want to lock in the silver smears from the front bumper for all eternity. Perhaps when I’m feeling like revisiting this model, a future generation can flat-black the car and turn it into a kaido racer. Or I can just buy another.</p>

<p>It was difficult for me to eyeball the angle of the windshield wipers, but I think they went on in a natural-looking way. Worst case, Dean put them back on wrong when he swapped a burned out wiper motor in the past. C’mon, Dean.</p>

<p>Calling it. I affixed the canopy with clear Elmer’s glue, which gave me a lot of curing time to think about what I was doing. Maybe too much time.</p>

<p>I only realized after it cured that I forgot to rubber-black the <em>blades</em> of the wipers before putting the windshield in.</p>

<h2 id="its-really-done">It’s Really Done?</h2>
<p><img src="/assets/arii-honda-z/outside-passenger-side.jpg" alt="The car is outside, with the passenger side on display." /></p>

<p><img src="/assets/arii-honda-z/driver-side.jpg" alt="A far shot of the driver side of the car, showing the embarrassing Sharpie mark in the middle of the door." /></p>

<p><img src="/assets/arii-honda-z/close-up-passenger-side.jpg" alt="A close shot of the grille and the front end on the passenger side of the car." /></p>

<p><img src="/assets/arii-honda-z/passenger-side.jpg" alt="The passenger-side shot of the car, sitting on my airbrush booth." /></p>

<p><img src="/assets/arii-honda-z/finished-underbody.jpg" alt="A shot of me holding it in my hand, so you can appreciate the weathering on the underbody." /></p>

<p><img src="/assets/arii-honda-z/outside-top.jpg" alt="The car is once again outside, with a close-up of the windshield. It is too sunny to see the interior, but you get a great shot of how bad the rain rails are." /></p>

<p>Yes, it’s really done!</p>

<h2 id="club-sandwich">Club Sandwich</h2>
<p>Despite all the problems I had building this kit, the charm of the Arii packaging and the kit shone through. It combines intricate detail with a fun toylike scale and a ridiculously low price. This is by far my favourite of the model kits I’ve constructed so far, and I’ve already ordered a handful of other Arii 1/32 Owners’ Club kits from Japan.</p>

<p>If you get the chance to build one of these, I bet you will have even more fun than me.</p>

<p>Thanks for reading! Please look forward to the next project.</p>
<div class="footnotes" role="doc-endnotes">
  <ol>
    <li id="fn:rising-trigger" role="doc-endnote">
      <p>The Rising-Trigger was <em>finished</em> first, but I started airbrushing on this car. You’ll see why this one wasn’t finished first very soon. <a href="#fnref:rising-trigger" class="reversefootnote" role="doc-backlink">&#8617;</a></p>
    </li>
    <li id="fn:abs" role="doc-endnote">
      <p>Although I thought initially the rear hatch/window surround was a rubber thing, it turns out it’s actually a very early – and pretty enormous – injection-moulded ABS plastic piece. On this particular Z’s one, I guess it must look a little more rubbery. Dean did it. <a href="#fnref:abs" class="reversefootnote" role="doc-backlink">&#8617;</a></p>
    </li>
  </ol>
</div>]]></content><author><name></name></author><category term="mokei" /><category term="arii" /><category term="honda" /><category term="honda-z" /><category term="owners-club" /><category term="car" /><summary type="html"><![CDATA[This model kit of a ‘71 Honda Z GSS was picked up at a Yodobashi Camera. I was drawn to its adorable 1/32 scale and its incredibly cheap price. Are these Owners’ Club kits junk? Do I have what it takes to paint and build this little car?]]></summary><media:thumbnail xmlns:media="http://search.yahoo.com/mrss/" url="https://plasmadash.com/assets/arii-honda-z/close-up-passenger-side.jpg" /><media:content medium="image" url="https://plasmadash.com/assets/arii-honda-z/close-up-passenger-side.jpg" xmlns:media="http://search.yahoo.com/mrss/" /></entry><entry><title type="html">Holiday Buggy build</title><link href="https://plasmadash.com/2026/06/18/tamiya-holiday-buggy-build.html" rel="alternate" type="text/html" title="Holiday Buggy build" /><published>2026-06-18T00:00:00+00:00</published><updated>2026-06-18T00:00:00+00:00</updated><id>https://plasmadash.com/2026/06/18/tamiya-holiday-buggy-build</id><content type="html" xml:base="https://plasmadash.com/2026/06/18/tamiya-holiday-buggy-build.html"><![CDATA[<p>Other than helping out some adults (by holding tools) as a kid, I haven’t built an R/C kit before. I can build a Mini 4WD! How much harder could a Tamiya Holiday Buggy be? It turns out, not much harder. Except for the stickers.</p>

<p><img src="/assets/holiday-buggy/yokoso-rainbow-tower-tokyo.jpg" alt="Yokoso Rainbow Tower is seen from the Yurikamome robot(!) train coming into the Tokyo Bay." /></p>

<p>When I was in Tokyo, I somehow ended up with some additional free checked baggage capacity, and I decided the best way to take advantage of that would be to go get another RC car. Yeah, another. I had already picked up a Blitzer Beetle on the same trip. You’ll see that one later.</p>

<p>This kit came from the Tamiya Plamodel Store in Shimbashi. I paid more than I would have on Amazon JP, but that’s alright. I also got some bearings while I was there; it’s all 1150s, as verified by one of the staff members who opened the box and checked the manual to make sure.</p>

<p>Why the Holiday Buggy? Well, it’s cheaper, but the primary reason is that the new post-2010 Holiday Buggy is based on the DT-02 chassis. There’s lots of parts available, and it’s got a good reputation for durability. It will be the perfect learning vehicle for the kiddo; the box even says so.</p>

<h2 id="shopping-list">Shopping List</h2>
<p>Why are these cars so cheap? In most configurations, Tamiya just sells you the mechanical parts of the kit. I would need to add:</p>

<ul>
  <li>a speed controller;</li>
  <li>a battery;</li>
  <li>a radio receiver;</li>
  <li>and a steering servo.</li>
</ul>

<p>In case you don’t know what these are, I learned what all of these parts do way back when I was <a href="/2025/04/16/tandy-atcomi-beetle-electronics-esc.html">retrofitting a new speed controller into my toy-grade Radio Shack Beetle</a>. I need to get back to that project too!</p>

<p>The MG996R steering servo and 1060 clone speed controller came from AliExpress, and were originally destined for a different project. Turns out they fit just fine, and I’m happy as long as they work.</p>

<h2 id="assembly">Assembly</h2>
<p><img src="/assets/holiday-buggy/front-suspension-and-cats.jpg" alt="The front suspension is assembled. A cat looks on. Another cat faces the other direction, indifferent." /></p>

<p>A big help to me was getting the proper Tamiya screwdrivers. I’m not new to JIS screwdrivers by any means, but the ones I had that were the proper size for these screws were also too big to go into the holes in e.g. the transmission case. After splashing out for some Tamiya R/C drivers, everything went super easy.</p>

<p><img src="/assets/holiday-buggy/servo-installed.jpg" alt="The steering servo is installed." /></p>

<p>I found adjusting the plastic steering turnbuckles to be pretty annoying. I think I might try to find if there’s a part that can be adjusted on the car.</p>

<p><img src="/assets/holiday-buggy/rear-wheel.jpg" alt="The rear wheel is installed, completing the mechanical part." /></p>

<h2 id="electronics">Electronics</h2>
<p>Right away, I ran into a problem. The power switch on the 1060 clone I was using didn’t fit into the pan brackets provided by Tamiya. This was a big surprise to me, as I thought Tamiya had been shipping the 1060 packaged with some of their RC cars!</p>

<p>Luckily, I found <a href="https://www.thingiverse.com/thing:6412705">a Thingiverse project that consisted of a 1060-to-Tamiya power switch adapter bracket</a>. Still not having a printer, I told JLCPCB to make five of them, which cost just over $3 CAD shipped in total.</p>

<p><img src="/assets/holiday-buggy/switch-adapter.jpg" alt="The switch adapters, sitting in the box." /></p>

<p>Unfortunately, this adapter did not fit whatever switch my clone 1060 was using. From the comments, it seems like there are at least three kinds of switches being used by 1060s. I thought about chopping the end off this one and soldering in a new switch, but I decided it would be easier to just design my own adapter bracket instead. Stay tuned for that!</p>

<p>For a battery, I went to my local store and asked them for a battery. They sold me a soft-cased GENS ACE 2200mAh lipo.</p>

<p>Mounting the battery was something that gave me a bit of anxiety. Like most lipo batteries for RC cars, this one is a “soft case” – it’s just the loose pouch cells wrapped together in some heat shrink. Bouncing around inside the car would be a really bad idea, and if anything were to substantially bend or impact the battery, we’d probably have a fire on our hands.</p>

<p>I ended up wrapping the battery compartment on the Holiday Buggy pan with soft “Frost King” 5/16” foam tape, and then smushing the lipo between layers of that foam tape to immobilize it.</p>

<p>My first fire-up had a bit of a surprise: the car tried to drive itself right off the kitchen table! I hadn’t even bound the receiver yet, so I guess the auto-braking did it. After that, I made sure to only turn the car on when it was off the ground: I used some cat food tins for axle stands.</p>

<p>Once everything was bound and trimmed, I did a celebratory low-speed figure-eight around my house. The cat hated it. He’ll come around.</p>

<h2 id="paint-and-stickers">Paint and stickers</h2>
<p>There’s thankfully not much to paint on this model, otherwise I would have been in paint paralysis mode. The body actually can’t be painted, since it’s made out of polyethlyene “milk jug” material. You’d have to use a flex additive and real catalyzed paint, like on a 90s car bumper.</p>

<p>My initial strategy was to paint dark to light: do the cockpit in flat black, the driver’s arms in “flat flesh,” and the driver’s shirt in whatever ridiculous colour I had loaded in the airbrush for another kit.</p>

<p><img src="/assets/holiday-buggy/driver-masked.jpg" alt="The driver is all masked up." /></p>

<p>One thing that did need to be painted was the driver figure. I’d never masked this much before; I was strictly a “one racing stripe” kind of painter. I got some 6mm Tamiya tape and did my best with an Olfa craft knife.</p>

<p>I am still really inexperienced with model painting in general. I was thankful that any mistakes I made here would be mostly hidden in the cabin and maybe even get obliterated in a huge wreck, if I’m lucky.</p>

<p><img src="/assets/holiday-buggy/driver-masked-background-painted.jpg" alt="The driver's background is now flat-blacked." /></p>

<p>I forgot to wash this to remove any mould release and finger oils before masking it; I will be way better at doing this in the future. I also had trouble sticking to a consistent paint pattern, which is why you see a bit of the tiger-striping and lighter areas here.</p>

<p><img src="/assets/holiday-buggy/overmasked-driver.jpg" alt="The driver is unmasked." /></p>

<p>Although I erred on the side of overmasking, I think the driver came out pretty unharmed. I resolved to develop basic skills at brush painting so I could clean this up.</p>

<p>My favourite local hobby store was out of flat flesh in everything but little enamel bottles. I decided to make use of the X-20 enamel thinner I had bought by mistake on a previous visit and brush it on.</p>

<p><img src="/assets/holiday-buggy/driver-arms-painted.jpg" alt="The arms are painted, although there's little flecks of overpainting here and there on the black surface." /></p>

<p>I should probably have done more for masking (I smacked the dashboard at one point while trying to get a finger) but it looked fine from a distance. To clean the brush, I picked up “The Masters” brush cleaner, which comes as a kind of hard brick of soap. It took me a really long time to figure out how to get it into a soapy-water form, but it seems to have cleaned and not ruined my brand new brush.</p>

<p>Good enough for now; let’s move on to the t-shirt.</p>

<p>In retrospect, it would have been way easier to paint light to dark in this case. Get all the skin done, then mask the arms, spray the shirt, mask the entire driver, and then spray the background. Flat black would easily cover up any errant colour in this scenario and it’d go much faster with way fewer missed spots.</p>

<p>I made a complete hash of trying to draw eye-whites and pupils on the driver’s face using super thick Testors paint markers, so I’m not going to show that. Let’s just pretend it’s hidden by the hat at all times. Rest assured I am ashamed and will clearly have to buy some “bystander figure” model kits to practice on in the future. Gundam markers for me from now on.</p>

<p>The roof was relatively simple to spray out; I used some Dspiae pre-thinned teal and just went to town. Since I’m still having trouble keeping consistent distance from the panel, and the fan on this brush is so tiny, I ended up having a bit of tiger striping. I would do way better if I repainted it now. You can’t really see it, and again, this thing is gonna be rolled.</p>

<p><img src="/assets/holiday-buggy/gas-cans-base-coat.jpg" alt="The gas cans are a relatively light grey for a supposedly dark grey" /></p>

<p>The gas cans <em>did</em> come out great (the first time.) I did those in Tamiya XF-24 “Dark Grey,” which didn’t actually look that dark when it dried. Turns out the LED lighting in the booth is a little bit deceptive.</p>

<p><img src="/assets/holiday-buggy/gas-cans-base-coat-white-bg.jpg" alt="With a white paper background, the can looks much darker and better defined." /></p>

<p>I used Mr. Hobby Levelling Thinner again at a 1:1.5 ratio, which seems to soak up a lot of my incompetence. It laid out super smooth. I have a lot more success painting tiny stuff than big stuff; clearly I should work harder at paneling big stuff and taking my time.</p>

<p><img src="/assets/holiday-buggy/gas-can-belt-is-nice.jpg" alt="The brown belt on the can looks really nice, but you can tell the dark grey paint is falling off." /></p>

<p>It’s really time-consuming to mask all the way around the handle, just so that you can spray the bit of belt that sticks under it!</p>

<p>Things started to get worse from here. That dark grey Tamiya paint did seem to scratch off easily when I accidentally hit it with my fingernail, so I need to do some more sanding before the first coat of this paint (I did wash these cans at least, unlike the driver.) Luckily, that section was covered when I painted the “belt” holding it on, but I scratched a lot more of it while removing the tape.</p>

<p><img src="/assets/holiday-buggy/tamiya-paint-damage.jpg" alt="A ton of paint is missing from the handle of the gas can, exposing shiny white plastic beneath." /></p>

<p>Ultimately, I solved this problem by roughly respraying the damaged parts (I’m glad it levels so well!) and then spraying some matte top coat over it. I hope this will hold up long-term, but I guess you’ll find out if there’s a future article called “I rolled my Holiday Buggy within five minutes and now we have to repaint everything.”</p>

<p>Cutting the stickers out of the sticker sheet and mounting them was very nerve-wracking, especially the super long hood stripes. I made a little mistake at the very front, which I tactically covered up with one of the leftover stickers on the sheet. As you do with this kind of thing, all I can see are flaws.</p>

<p><img src="/assets/holiday-buggy/driver-side-finished.jpg" alt="The driver is painted, assembled, and sitting in the cab of the car." /></p>

<p>Finally, it was time to paint the driver’s shirt. I had a disaster with masking tape pulling up the paint on a kit just a few days previous, so I was really worried about masking around the driver, but everything turned out okay. Thanks, flat black paint. You’re really tough.</p>

<p><img src="/assets/holiday-buggy/rear-3-4-view-finished.jpg" alt="The same shot of the car, from the driver's side rear." /></p>

<p>Once again, I overmasked and missed some areas. If it ends up really bothering me, I might bring the airbrush in super close and spray a gentle shadow-fade outline around those areas with flat black. Like the pros say: painting is all about covering up the mistakes you made on the previous layer.</p>

<h2 id="lets-go-menace-the-cat">Let’s go menace the cat</h2>
<p><img src="/assets/holiday-buggy/finished-menacing-the-cat.jpg" alt="The Holiday Buggy is tooling around my living room. My cat stares in impotent rage." /></p>

<p>Sadly, it’s raining very hard, so I can’t take the non-waterproof Buggy out for a proper outdoor spin right now. Add that to the to-do list!</p>

<p>I had a lot of fun building my first Tamiya R/C car, and I just so happen to have purchased a bunch more that are going to follow in its steps. Thanks for reading!</p>]]></content><author><name></name></author><category term="rc" /><category term="tamiya" /><category term="holiday-buggy" /><category term="dt02" /><category term="car" /><summary type="html"><![CDATA[Other than helping out some adults (by holding tools) as a kid, I haven’t built an R/C kit before. I can build a Mini 4WD! How much harder could a Tamiya Holiday Buggy be? It turns out, not much harder. Except for the stickers.]]></summary><media:thumbnail xmlns:media="http://search.yahoo.com/mrss/" url="https://plasmadash.com/assets/holiday-buggy/driver-side-finished.jpg" /><media:content medium="image" url="https://plasmadash.com/assets/holiday-buggy/driver-side-finished.jpg" xmlns:media="http://search.yahoo.com/mrss/" /></entry><entry><title type="html">The Trigger Also Rises</title><link href="https://plasmadash.com/2026/05/21/daxing-rising-trigger-build-and-paint.html" rel="alternate" type="text/html" title="The Trigger Also Rises" /><published>2026-05-21T00:00:00+00:00</published><updated>2026-05-21T00:00:00+00:00</updated><id>https://plasmadash.com/2026/05/21/daxing-rising-trigger-build-and-paint</id><content type="html" xml:base="https://plasmadash.com/2026/05/21/daxing-rising-trigger-build-and-paint.html"><![CDATA[<p>Now that I’ve <a href="/2025/03/25/rising-trigger-super-xx-chassis-fix.html">fixed the Rising-Trigger knockoff chassis’s broken motor mount</a> in the previous entry, it’s time to move on and start building the car. Of course, since it’s a knockoff Daxing chassis, this car will mostly be used for display. So we better do a good paint job. Did I mention it’s my first paint job?</p>

<h2 id="paint-prep">Paint Prep</h2>
<p>I started out by cleaning the model in dish soap and warm water, and then moved on to wet-sanding it down. The Daxing plastic is extremely shiny, which means it probably won’t take paint very well, so roughing it up felt like the right thing to do. I used 800-grit hardware store sandpaper, although it was difficult to get into all the nooks and crannies with it.</p>

<p>For priming, I decided to use Surfacer 1000 in grey, because that’s what was available. I had never used Mr. Hobby surfacer before, and I could only get the spray bomb in the store, so consider this a bit of a learning project. Even with my terrible airbrush skills, I would have preferred to get this in airbrush format. Not only is it cheaper, but it’s a lot easier to apply. Spray bombs are really messy when you’re trying to hit a complex target just slightly smaller than a TV remote.</p>

<p><img src="/assets/rising-trigger/surfacer-1000-with-cat-hair.jpg" alt="After the first coat of Surfacer 1000, it is very spackly. There is a cat hair on it." /></p>

<p>As per the usual instruction, I did a quick light coat for my first shot. Then I immediately found a cat hair on it.</p>

<p>I am very glad I have a place to do this outside, because boy does this stuff stink. That’s how you know it’s working! You definitely want to put on at least a dust mask even so. If I could have done this over again, I would have filed down the sprue marks on the corners a little better before getting the cowl ready for paint. They weren’t obvious when the model was all in black, but immediately popped out at the surfacer stage, and are very obvious in the colour.</p>

<p>I waited 10 minutes between coats, setting a timer so that my notorious lack of patience didn’t screw up the job again. I tried really hard to only use gentle pressure on the trigger so it wouldn’t spatter.</p>

<p><img src="/assets/rising-trigger/surfacer-1000-2nd-coat.jpg" alt="After the second coat of Surfacer 1000, the coating is nice and smooth." /></p>

<p>My second coat went on a little thicker, and by then I had run out of time and weather to paint. After a couple hours of drying in the sun, it looked amazing as I brought it inside to cure overnight. So let’s assume I did that right.</p>

<h2 id="paint">Paint</h2>
<p>That fresh surfacer then cured over a <em>lot</em> of nights; it sat in my basement for the entire winter! Finally, as part of learning to airbrush in general, I was casting around for something – anything – ready to paint after getting an indoor paint booth. Retrieving it from the basement, I then lit up the inner details with some Dspiae orange paint.</p>

<p><img src="/assets/rising-trigger/highlights.jpg" alt="Orange highlights are sprayed into the innermost detail areas of the car, including the motor hump." /></p>

<p>This provided a good excuse to learn how to mask, which took a long time, but I think looked pretty nice considering my inexperience. I have to be more gentle with the knife for sure, as I put some deep gouges in the surfacer that show up when you look closely. Probably, it is a bad idea to cut the masking tape direct on the body <em>at all</em>.</p>

<p><img src="/assets/rising-trigger/masked.jpg" alt="The highlights are covered up by the masking tape to prepare for the colour coat. Some X-20 thinner is in the background, which you absolutely should not use for acrylics." /></p>

<p>I decided to top-coat with Mr. Hobby Aqueous “Sky Blue,” because it was what was on the desk at the time. Learning from my many mistakes in the past, I tried hard to make sure each surface got an adequate coating. This was made a little bit easier since there are <em>so many</em> flat surfaces to help me split up my panels, instead of just one large one like on most real cars.</p>

<p><img src="/assets/rising-trigger/colour-coat-1.jpg" alt="The blue colour coat is present now." /></p>

<p>I noticed that even the orange paint was very soft and thin. Maybe I should have done more coats? I wasn’t sure if only the clear coat was meant to protect the colour layers.</p>

<p><img src="/assets/rising-trigger/colour-coat-2.jpg" alt="Another view of the car. You can see some wavy masking lines." /></p>

<p>I had a bit of trouble with the end of the masked stripes fraying at the ends when I tried to cut them at the body edge. I think i should have used another piece of masking tape sideways to end the stripe, but that’s a lesson learned, and the spoiler will cover most of my sins.</p>

<p>I wanted to do a clear coat to keep the paint from chipping off, so I grabbed a jar of Mr. Hobby Aqueous GH-101 “Premium Topcoat Smooth Clear,” and put it on. It is a matte finish, which I somehow missed despite being prominently stated on the label. Smooth Clear is very gloopy and viscous in the jar, so I thinned it 1:2 and seemed to get a decent result.</p>

<p><img src="/assets/rising-trigger/thumbprint-damage.jpg" alt="There's a smear in the quarter's blue paint showing some exposed orange-ish colour." /></p>

<p>Although everything went (ha!) smoothly, it wasn’t perfect. One big whoopsie is when I put it on way too wet and then stuck my thumb in that exact spot a couple seconds later to turn the car around. The thinner had softened the paint beneath it and I mushed the whole thing.</p>

<p><img src="/assets/rising-trigger/test-fit-no-rollers.jpg" alt="The body is mated with the chassis, which has wheels and axles, but no rollers." /></p>

<p>At least it draws some attention away from the fact that I failed to sand down the sprue marks on each side.</p>

<h2 id="dry-fit">Dry fit</h2>
<p>Even so, I was now confident enough to try a test assembly with the rest of the car. I put the driveshaft, the countershaft gear, and the drive gears into the chassis, and loosely installed the axles.</p>

<p><img src="/assets/rising-trigger/test-fit-no-rollers-front.jpg" alt="Head-on, you can see that the tires look oddly wide compared to the body." /></p>

<p>I considered painting the wheels, but gave up when I realized the inner rim was still visible around the tires. I’m not sure how the Rising-Trigger “aero” wheels really vibe with this colour, but unfortunately they didn’t cover up the blemish I made in the front left quarter of the body.</p>

<p><img src="/assets/rising-trigger/test-fit-no-rollers-from-above.jpg" alt="From above, the proportions look more like a classic 80s open-wheel race car. You can still see the damage to the front left corner very clearly." /></p>

<h2 id="chassis-assembly">Chassis assembly</h2>
<p><img src="/assets/rising-trigger/with-rollers.jpg" alt="The kit is assembled with rollers and (although you can't see it) drivetrain" /></p>

<p>Despite the somewhat mangled motor mount, everything went together smoothly. The quality of the plastic is not quite as stiff as the Tamiya stuff, but the mould is dead on, without lots of flash. Everything fit together quite well.</p>

<p><img src="/assets/rising-trigger/rollers-from-behind.jpg" alt="The rollers in the back are low, and upside down." /></p>

<p>Being an older kit, I forgot that it has the “under-ride” rollers in the rear, which makes it look a little weird. Good thing the giant spoiler helps visually balance that out, in the grand tradition of the 80s.</p>

<h2 id="conclusion">Conclusion</h2>
<p><img src="/assets/rising-trigger/on-the-deck.jpg" alt="The Rising-Trigger zooms off to its next battle, which will probably be caused by two squabbling brothers." /></p>

<p>I’m happy with how this turned out. The paint job isn’t 100% even, but the masking and the bold colours make me happy. I may have had more than one oopsie with dissolving layers of wet paint with the clear, so I need to be more careful next time to make sure to only handle the kit by a stand instead of directly.</p>

<p>A glossy clear would probably have looked nicer as well, as the matte clear makes it look sort of like a “2000s thing,” instead of a 1980s thing. Even so, this is one kit that I’m happy to put on my shelf. Thanks for reading!</p>]]></content><author><name></name></author><category term="mini4wd" /><category term="daxing" /><category term="rising-trigger" /><category term="paint" /><category term="car" /><summary type="html"><![CDATA[Now that I’ve fixed the Rising-Trigger knockoff chassis’s broken motor mount in the previous entry, it’s time to move on and start building the car. Of course, since it’s a knockoff Daxing chassis, this car will mostly be used for display. So we better do a good paint job. Did I mention it’s my first paint job?]]></summary><media:thumbnail xmlns:media="http://search.yahoo.com/mrss/" url="https://plasmadash.com/assets/rising-trigger/test-fit-no-rollers.jpg" /><media:content medium="image" url="https://plasmadash.com/assets/rising-trigger/test-fit-no-rollers.jpg" xmlns:media="http://search.yahoo.com/mrss/" /></entry><entry><title type="html">Watersliding my NC Miata around</title><link href="https://plasmadash.com/2026/05/07/bburago-nc1-miata-waterslide-disaster.html" rel="alternate" type="text/html" title="Watersliding my NC Miata around" /><published>2026-05-07T00:00:00+00:00</published><updated>2026-05-07T00:00:00+00:00</updated><id>https://plasmadash.com/2026/05/07/bburago-nc1-miata-waterslide-disaster</id><content type="html" xml:base="https://plasmadash.com/2026/05/07/bburago-nc1-miata-waterslide-disaster.html"><![CDATA[<p>Here’s another easy-to-build pre-painted kit that I haven’t gotten around to building in well over a decade. This NC1 Miata is a pretty thing with very awkward instructions. The purpose of finishing this is to learn how to do waterslide stickers!</p>

<p><img src="/assets/bburago-nc1-miata/box.jpg" alt="The box that the kit came in. The body is no longer visible through the window, having been partially assembled and thrown loosely back into the box." /></p>

<p>I don’t even remember working on this kit, but it is partially assembled and sitting in a pile of other debris. Since the weather is still not cooperating for paint, let’s finish this off. Like many things I gave up on in the past, I assumed that I had given up not because one thing was going wrong, but because multiple things had gone wrong in close succession.</p>

<p>First off, I realized that I had held the passenger-side headlight in with Scotch tape. Over the years, this of course left sticky residue on the headlight and the body of the car itself. Not sure what I was thinking. As soon as I removed the tape, the headlight fell out, its clear plastic pegs poorly matched to the size of the holes in the metal body.</p>

<p>Water did not remove the tape residue, and I’ve had terrible results in the past with isopropyl alcohol eating metallic paint that looks very much like this one does. Maybe it would be safe on clearcoat, but for now I scrubbed it a bit with a baby wipe and hoped for the best.</p>

<p>I stuck some Tamiya glue in the backside of those pegs, and it seemed to hold the headlights in place. Ah, a demon of the past defeated. Now to figure out where I left off.</p>

<h2 id="the-revenge">The revenge</h2>
<p>After consulting the spectacularly bizarre and insanely badly translated one-page instructions, I determined that where I had stopped was putting the dashboard together. Why? Because it needed a waterslide decal for the gauges on the dashboard, which apparently I was too afraid to do back then. No time like the present!</p>

<p>That fear may have been justified. I screwed up a couple things here! For starters, I cut the waterslide right down to the colour area, so I had no non-decal part to grab onto with the tweezers. And I had no idea what was supposed to happen, so, after soaking it in water as per the Bburago instructions, I tried to peel the backing plate off and ripped it. The label was still fine, but it had a chunk of paper attached to it that I slowly had to move off. This produced some success.</p>

<p>I thought about putting some UV resin on here to create a false “lens” over the gauge cluster, but I hadn’t actually used my UV resin kit for anything yet, and I didn’t want to find out that it somehow eats whatever waterslides are made out of in the process. Maybe next time.</p>

<p>Remarkably, the rest of the interior was really easy to put together. All of the little fastening tabs were well-formed, there was no flash to speak of, and the shifter and handbrake stayed in without any glue. Nice work there.</p>

<p><img src="/assets/bburago-nc1-miata/interior.jpg" alt="The dashboard, featuring a shifter and handbrake. The Mazda logo has fallen off the steering wheel." /></p>

<p>My greatest struggle, it turns out, was still to come. The steering linkage consists of a fork-shaped part that pivots on a riser on the front subframe, and pushes the steering rack side to side. Every time I tried to put the top shell back on, the steering wheel would pop out or otherwise become misaligned, and I’d lose steering again. Even if I did manage to get steering, bumping the front wheels in any way would immediately eject the steering wheel.</p>

<p>I spent so much time messing with it – over an hour of fighting these two pieces of plastic – that the waterslide Mazda decal on the steering wheel fell off. I guess it wasn’t fully dry? I never found out where it went, which made me feel even worse. Luckily, Bburago gives you two copies of each decal, but I was not willing to dismantle the car again in order to get a second decal on the steering wheel, and the other copy had gotten badly creased in the cutting of the first one. A shame. It looked really good before I screwed everything up, too.</p>

<p><img src="/assets/bburago-nc1-miata/with-front-badge.jpg" alt="The front badge is nicely waterslid into place." /></p>

<p>I did get a chance to redeem myself, because after the car was complete, I did some flawless mirror decals (self-adhesive.) Then it was time to do the waterslide Mazda logo for the front… and it came off the sheet perfectly after I took my time with each step. Almost like I gained some experience doing this project, and finally patiently learned what was supposed to be happening this whole time.</p>

<p><img src="/assets/bburago-nc1-miata/ppf.jpg" alt="The rear differential and powerplant frame." /></p>

<p>Like usual, I almost forgot to put the exhaust on. If you’re familiar with Miatas or RX-8s, you’ll notice that the rear diff is fairly well modeled in this kit, if a bit flat compared to the real thing. Something feels off about the powerplant frame, as well, but they had to make choices to make it easy to assemble the kit.</p>

<p>I’m calling it there. A trunk badge would be nice, but the waterslide sheet is badly creased in that section as well. Although it looks very good on my “shelf” consisting of an Atari ST CRT monitor, I’m definitely going to avoid handling this car and its fifteen-plus-year-old waterslides until I can get a bottle of Mr. Mark Fitter.</p>]]></content><author><name></name></author><category term="mokei" /><category term="bburago" /><category term="mazda" /><category term="backlog" /><category term="car" /><summary type="html"><![CDATA[Here’s another easy-to-build pre-painted kit that I haven’t gotten around to building in well over a decade. This NC1 Miata is a pretty thing with very awkward instructions. The purpose of finishing this is to learn how to do waterslide stickers!]]></summary><media:thumbnail xmlns:media="http://search.yahoo.com/mrss/" url="https://plasmadash.com/assets/bburago-nc1-miata/with-front-badge.jpg" /><media:content medium="image" url="https://plasmadash.com/assets/bburago-nc1-miata/with-front-badge.jpg" xmlns:media="http://search.yahoo.com/mrss/" /></entry><entry><title type="html">Super Street Subaru WRX</title><link href="https://plasmadash.com/2026/04/30/revell-super-street-subaru-wrx-build.html" rel="alternate" type="text/html" title="Super Street Subaru WRX" /><published>2026-04-30T00:00:00+00:00</published><updated>2026-04-30T00:00:00+00:00</updated><id>https://plasmadash.com/2026/04/30/revell-super-street-subaru-wrx-build</id><content type="html" xml:base="https://plasmadash.com/2026/04/30/revell-super-street-subaru-wrx-build.html"><![CDATA[<p>This ‘04 Subaru WRX model kit has been sitting on my shelves for what must be well over fifteen years. I opened it once, looked at the contents, and then closed it up to wait for some time. Let’s make that time now!</p>

<p>There have been many years since I built a model kit, but I bought this one in the middle of the slump and then never got around to it. I wanted to take care of this one before I moved on to bigger and better kits, mostly because I don’t have to paint it. More on that in a second.</p>

<p><img src="/assets/revell-wrx/box.jpg" alt="The big yellow &quot;Super Street&quot; branded box, with the Subaru WRX hidden from view." /></p>

<p>The box advertises a collaboration with <em>Super Street</em> magazine, which I didn’t love as much as <em>Sport Compact Car</em>. As such, it offers a couple little items for you to modify your car with in order to make it more “tuned” – ineffective bolt-in half-roll-cages, fire extinguishers, etc. For the most part, I stayed away from these gadgets and tried to build a regular old WRX.</p>

<p><img src="/assets/revell-wrx/body.jpg" alt="The body has been removed from the box. Even though I've just now removed it, the windshield is dirty." /></p>

<p>The metal body comes pre-painted, with a WRX wing attached. You can open and close the hood. For some reason, even though it was sealed up until now, the windshield is already dirty. We can fix that.</p>

<p><img src="/assets/revell-wrx/enormous-glue-tube.jpg" alt="A huge orange-red tube of Testors model cement." /></p>

<p>Also in the box is this enormous tube of Testors model cement. I am assuming this is not good forever, and will be using my hoard of Tamiya stuff as much as possible.</p>

<p>Rather than try to do the best job possible, I decided that I would give myself about a week to finish this model quickly and get it showing off on my shelf. It shouldn’t be too hard, right? Thing’s already painted!</p>

<h2 id="the-assembly-begins">The assembly begins</h2>
<p>One of my favourite parts of building a model of a car that I know well is that it helps make the fake thing easier to build. All of my most-hated enemies in a Subaru engine bay lined up to be dispatched one at a time in miniature form. The manual seems to imply that you can install the oil filter <em>after</em> you put the turbo header on, but everyone who has tried to change oil on one of these would say otherwise.</p>

<p>My first real obstacle was dealing with the seats. The front seats are glued to some kind of U-bracket in the floor pan, but it’s not deep enough to get a good grip on the seats. I’d accidentally put some gentle pressure on the back of the front seats and break them right off the floor while the glue was drying. Some kind of pin would be awesome here!</p>

<p>I switched to quick-set Tamiya extra thin, and took a walk around the block while it was curing, and that seemed to solve the problem a little better. Who’d have thought this hobby requires patience?</p>

<p>Another challenge came when trying to install the front and rear subframes. Both of them require struts that have to line up with the body being dropped on top, and so they need to be glued in pretty straight. Unfortunately, the mounting pins are too short to make a really positive connection.</p>

<p>That meant they were cockeyed as the bottom of the body was offered to the painted top shell. I ended up having to do some forcible fiddling to bring them into the right position, which felt bad but didn’t seem to break anything. The (out-of-scale thin) driveshaft piece also seems to have a lot of tolerance, which helped make up for the couple mm of inaccuracy in my front subframe install.</p>

<p><img src="/assets/revell-wrx/charcoal-canister.jpg" alt="The charcoal canister box is just behind the rear subframe." /></p>

<p>I was delighted to discover that the WRX still has its stock teeny-tiny rear sway bar and charcoal canister in the back. Does <em>Super Street</em> promote retaining your stock emissions system?</p>

<p><img src="/assets/revell-wrx/brembos-maybe.jpg" alt="All four brakes are identical, with relatively tiny rotors and huge calipers." /></p>

<p>Before throwing the brakes on, I decided to wait for some Gundam markers to be delivered. Gotta have red calipers. On this model, all four calipers are the same size, and they’re very visibly not the stock 2-pot fronts that you would expect on an ‘04. They look more like STI Brembos to me.</p>

<p><img src="/assets/revell-wrx/caliper-is-nice-and-red.jpg" alt="The front right brake caliper is nice and red. The rotor around it is both unpainted, and still has an unsightly sprue-cut line on the bottom." /></p>

<p>I masked up one of the calipers, and decided that it would be too much of a pain to mask the others, so I was just very careful with them. Of course, the one that I masked, I put a big glob of paint all over. I only realized that it had seeped between the tape and onto the rotor surface after it had dried, so I tried my best to scrape it off and then put it in the rear of the car. At least you can’t really see it with the wheels installed.</p>

<p><img src="/assets/revell-wrx/caliper-behind-snowflake-wheels.jpg" alt="The caliper offers a little dash of colour behind the relatively boring chrome wheel." /></p>

<p>After popping on the wheels, I thought everything looked pretty snazzy. This is probably my favourite part of the build, and so it was definitely worth waiting for the markers to arrive.</p>

<p>The exhaust is one big piece, which clips into the downpipe of the turbocharger, and runs all along the bottom of the body. All of the heat shields are reproduced (there’s that famous <em>Super Street</em> commitment to maintaining California-standard emissions equipment.) I painted those a darker grey with the Gundam markers for a bit of contrast. This setup doesn’t look like a factory exhaust: it’s got a single tip on the muffler, for starters. Maybe Borla? Getting it to stick onto and stay on the downpipe was a challenge, as I’m still not 100% convinced the motor is exactly in the right place.</p>

<p>The last hurdle came from trying to put the mirrors on the car. The pegs are a bit too large for the body, as you might expect from the tolerances being different between the shell and the little blue plastic runner. As a result, I had to use way more force than I wanted and bent one of the wiper blades in the process. It bent back, but I felt like an idiot, and I still don’t think the wipers look right.</p>

<h2 id="final-shots">Final shots</h2>
<p><img src="/assets/revell-wrx/unpainted-engine-bay.jpg" alt="The assembled engine bay. Check out the timing cover, intercooler, 12-volt battery, and clear washer fluid jug." /></p>

<p>In order to make it easy to open, the hood has a prominent gap which is unfortunate. The hood also doesn’t stay open by itself, nor is there a little prop-rod you can put up to admire the accurately-reproduced washer fluid bottle and coolant puke tank.</p>

<p><img src="/assets/revell-wrx/front-right-corner.jpg" alt="The front right corner of the car shows that the hood gap is not quite right. The &quot;T&quot; shaped plastic bit inside the bumper opening is also painted body colour instead of black." /></p>

<p>I feel as if the ride height is a little lower than it would be on a stock WRX, which is fine for a <em>Super Street</em> build.</p>

<p>On the real car, the plastic area under the front license plate holder is black, not body colour. Maybe this one has been crashed and repainted. I could probably go back and fix this if it continues to bother me in the future, but this was a quick build.</p>

<p><img src="/assets/revell-wrx/rear-right-corner.jpg" alt="The rear right corner of the car shows the gas cap, and also that I forgot to put the exhaust on for this picture." /></p>

<p>Around back, everything seems pretty normal. Except I forgot to put the exhaust on when I took this picture. Check out the silver lock cylinder on the trunk!</p>

<p><img src="/assets/revell-wrx/rear-left-corner.jpg" alt="The rear left corner of the car shows the exhaust is now present." /></p>

<p>I liked building this kit, although it was at times pretty fiddly. It is refreshing to see an American company do model kits of a Japanese car. Not having to worry about painting the body saved me a lot of stress and opportunities for procrastination, but the downside is that it doesn’t feel like I could be super proud of it. All the stuff I worked on is hidden!</p>

<p><img src="/assets/revell-wrx/front-left-corner.jpg" alt="The front left corner of the car. You can just barely see the reflection of those nice red calipers." /></p>

<p>With this bit of confidence under my belt, I am definitely looking forward to doing a proper model car build soon. I’ve got another “easy” pre-painted kit, a BBurago NC1 Miata, to build.</p>

<p>After that, there are tons of options for <em>real</em> kits: either take the AMT International Harvester Scout II off my backlog, or valiantly continue to ignore it and start working on some of my Arii 1/32 Owners’ Club machines instead. Or, like, finish up all the mini 4WD cowls I’ve been piling up. It’s almost painting season!</p>]]></content><author><name></name></author><category term="mokei" /><category term="revell" /><category term="subaru" /><category term="backlog" /><category term="car" /><summary type="html"><![CDATA[This ‘04 Subaru WRX model kit has been sitting on my shelves for what must be well over fifteen years. I opened it once, looked at the contents, and then closed it up to wait for some time. Let’s make that time now!]]></summary><media:thumbnail xmlns:media="http://search.yahoo.com/mrss/" url="https://plasmadash.com/assets/revell-wrx/front-left-corner.jpg" /><media:content medium="image" url="https://plasmadash.com/assets/revell-wrx/front-left-corner.jpg" xmlns:media="http://search.yahoo.com/mrss/" /></entry><entry><title type="html">Tamiya Electric Handy Router build</title><link href="https://plasmadash.com/2026/04/23/tamiya-electric-handy-router-one-day-build.html" rel="alternate" type="text/html" title="Tamiya Electric Handy Router build" /><published>2026-04-23T00:00:00+00:00</published><updated>2026-04-23T00:00:00+00:00</updated><id>https://plasmadash.com/2026/04/23/tamiya-electric-handy-router-one-day-build</id><content type="html" xml:base="https://plasmadash.com/2026/04/23/tamiya-electric-handy-router-one-day-build.html"><![CDATA[<p>I already have a perfectly good hoard of Dremels in my collection of tools. So why am I paying Tamiya a bunch of money to buy one that runs on AA batteries? You know why. Because it comes as a <em>kit</em>.</p>

<p><img src="/assets/tamiya-handy-router-build/handy-router-box.jpg" alt="The box, showing all the parts of the Electric Handy Router." /></p>

<p>The Handy Router comes in Tamiya’s standard “small” box. That’s the same size they use for most Mini 4WD kits, so it stacks well in your backlog with all of those. Mine was sitting on top of a Tridagger XX. An unexpectedly rainy day derailed my painting plans<sup id="fnref:booth" role="doc-noteref"><a href="#fn:booth" class="footnote" rel="footnote">1</a></sup>, so I got around to getting it out.</p>

<p><img src="/assets/tamiya-handy-router-build/handy-router-unboxed.jpg" alt="A bunch of bags live inside the box." /></p>

<p>Inside the box is the usual collection of bags, along with a really thin manual. The standard blue Tamiya grease tube is on offer, just like with a Mini 4WD.</p>

<p><img src="/assets/tamiya-handy-router-build/handy-router-hardware-bags.jpg" alt="From left to right: a bag containing shafts, chucks, collets, and bits; another bag, containing e-clips, washers, and screws; and a third bag, containing a plastic 1150 bushing and battery terminals. There's also a made-in-China 130 motor and a tube of grease." /></p>

<p>Of primary interest are these hardware bags, which contain (among other things) a nicely machined shaft, a drill chuck and a collet. It’s only here, reading over the manual, that I finally discovered the difference between a “chuck” and a “collet.” This is probably where ninety percent of the BOM cost of this thing was.</p>

<p>The motor is a standard-looking type 130, but it says “made in China.”</p>

<p>I was very tempted to replace the plastic 1150 bushing in this with one of my RC bearings, but I figure I will wait and see how much this gets used first.</p>

<p>It is nice of Tamiya to provide extra E-clips and washers. They <em>know</em>.</p>

<h2 id="assembly">Assembly</h2>
<p>The first steps are pretty simple: clip out some plastic, attach the battery terminals, and slap the motor in there. Then you have to make a linkage for the trigger, trigger lock, and shaft brake.</p>

<p><img src="/assets/tamiya-handy-router-build/handy-router-switch-linkage.jpg" alt="The dark-grey switch linkage worms its way from the trigger of the router, all the way down the handle to where the battery terminals will live at the end." /></p>

<p>The trigger kept falling out of its hole, which was annoying. Later on, I had to dismantle the entire handle and put it back in place while I was screwing the two halves apart, because it had popped out while I was test-fitting and I didn’t notice.</p>

<p><img src="/assets/tamiya-handy-router-build/handy-router-geartrain.jpg" alt="A long metallic shaft is installed into the business end of the router, with an orange drive gear and a white plastic 1150 bushing supporting it." /></p>

<p>After the trigger mechanism, the next step is to build and install the gear train. I’m not sure what material this bright orange gear is – the sprue tree didn’t say – but it’s probably POM and not ABS.</p>

<p>Then you clip the motor in, making sure its pinion meshes nicely with the big gear. The final step before screwing the two halves together is to put on a guide plate for the trigger linkage. This guide plate helps constrain the linkage so that it can push the negative terminal on and off of the battery, running or stopping the motor appropriately.</p>

<p><img src="/assets/tamiya-handy-router-build/handy-router-complete.jpg" alt="The final assembly: an entire Tamiya Electric Handy Router. The button on the side is for the shaft brake so you can tighten the chuck properly." /></p>

<p>After installing the chuck/collet and router bit, everything is ready to go. Well, once you put batteries in it.</p>

<h2 id="testing">Testing</h2>
<p>Since I just recently finished the router, I have not had much of a chance to even try it out. I have only used this a little bit to clean up some flash on some parts, but it seems to work nicely.</p>

<p>My biggest complaint is that it’s incredibly loud out of the box. That said, it is much quieter than a Dremel, but I wonder if putting a full 1150 bearing in there would help quiet it down. Maybe I’ll grab some cheap ones from Amazon.</p>

<p>If you can get this kit for relatively cheap, I recommend it. It’s a fun way to spend an hour or two building something that’s of at least moderate usefulness. I’m definitely going to go back and get the sister kit that lets you build a Handy Drill.</p>

<p>Thanks for reading!</p>
<div class="footnotes" role="doc-endnotes">
  <ol>
    <li id="fn:booth" role="doc-endnote">
      <p>I still have yet to get a model booth (not for lack of trying,) so I’m painting on the picnic table outside. Hey, I now have a 12 inch by 12 inch space on my desk loosely reserved for “building kits.” That’s a huge advancement on its own over the way it used to be, where I had to build everything on the kitchen table. <a href="#fnref:booth" class="reversefootnote" role="doc-backlink">&#8617;</a></p>
    </li>
  </ol>
</div>]]></content><author><name></name></author><category term="tamiya" /><category term="quick" /><category term="tools" /><summary type="html"><![CDATA[I already have a perfectly good hoard of Dremels in my collection of tools. So why am I paying Tamiya a bunch of money to buy one that runs on AA batteries? You know why. Because it comes as a kit.]]></summary><media:thumbnail xmlns:media="http://search.yahoo.com/mrss/" url="https://plasmadash.com/assets/tamiya-handy-router-build/handy-router-complete.jpg" /><media:content medium="image" url="https://plasmadash.com/assets/tamiya-handy-router-build/handy-router-complete.jpg" xmlns:media="http://search.yahoo.com/mrss/" /></entry></feed>