
Moto-Incompetent
Tags: mokei honda aoshima motorcycle motocompo
Motorcycles are super cool, especially tiny Honda ones. I have never owned a motorcycle, so the desire to virtually work on one by making a plastic model is strong. Let’s see how making an Aoshima Honda Motocompo goes.
Honda released the Motocompo in ‘81, with the intent of it being used as a “trunk bike” for urban dwellers. The idea is that you would drive your car to the less densely-populated periphery of an area, then pop out your tiny motorcycle and ride it into downtown. In order to accomplish this, the already-quite-small bike folds its handlebars and seat down to fit into the hatch of a Honda car.
Although it’s most famous for being easy to put into a Honda City, the Motocompo was also offered alongside the similarly-sized Honda Today.
Prep
Because I wanted painting to go smoothly, I tried to be smart about it. Flipping ahead in the manual, I separated parts by colour. That’s quite easy for this model: for the most part it’s just flat black or gloss black, and body colour. The lights I did with Sharpie, although I probably won’t do this any more (more on this later.)
After doing all the separation, I tripped on my “parts organizer” (a reusable lunch container) and nearly lost one of the turn signal buckets. I need to figure out a better solution for this.
The Aoshima sprues are pretty good, without too many obvious gate marks. I took some time to file down the body and frame gates, as they’d be obvious, but I missed a really blatant one on the body that only showed up as I painted it. The frame had a bunch of really ugly sink marks, especially near the handlebar tube, but I figured they wouldn’t show up with the body installed.
Defying the instructions, I was able to glue some parts of the frame together to minimize painting. The chain cover, clutch cover, and kick start lever seemed to be free to install without worries. I did break off the kick start lever later by accident while trying to lift the entire bike by it, and had to add more glue.
There’s some moving parts to handle the Motocompo’s “transformation” – the steering column, the kickstarter, and the adjustable seat – so you have to wait until everything is painted and ready to glue the two halves together. This was really frustrating because the seat kept falling down the entire time I was putting the kit together. I should have just glued it in place.
The Nitto-branded rubber tires had a little bit of flash on them, so I cleaned that up.
During assembly, I screwed up and transferred stray super glue from my fingers onto the (highly textured) seat as well as several other parts of the frame and clutch cover. At first, I thought about covering this up with dry brushing, but the seat texture was ruined either way.
I was having a lot of trouble with getting Tamiya Extra Thin to bond the frame halves before I realized I didn’t scrape off the paint. Semi-gloss black on a black thing is hard to see!
Because they had been cut off the sprue, I lost track of all the individual fender spats and had a puzzle on my hands to try and put them onto the front fender… and then gave up.
I broke the kick stand mounts because I tried to force them in after gluing the frame together. There’s no excuse for this. I already dry fit everything together a few minutes prior, so it’s not like I didn’t realize I couldn’t do it after. To hold the bike up for display and finishing, I ended up cutting one of the mounting holes for the kickstand and then gluing the whole thing in.
For some very small parts (e.g. the brake master) I just didn’t paint them, because they looked okay in unpainted black plastic, and it was faster to glue them on right away.
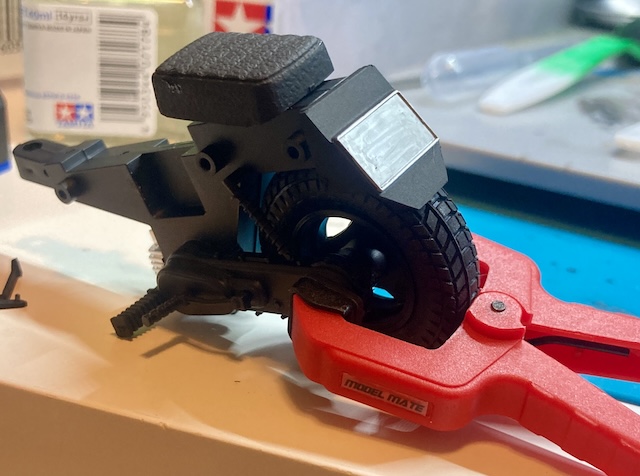
The swingarm gave me some unexpected trouble. I had to clamp in the rear wheel to get everything to fit straight, the clamp was just barely big enough.
Body painting time! The manual claims that the Honda Carribbean Red can be replicated with standard Gunze red. I painted them with straight up Tamiya X-7 red, but it seemed like it was hard to get coverage in the “vents” on the side.
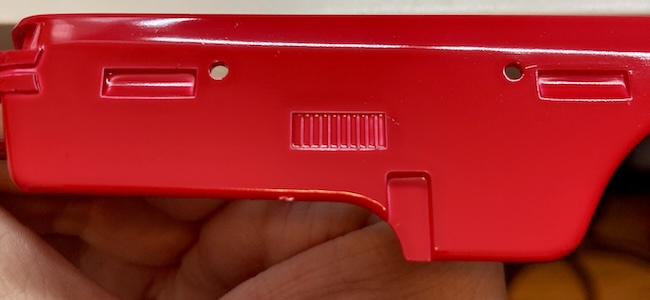
At the time, I thought this was simply “I didn’t put enough paint in the vents,” but in reality it was because I forgot to paint the inside of the fairings to make it more opaque, and the plastic is thin enough in those spots to bleed the white colour of the plastic through. Because I didn’t realize this, I tried to use more paint in those vents, and ended up doing a very large run after getting frustrated.
I tossed it into the alcohol to strip it. After stripping it, I repainted it, but there was some gunk left behind on the surface that came up as I painted. I should have done more to rinse it off. We’ll call it weathering. Both halves clear coated quite well, although the finish is dull because I didn’t polish it.
Fiddly bits
The rear-view mirror tells you to paint it flat black except for the mirror portion, which means I needed a circular mask cut. I used a Dspiae circle cutter; after figuring out how it works (the little plastic protective cover comes off the blades, and the ruler is in “radius” not “diameter”) I was able to cut some nice-looking circles. It would be nice if this were included in some kind of instruction manual with the cutter, instead of relying on the community to make YouTube videos.
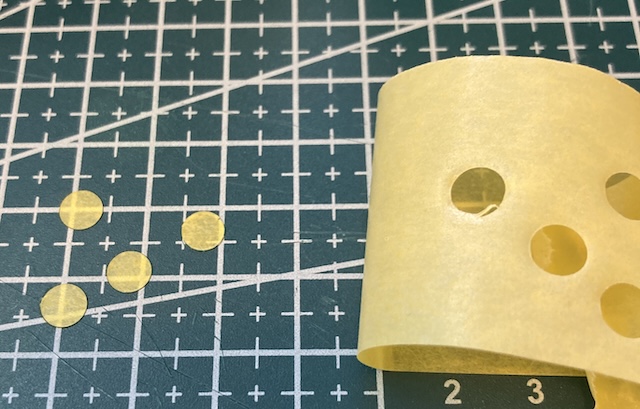
Of course, getting the little tape circles off my cutting mat afterward without folding or tearing them is a whole other kettle of fish, and I think I dulled the edge of the cutter a little bit as I had it down way too far. Centering the “sticker” on the part was also challenging. After snapping and gluing together the spindly mirror arm trying to move the tape around, I was a bit grumpy.
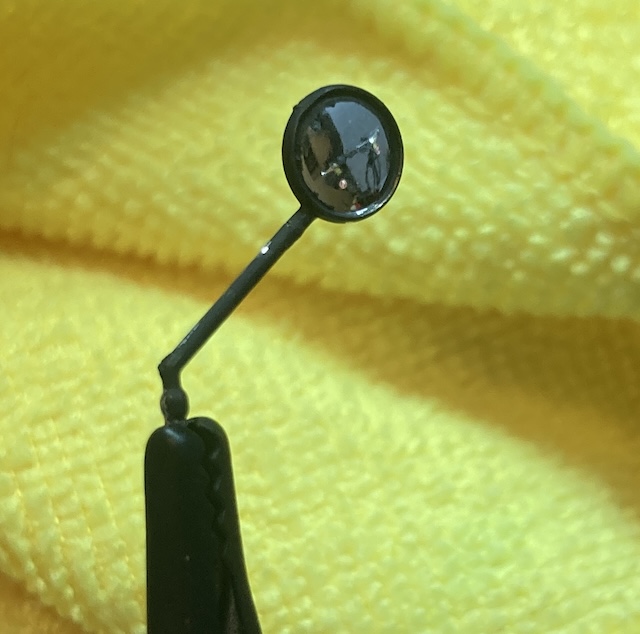
I ended up using the AK flat black marker to paint this mirror, because I wasn’t sure if I had a good enough tape edge to risk using the airbrush. I was right… if I was using my brains that morning, I would have used the little bit of leftover clear coat to help seal in the edges of the mask before painting a slick surface like a mirror. It is also really hard to pull up a piece of tape this small without folding it over or ripping the edge. Live and learn.
I’ll still keep using this tool, as I think it will come in handy for tires on certain kits. Also, it was really expensive.
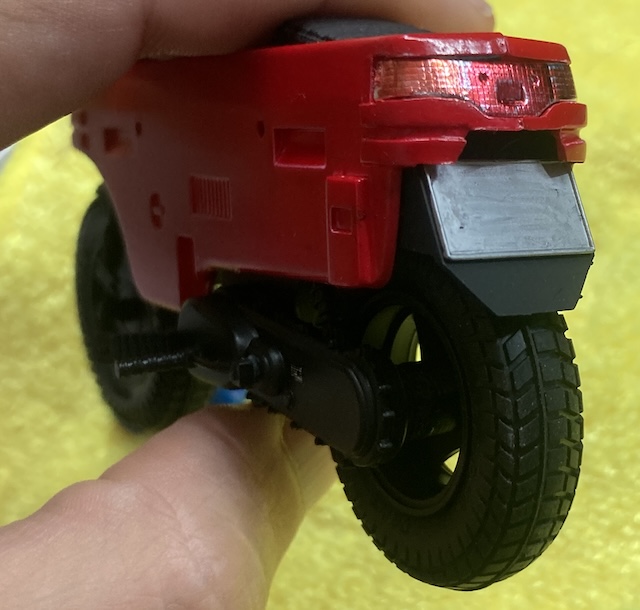
As expected, getting the tail light in was an absolute bear. I’ve seen people break it before, so I knew that going in. I ended up sanding down the top edges and still gave it way too much English. The orange Sharpie on the chrome also rubbed off easily on my hands after days of being dry. The whole thing does not look great, but it’s better than a hole. The marker experiment was fun, but the fun has come to an end. Next time, I will brush paint with clear colours.
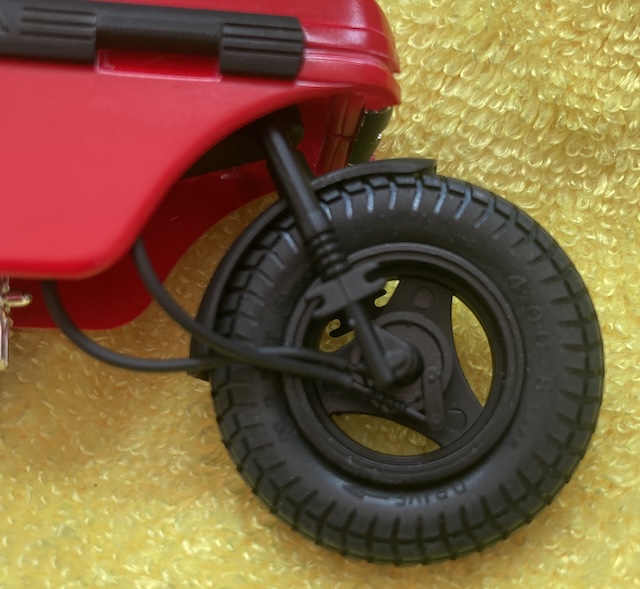
Putting the brake hoses on is really hard because the handlebar handles are not glued into place (they have to be removable so you can transform the bike into a trunk bike.) I bent the nipple on the lower one and had to slowly fix it with tweezers, but ultimately was successful after many minutes.
I missed the instruction to attach the main exhaust before putting the fairings on until the very end, and ended up gluing it in loosely into the bottom of the frame. I also broke off the muffler trying to put the two fairing halves together, so I guess this is one loud Motocompo.
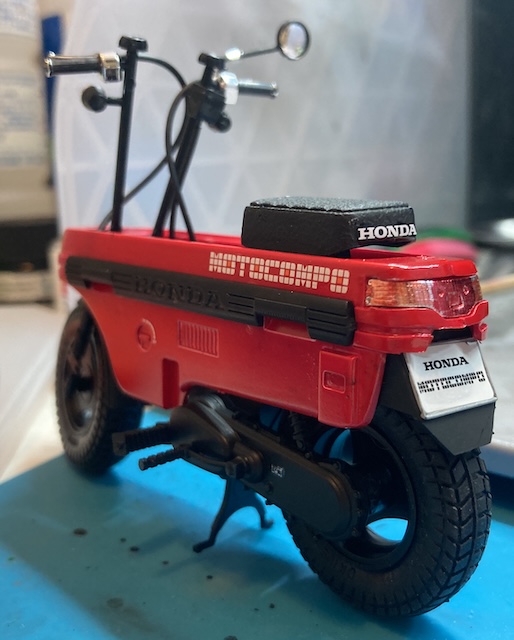
I had no problems with the waterslides, they’re very thick and durable. Still not sure how I should be sealing these decals in, as the manual says to do it as basically the last step, and clear coating the entire fully-assembled bike is not really practical or desirable. Maybe Tamiya brush-on enamel clear would be appropriate.
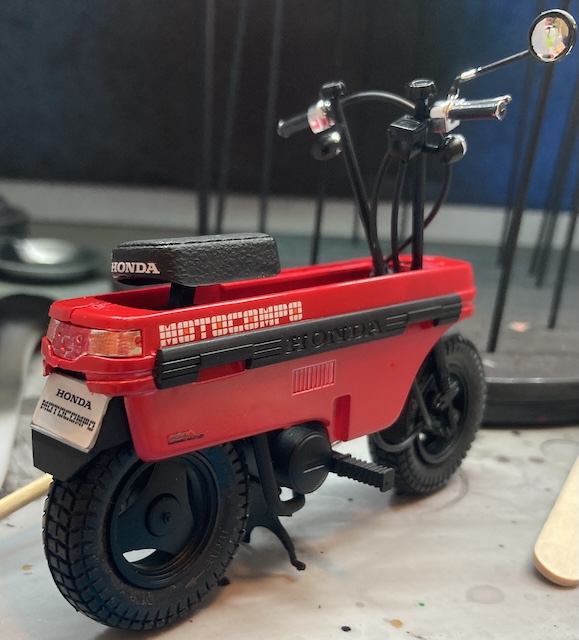
I did not do all of the decals, but I’m pretty happy with the ones that I chose to do! Here’s some quick pictures of the finished result.
Conclusion
As always, on this project, I learned the value of not rushing and of cleaning my airbrush. I’m most disappointed in the sprue marks on top of the body and the broken exhaust, but I think it is still a workable model.
I wish I had picked a less fiddly model to start with for bikes – the “transforming” aspect of it is not very good. Trying to pose it largely ends up with the seat repeatedly falling down and the handlebars hanging on by a thread at weird angles. Those parts should have been glued into place. I got a couple more Aoshima motorcycle kits along with this one, so hopefully those will be more normal.
Thanks for reading!