Super Street Subaru WRX
Tags: mokei revell subaru backlog
This ‘04 Subaru WRX model kit has been sitting on my shelves for what must be well over fifteen years. I opened it once, looked at the contents, and then closed it up to wait for some time. Let’s make that time now!
There have been many years since I built a model kit, but I bought this one in the middle of the slump and then never got around to it. I wanted to take care of this one before I moved on to bigger and better kits, mostly because I don’t have to paint it. More on that in a second.
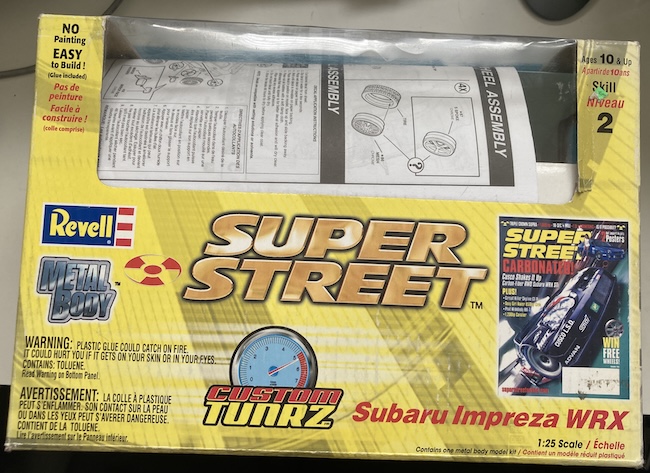
The box advertises a collaboration with Super Street magazine, which I didn’t love as much as Sport Compact Car. As such, it offers a couple little items for you to modify your car with in order to make it more “tuned” – ineffective bolt-in half-roll-cages, fire extinguishers, etc. For the most part, I stayed away from these gadgets and tried to build a regular old WRX.
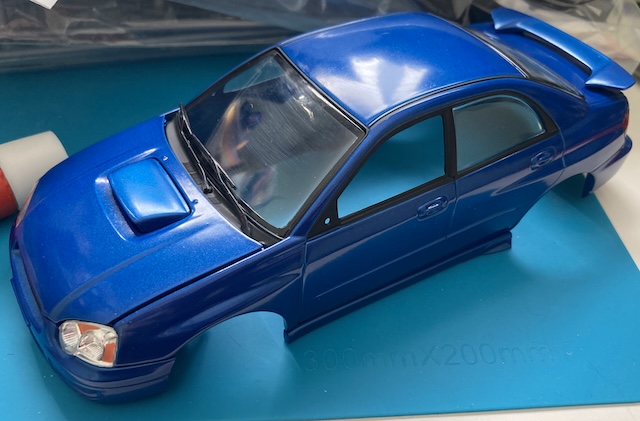
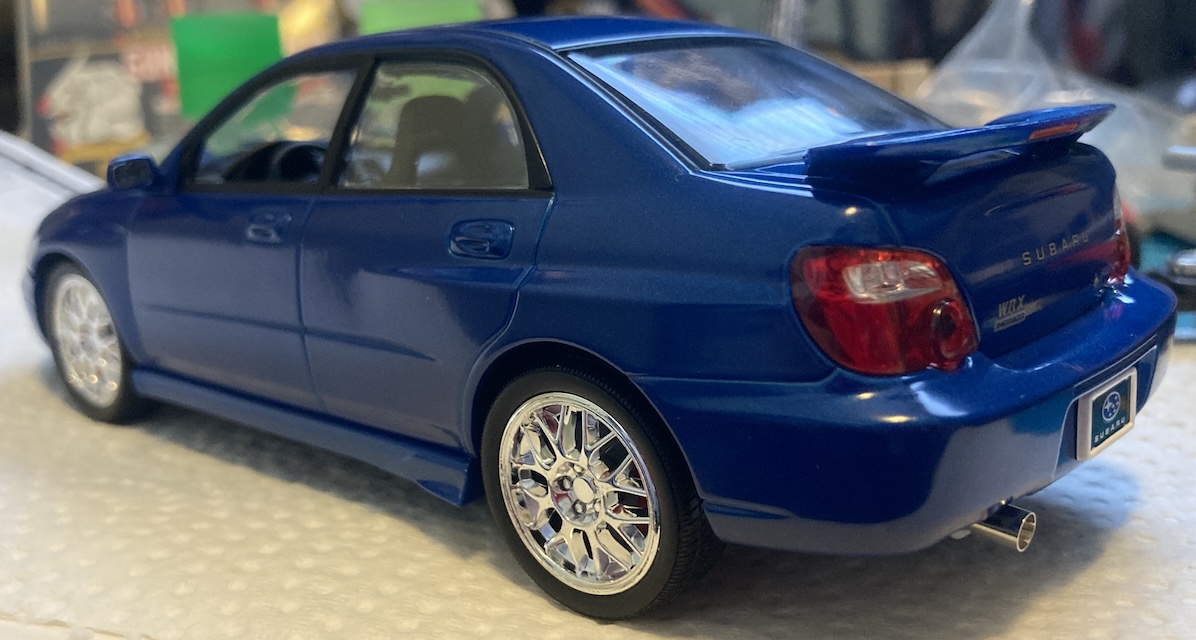
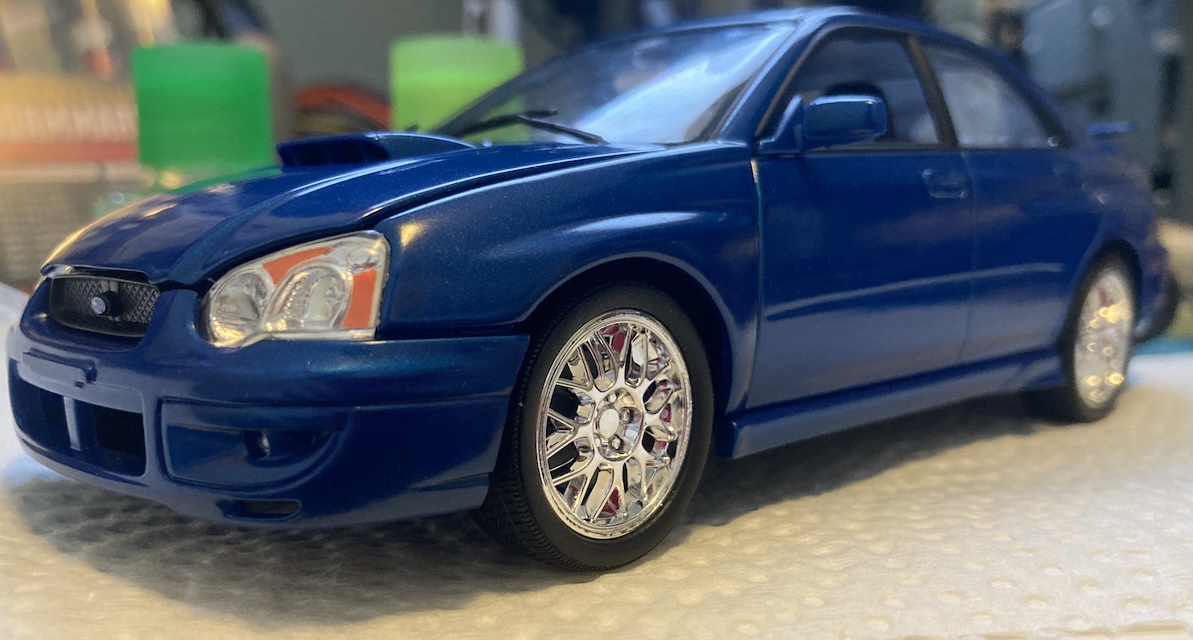
The metal body comes pre-painted, with a WRX wing attached. You can open and close the hood. For some reason, even though it was sealed up until now, the windshield is already dirty. We can fix that.
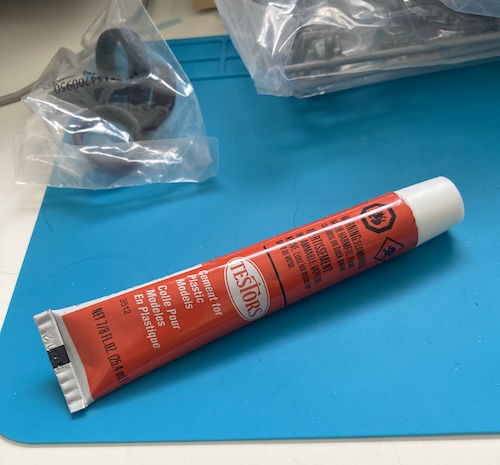
Also in the box is this enormous tube of Testors model cement. I am assuming this is not good forever, and will be using my hoard of Tamiya stuff as much as possible.
Rather than try to do the best job possible, I decided that I would give myself about a week to finish this model quickly and get it showing off on my shelf. It shouldn’t be too hard, right? Thing’s already painted!
The assembly begins
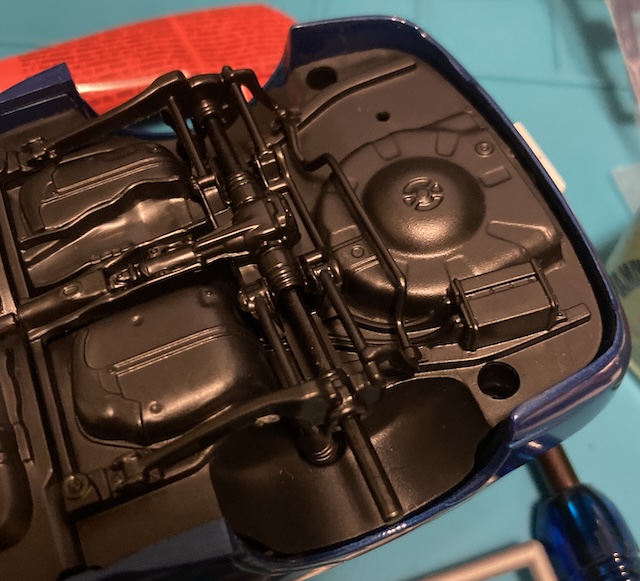
One of my favourite parts of building a model of a car that I know well is that it helps make the fake thing easier to build. All of my most-hated enemies in a Subaru engine bay lined up to be dispatched one at a time in miniature form. The manual seems to imply that you can install the oil filter after you put the turbo header on, but everyone who has tried to change oil on one of these would say otherwise.
My first real obstacle was dealing with the seats. The front seats are glued to some kind of U-bracket in the floor pan, but it’s not deep enough to get a good grip on the seats. I’d accidentally put some gentle pressure on the back of the front seats and break them right off the floor while the glue was drying. Some kind of pin would be awesome here!
I switched to quick-set Tamiya extra thin, and took a walk around the block while it was curing, and that seemed to solve the problem a little better. Who’d have thought this hobby requires patience?
Another challenge came when trying to install the front and rear subframes. Both of them require struts that have to line up with the body being dropped on top, and so they need to be glued in pretty straight. Unfortunately, the mounting pins are too short to make a really positive connection.
That meant they were cockeyed as the bottom of the body was offered to the painted top shell. I ended up having to do some forcible fiddling to bring them into the right position, which felt bad but didn’t seem to break anything. The (out-of-scale thin) driveshaft piece also seems to have a lot of tolerance, which helped make up for the couple mm of inaccuracy in my front subframe install.
I was delighted to discover that the WRX still has its stock teeny-tiny rear sway bar and charcoal canister in the back. Does Super Street promote retaining your stock emissions system?
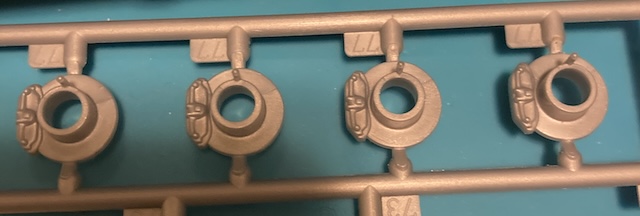
Before throwing the brakes on, I decided to wait for some Gundam markers to be delivered. Gotta have red calipers. On this model, all four calipers are the same size, and they’re very visibly not the stock 2-pot fronts that you would expect on an ‘04. They look more like STI Brembos to me.
I masked up one of the calipers, and decided that it would be too much of a pain to mask the others, so I was just very careful with them. Of course, the one that I masked, I put a big glob of paint all over. I only realized that it had seeped between the tape and onto the rotor surface after it had dried, so I tried my best to scrape it off and then put it in the rear of the car. At least you can’t really see it with the wheels installed.

After popping on the wheels, I thought everything looked pretty snazzy. This is probably my favourite part of the build, and so it was definitely worth waiting for the markers to arrive.
The exhaust is one big piece, which clips into the downpipe of the turbocharger, and runs all along the bottom of the body. All of the heat shields are reproduced (there’s that famous Super Street commitment to maintaining California-standard emissions equipment.) I painted those a darker grey with the Gundam markers for a bit of contrast. This setup doesn’t look like a factory exhaust: it’s got a single tip on the muffler, for starters. Maybe Borla? Getting it to stick onto and stay on the downpipe was a challenge, as I’m still not 100% convinced the motor is exactly in the right place.
The last hurdle came from trying to put the mirrors on the car. The pegs are a bit too large for the body, as you might expect from the tolerances being different between the shell and the little blue plastic runner. As a result, I had to use way more force than I wanted and bent one of the wiper blades in the process. It bent back, but I felt like an idiot, and I still don’t think the wipers look right.
Final shots
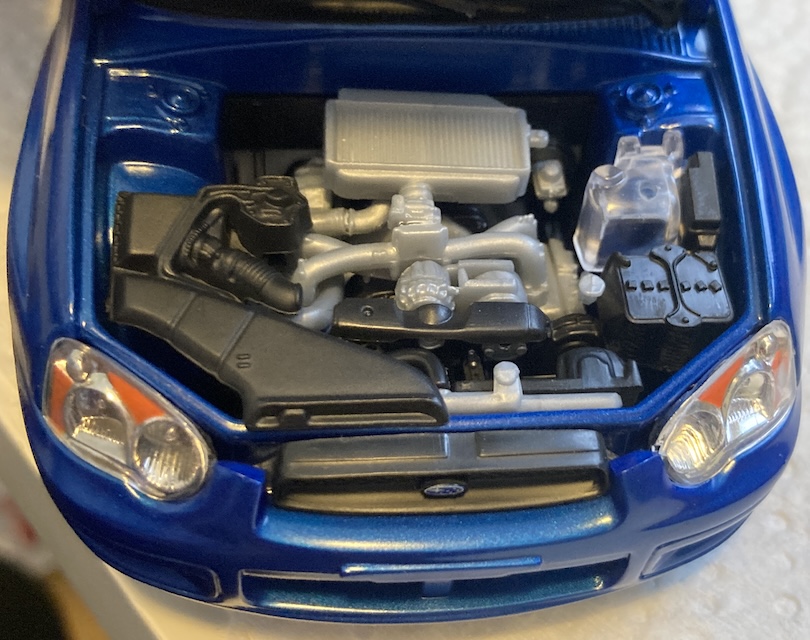
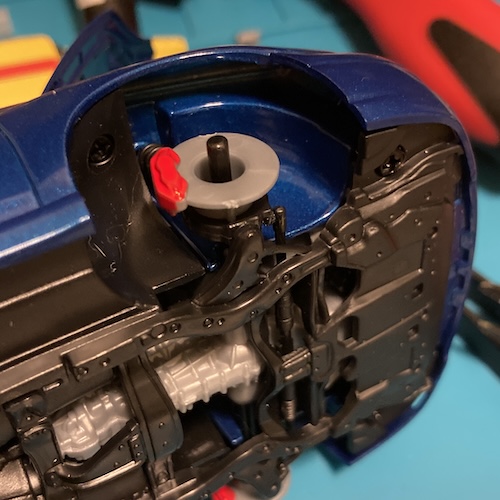
In order to make it easy to open, the hood has a prominent gap which is unfortunate. The hood also doesn’t stay open by itself, nor is there a little prop-rod you can put up to admire the accurately-reproduced washer fluid bottle and coolant puke tank.
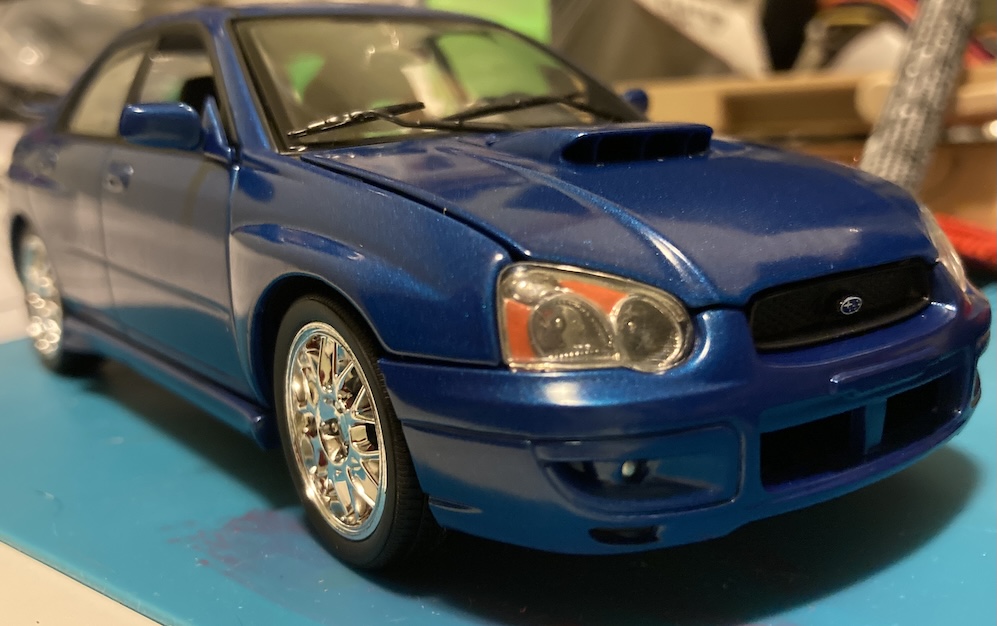
I feel as if the ride height is a little lower than it would be on a stock WRX, which is fine for a Super Street build.
On the real car, the plastic area under the front license plate holder is black, not body colour. Maybe this one has been crashed and repainted. I could probably go back and fix this if it continues to bother me in the future, but this was a quick build.
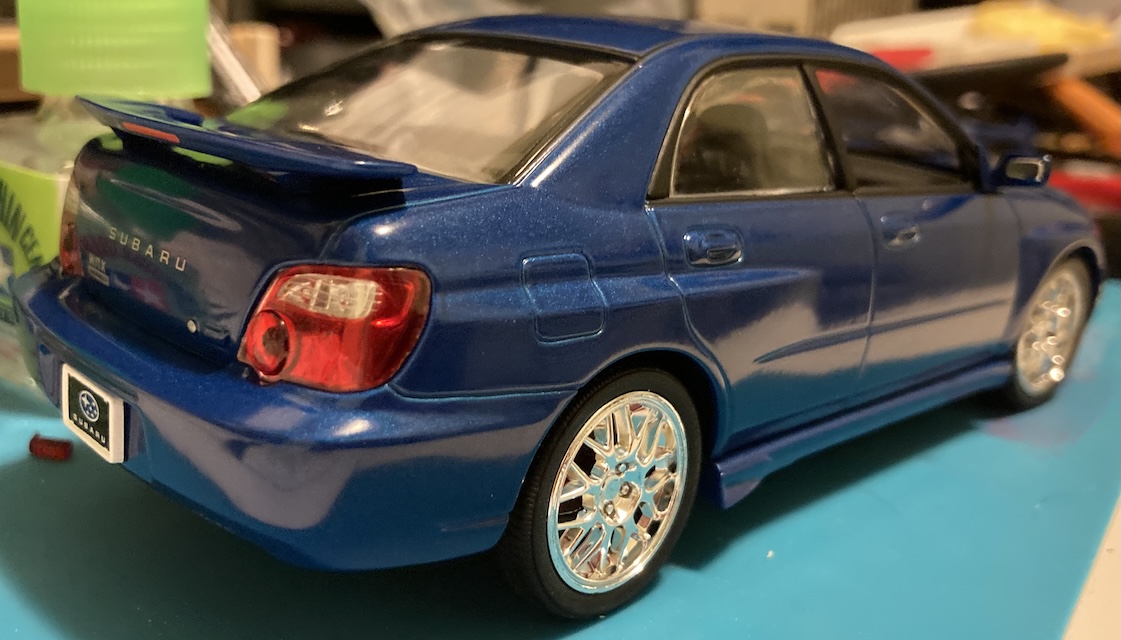
Around back, everything seems pretty normal. Except I forgot to put the exhaust on when I took this picture. Check out the silver lock cylinder on the trunk!
I liked building this kit, although it was at times pretty fiddly. It is refreshing to see an American company do model kits of a Japanese car. Not having to worry about painting the body saved me a lot of stress and opportunities for procrastination, but the downside is that it doesn’t feel like I could be super proud of it. All the stuff I worked on is hidden!
With this bit of confidence under my belt, I am definitely looking forward to doing a proper model car build soon. I’ve got another “easy” pre-painted kit, a BBurago NC1 Miata, to build.
After that, there are tons of options for real kits: either take the AMT International Harvester Scout II off my backlog, or valiantly continue to ignore it and start working on some of my Arii 1/32 Owners’ Club machines instead. Or, like, finish up all the mini 4WD cowls I’ve been piling up. It’s almost painting season!